When my husband got his first teaching job, in an amazing little Wyoming town, he asked me to crochet some dolls for all his students. I think he was scared the kids wouldn't like him so he wanted something to bribe them with. But they LOVED him, so he decided the kids would earn the dolls by hitting their reading goals. And what started out as a one time thing for my husband to make friends with third graders, has continued for 10 years, He still teaches in the same school and everyone still loves him. Here is a look at the things I have made throughout the years.
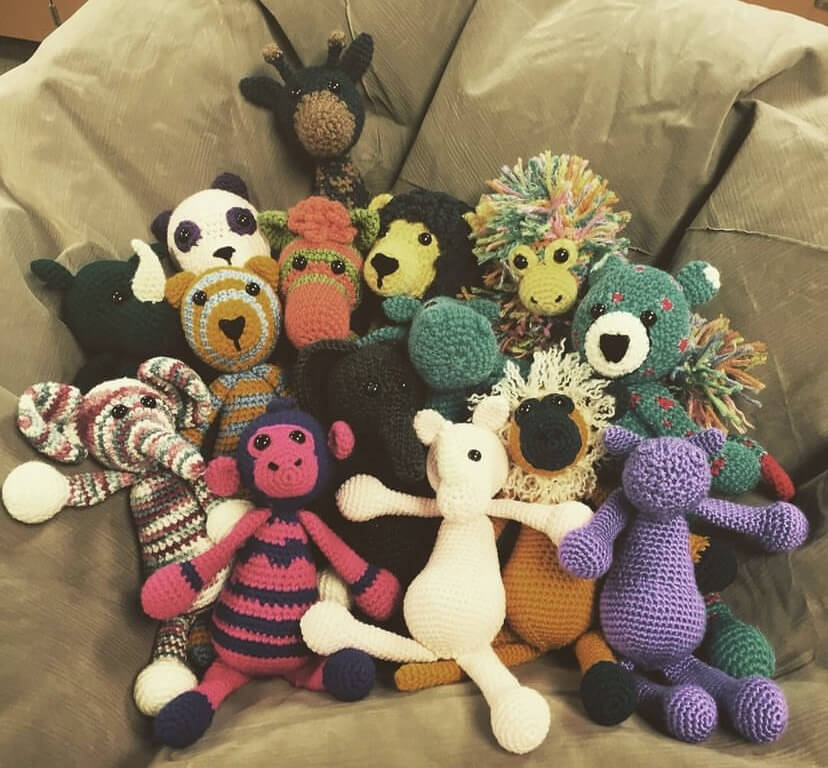
1st year (2015-16)
This was a jungle theme. I made a bunch of different dolls, the patterns were all from this book.
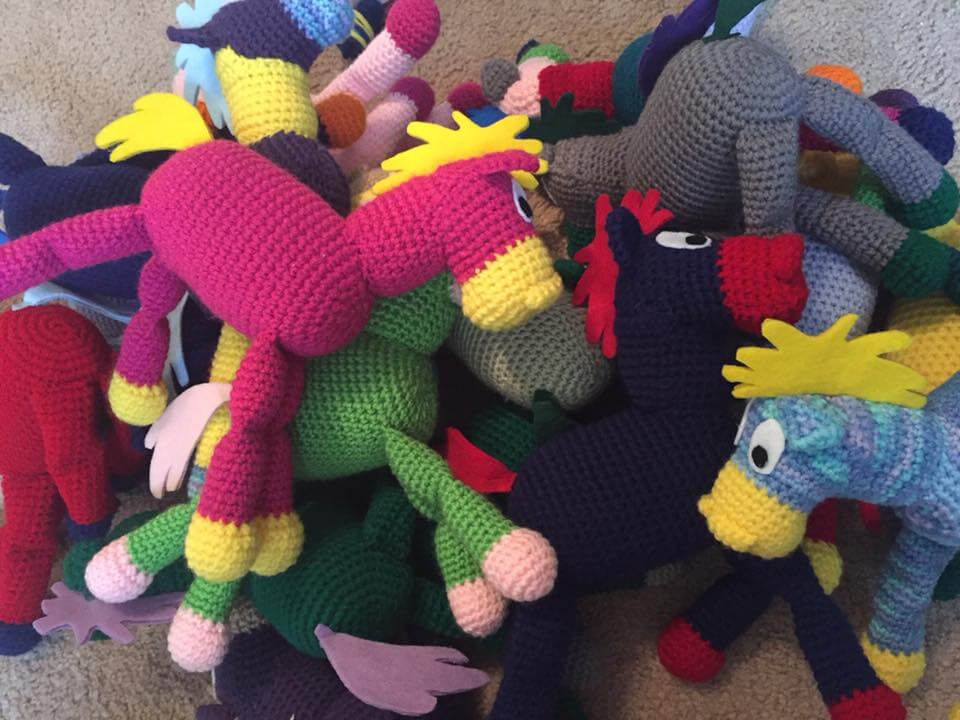
2nd year (2016-17)
Cowboy theme. I made horses, the pattern I used can be found here.
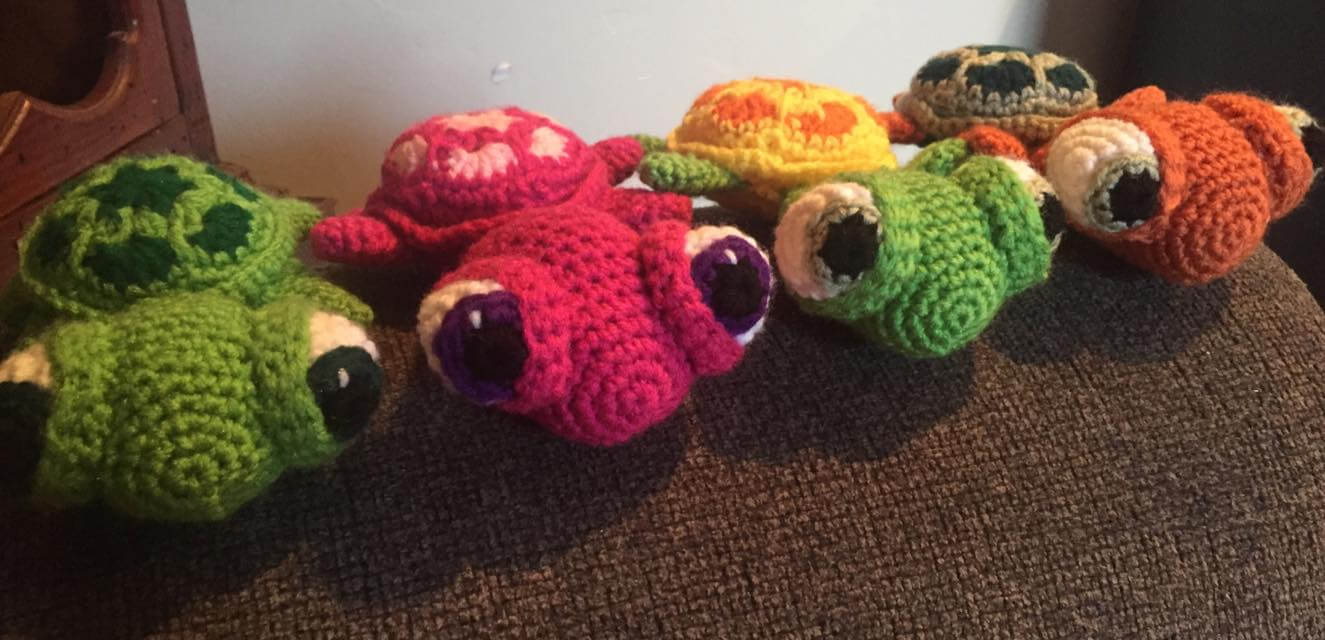
3rd year (2017-18)
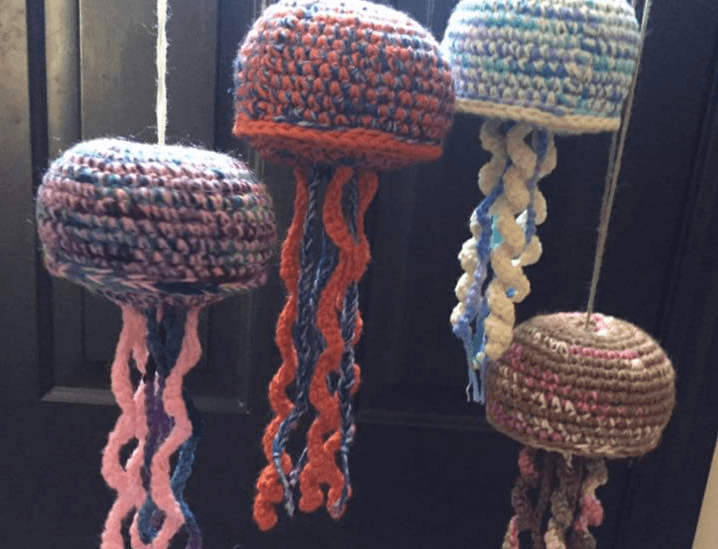
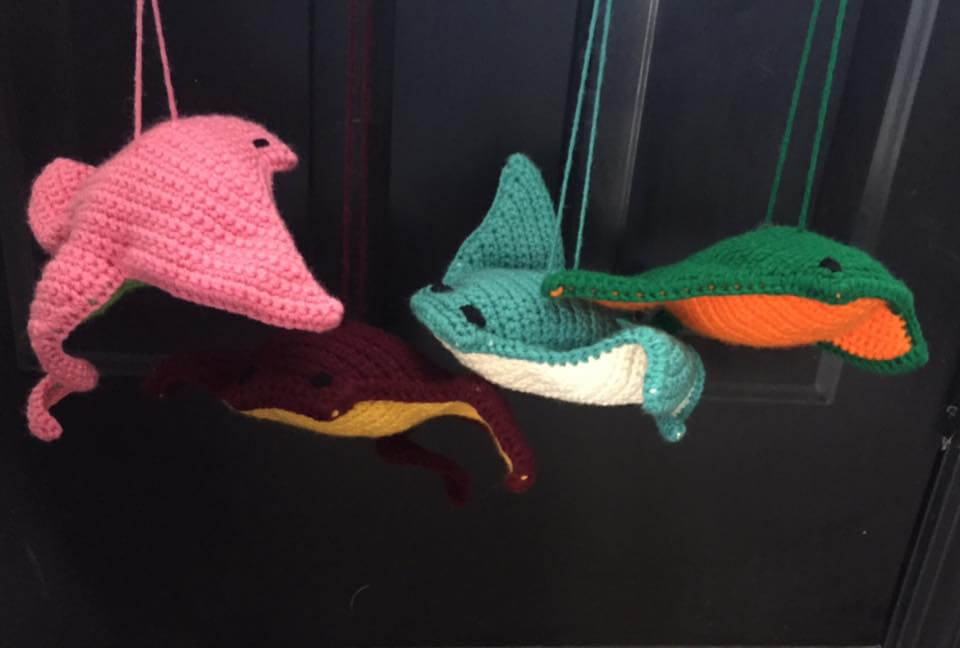
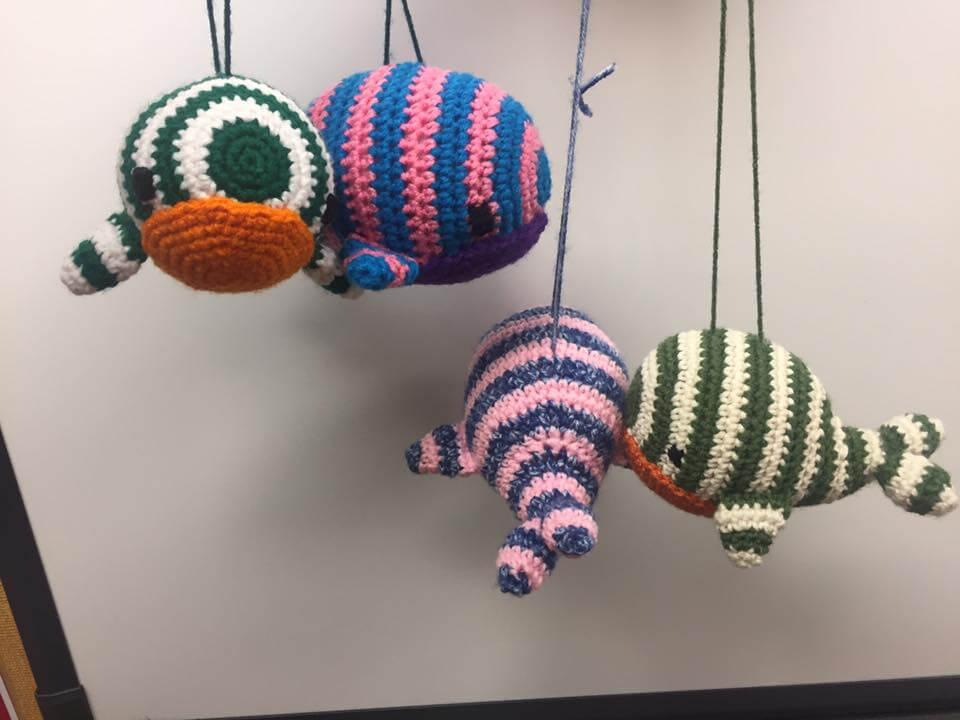
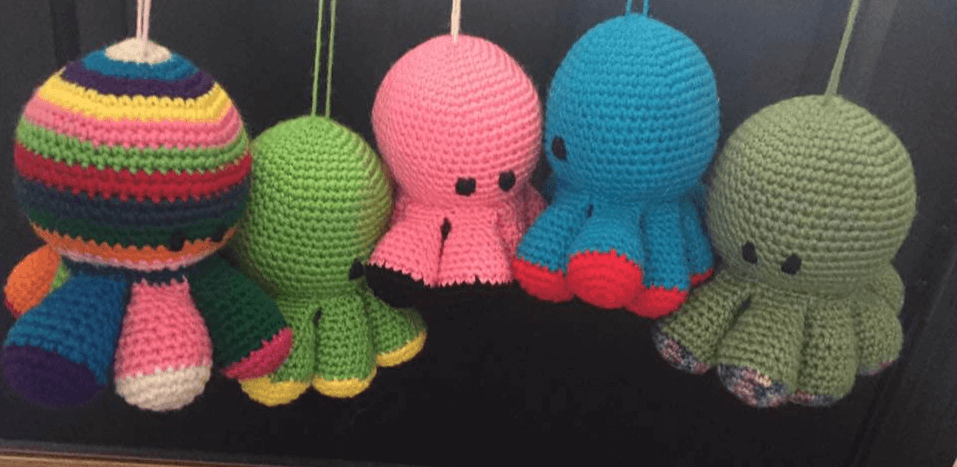
Ocean theme. I made up the octopus and jelly fish patterns. The rays came from here. And the turtles and whales both came from the same shop.
4th year (2018-19)
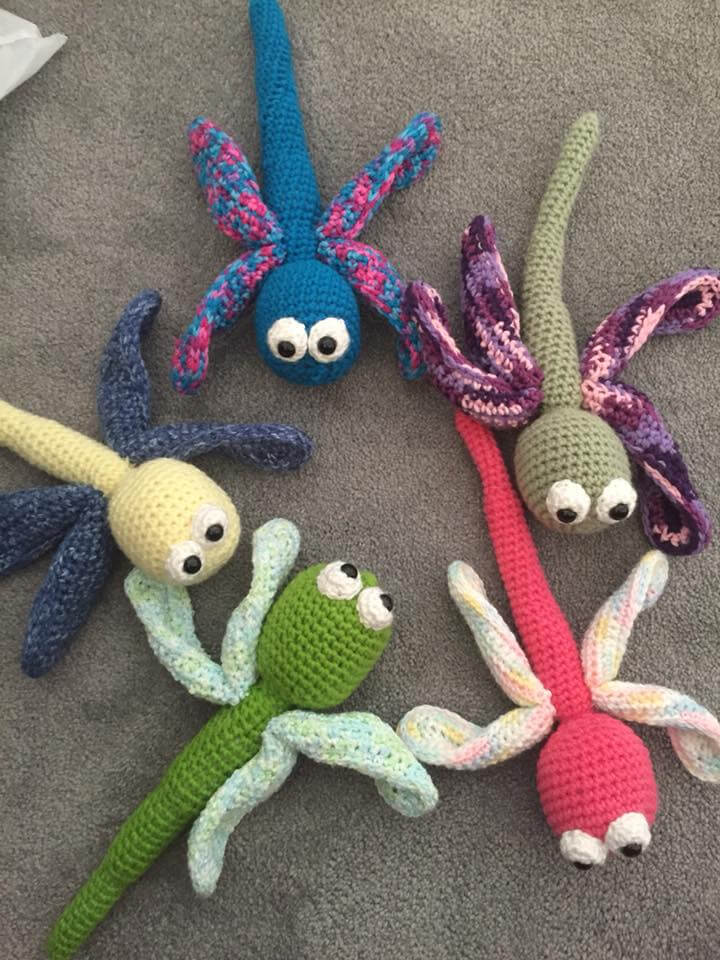
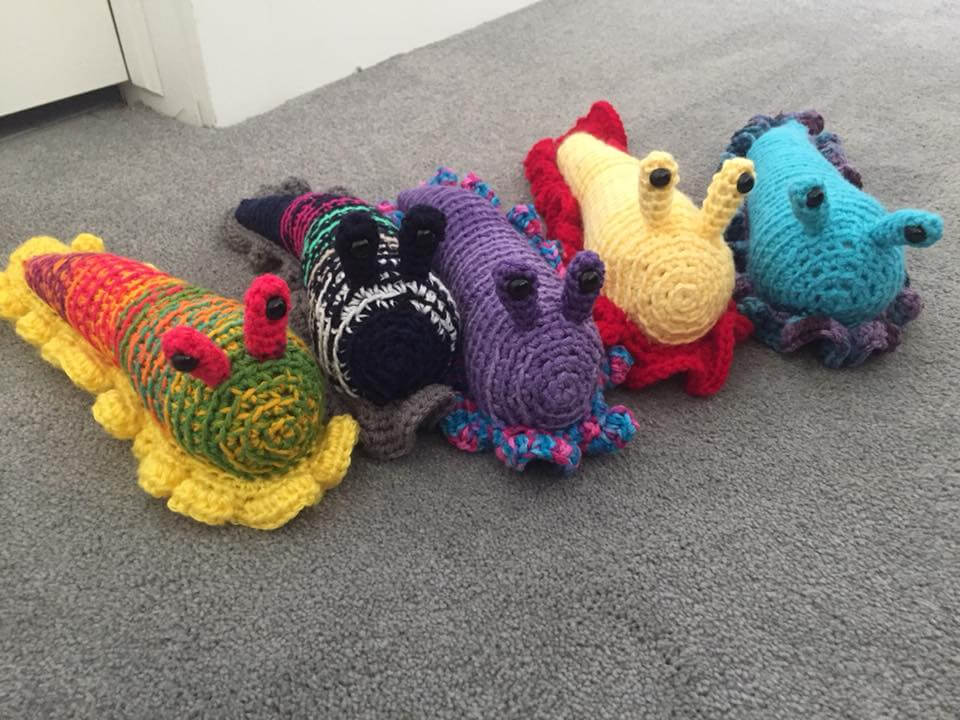
Bugs theme. My least favorite. Luckily there weren't many kids in the class and not many of them hit their goals. I also made butterflies. The slugs were from this pattern. I made up the others.
5th year (2019-20)
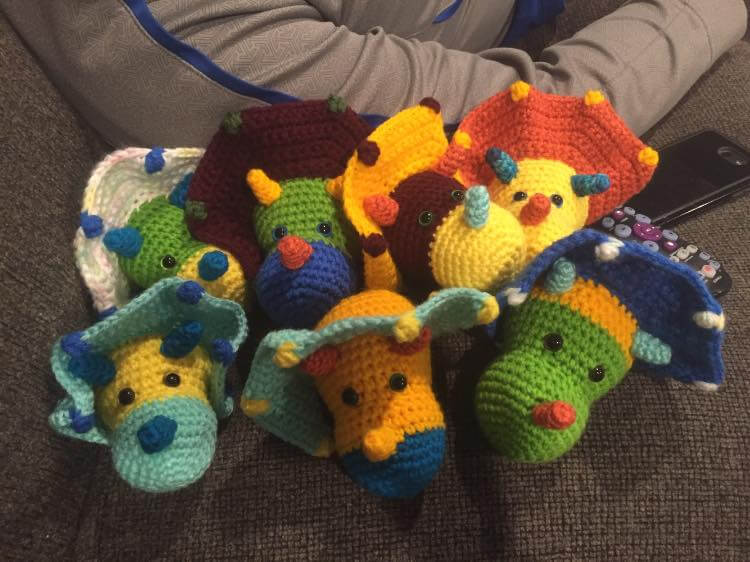
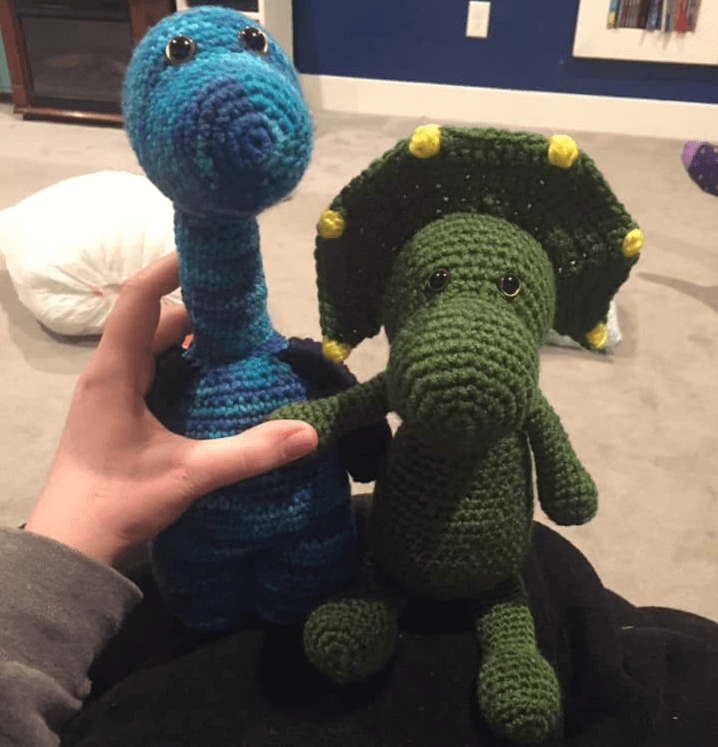
Dinosaur theme. I got the idea from dinosaurs from this shop, but really had to tweak them to make them smaller.
6th year (2020-21)
This was the start of my husband picking the theme, before that, the librarian picked a theme for the whole school and we went along with that. Then she retired so he started picking. This was baby yoda, my own made up pattern.
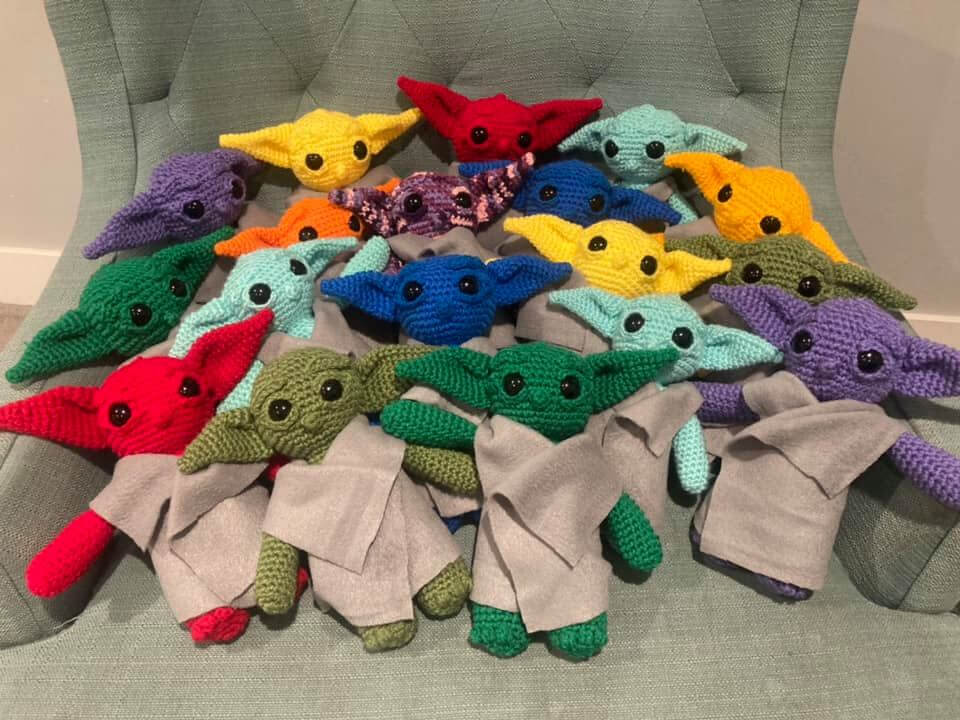
7th year (2021-22)
He picked dragons for this year. I think it was because I made up this pattern and he loved it.
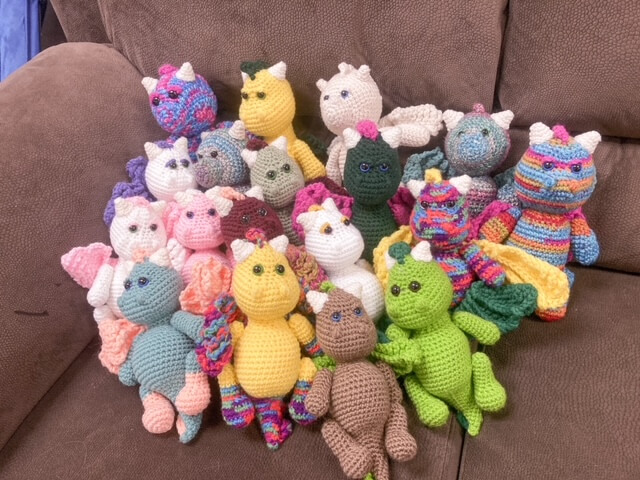
8th year (2022-23)
These sharks are all my own patterns, I will have to put them in my shop soon!


9th year (2023-24)
This Mario theme has been my favorite! I made all the patterns, but the only ones I wrote down were the Mario, Luigi, and them in cat costumes. This year I tried out making some smaller dolls as keychains, and they were a bust. They were the last two picked.

10th year (2024-25)
Star Wars theme this year. I did baby Yoda before, but did all new characters this time. They were all my own patterns, based off this Porg pattern and this Ewok pattern.
I'll get pics soon!

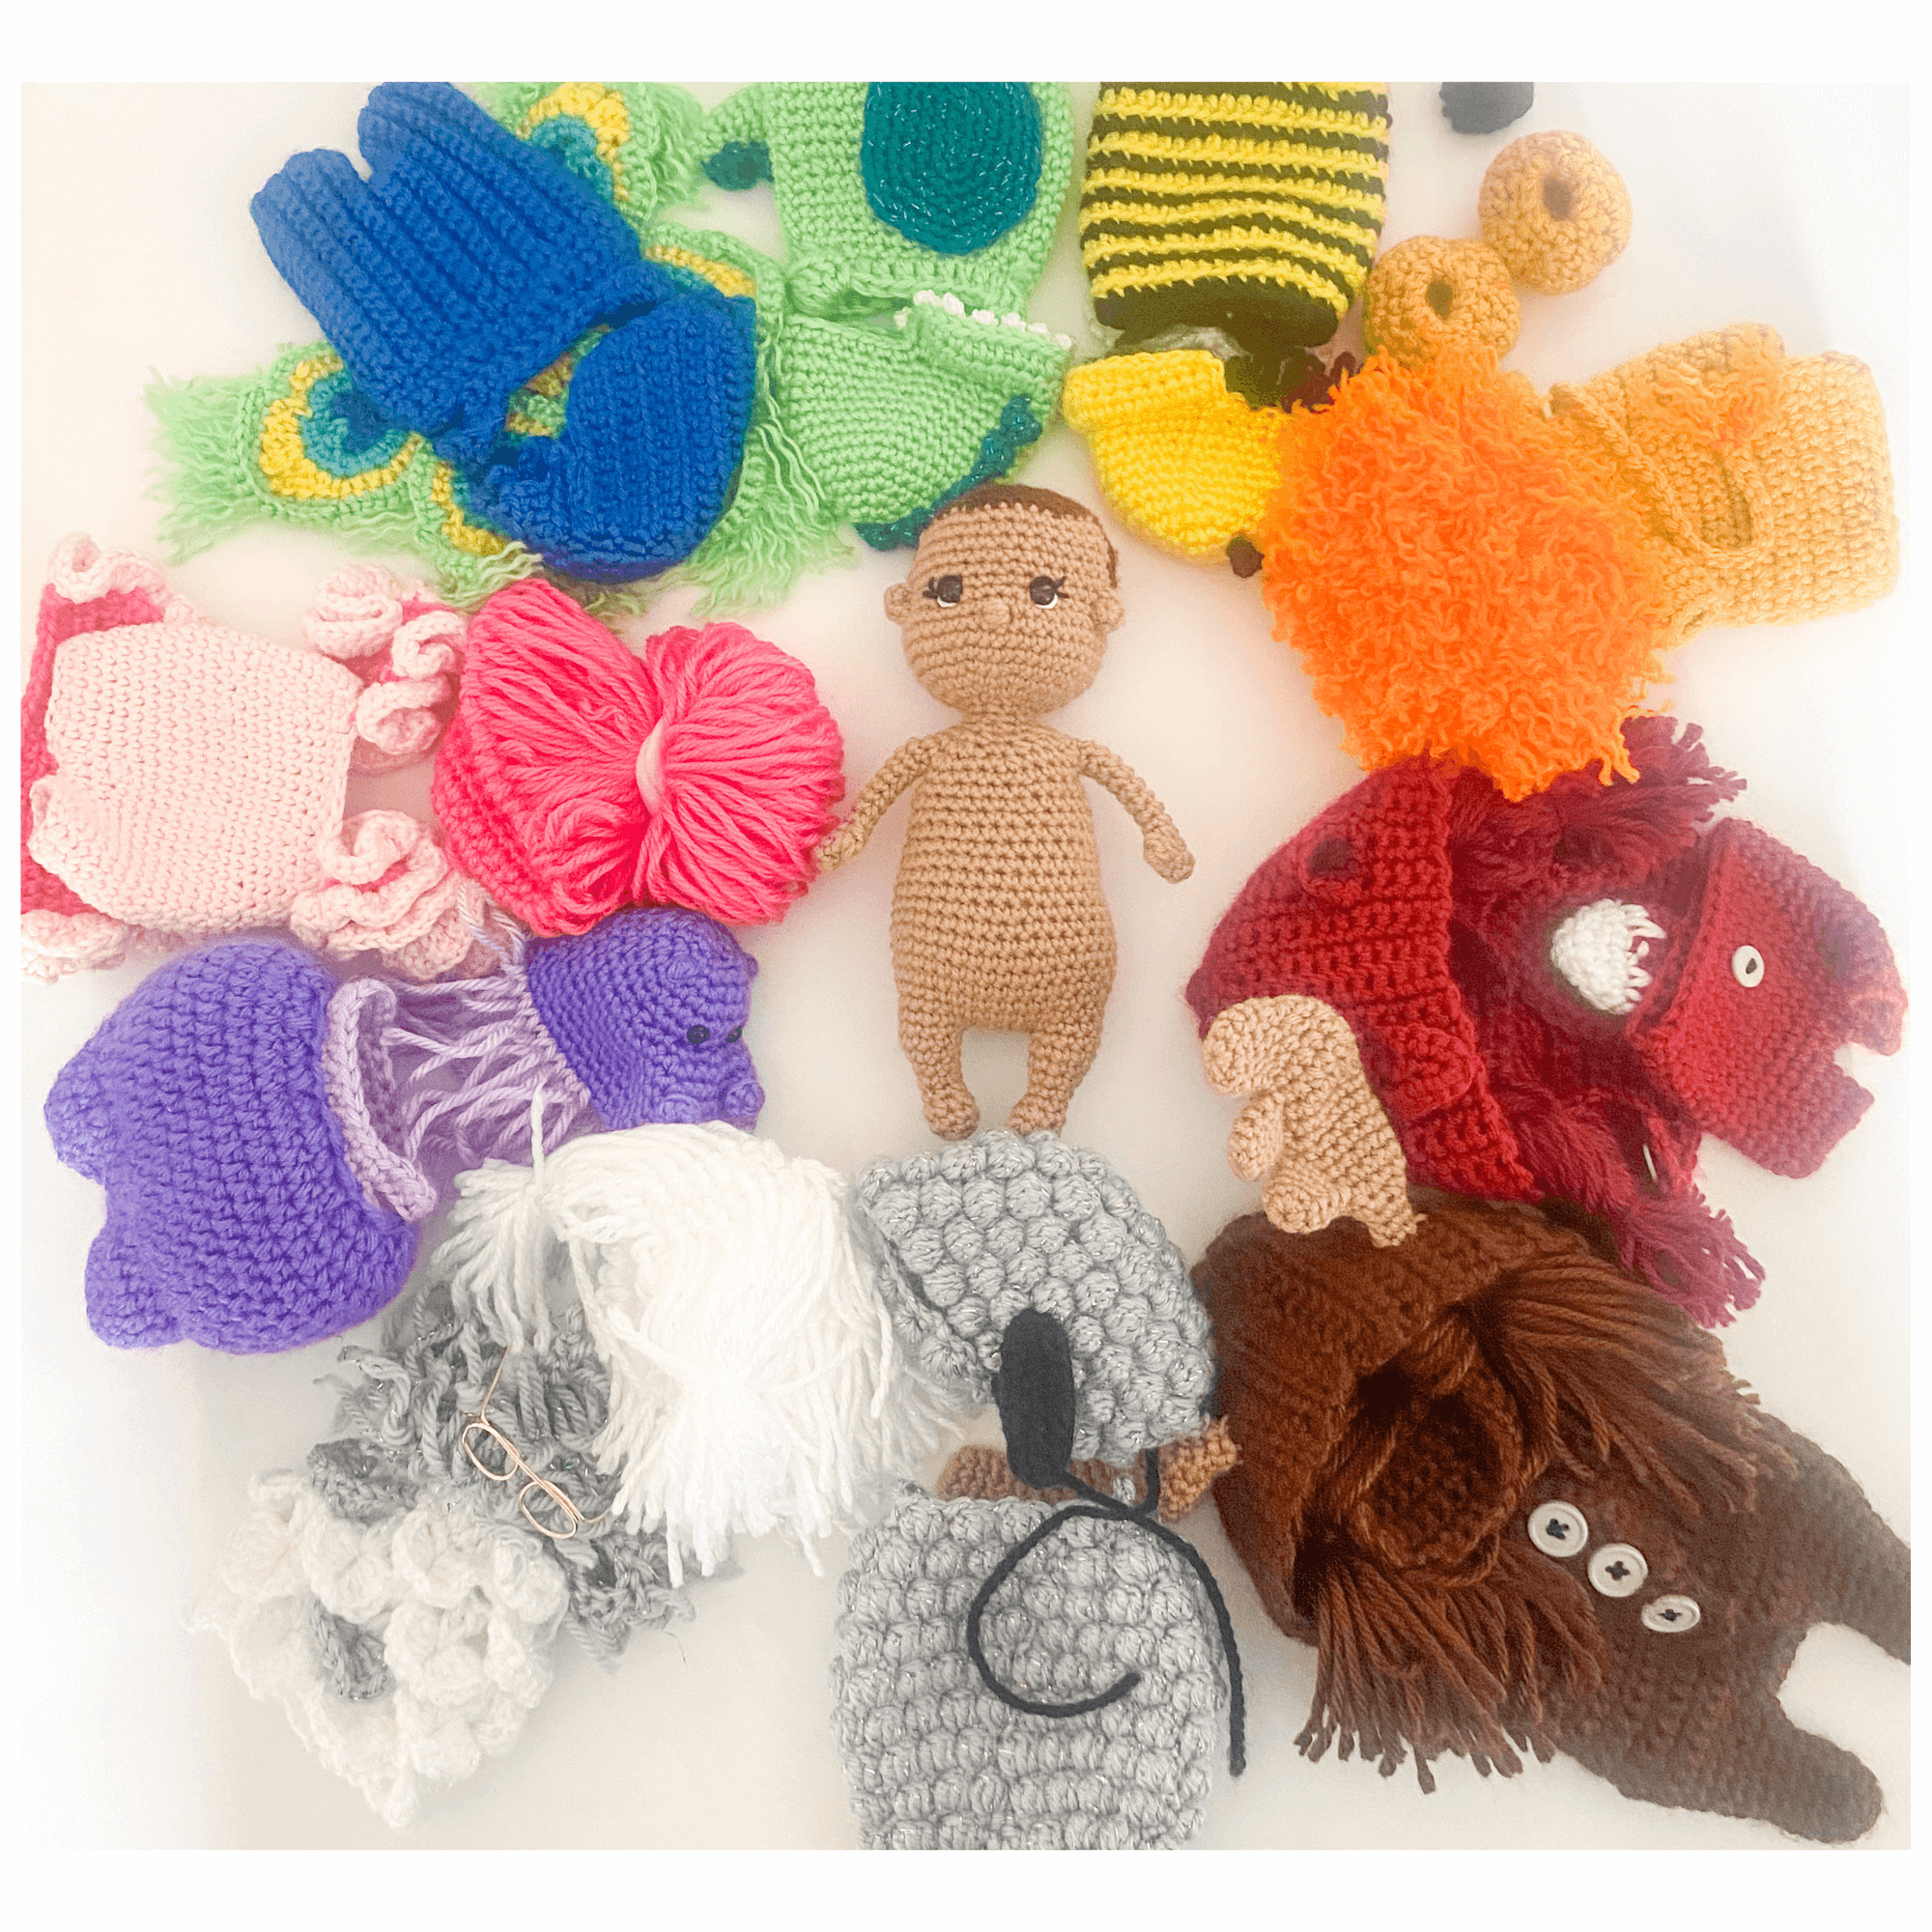
These little dolls might be my most favorite creations of all time. Especially the moose. It makes me want to have a baby and make a bigger version of the costume for my baby!
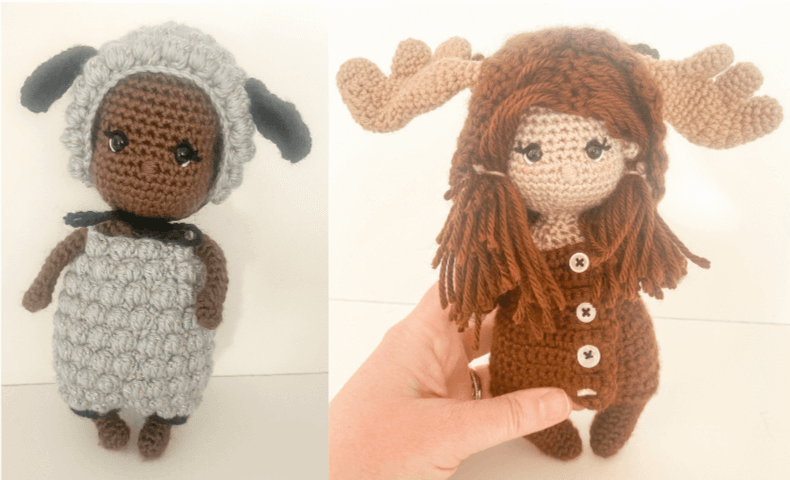
The best part about these patterns is the hair. I made different options available in the patterns. You can either make your dolls bald or with a buzz cut look and then make the wig version of the costumes so the hair can change with the costumes. Or you can connect the hair right on to the dolls head so it is permanent. Both ways are included in the patterns!
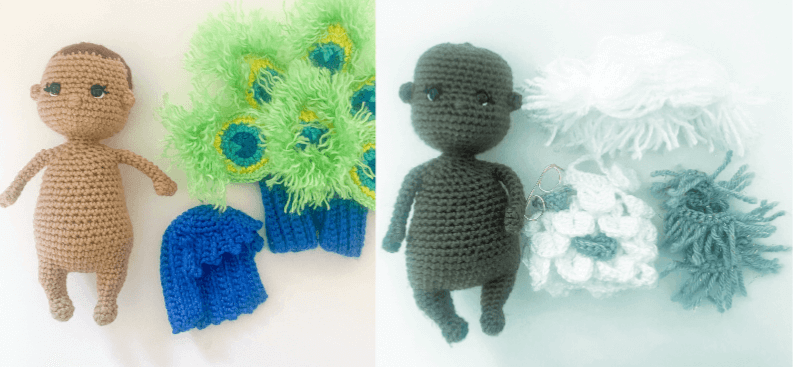
The patterns range from beginner to intermediate and use a bunch of different stitches. The fox, bee. dino, and moose are easy. The peacock, flamingo, and hippo are a bit more complicated. The lion, owl and sheep all use special stitches and might take some trial and error if you aren't familiar with those stitches. But they all come out so amazing and adorable!
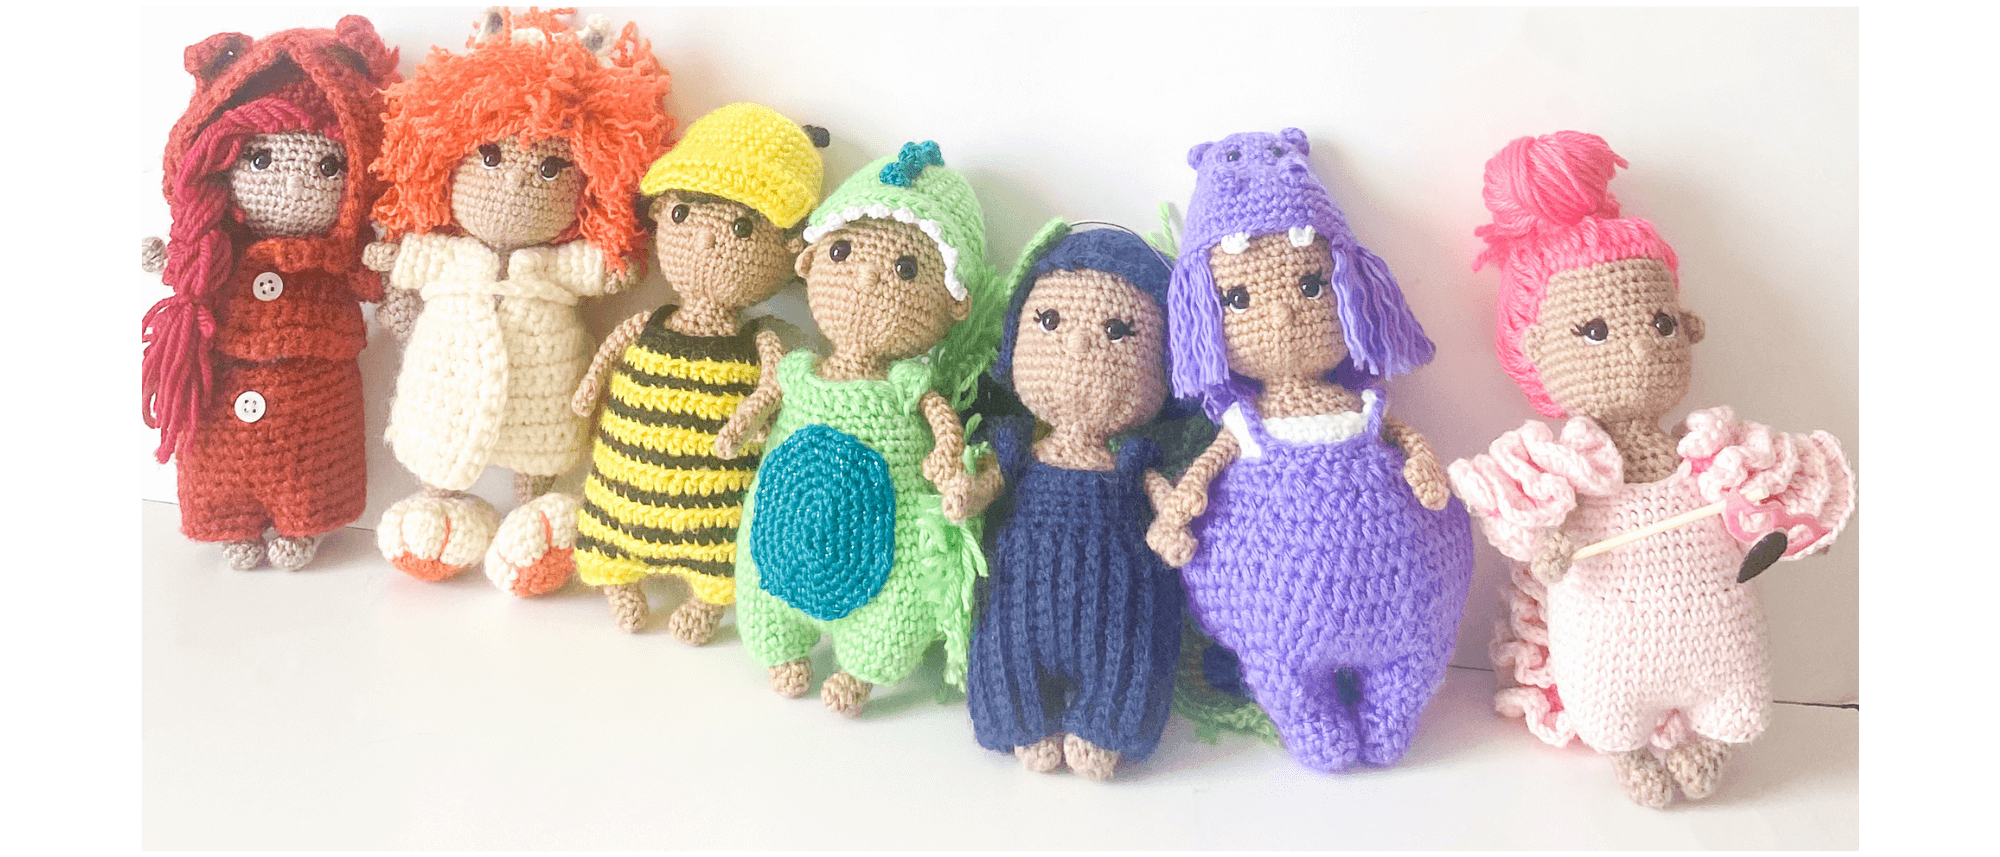
I used Caron Simply Soft yarn for all my dolls, but you should be able to get away with any other size 3 or size 4 brand, but the size of the dolls might change, so make sure you are consistent in using the same brand for both the dolls and the costumes. If you make any of the patterns, please tag me or email a picture so I can see how they turned out!

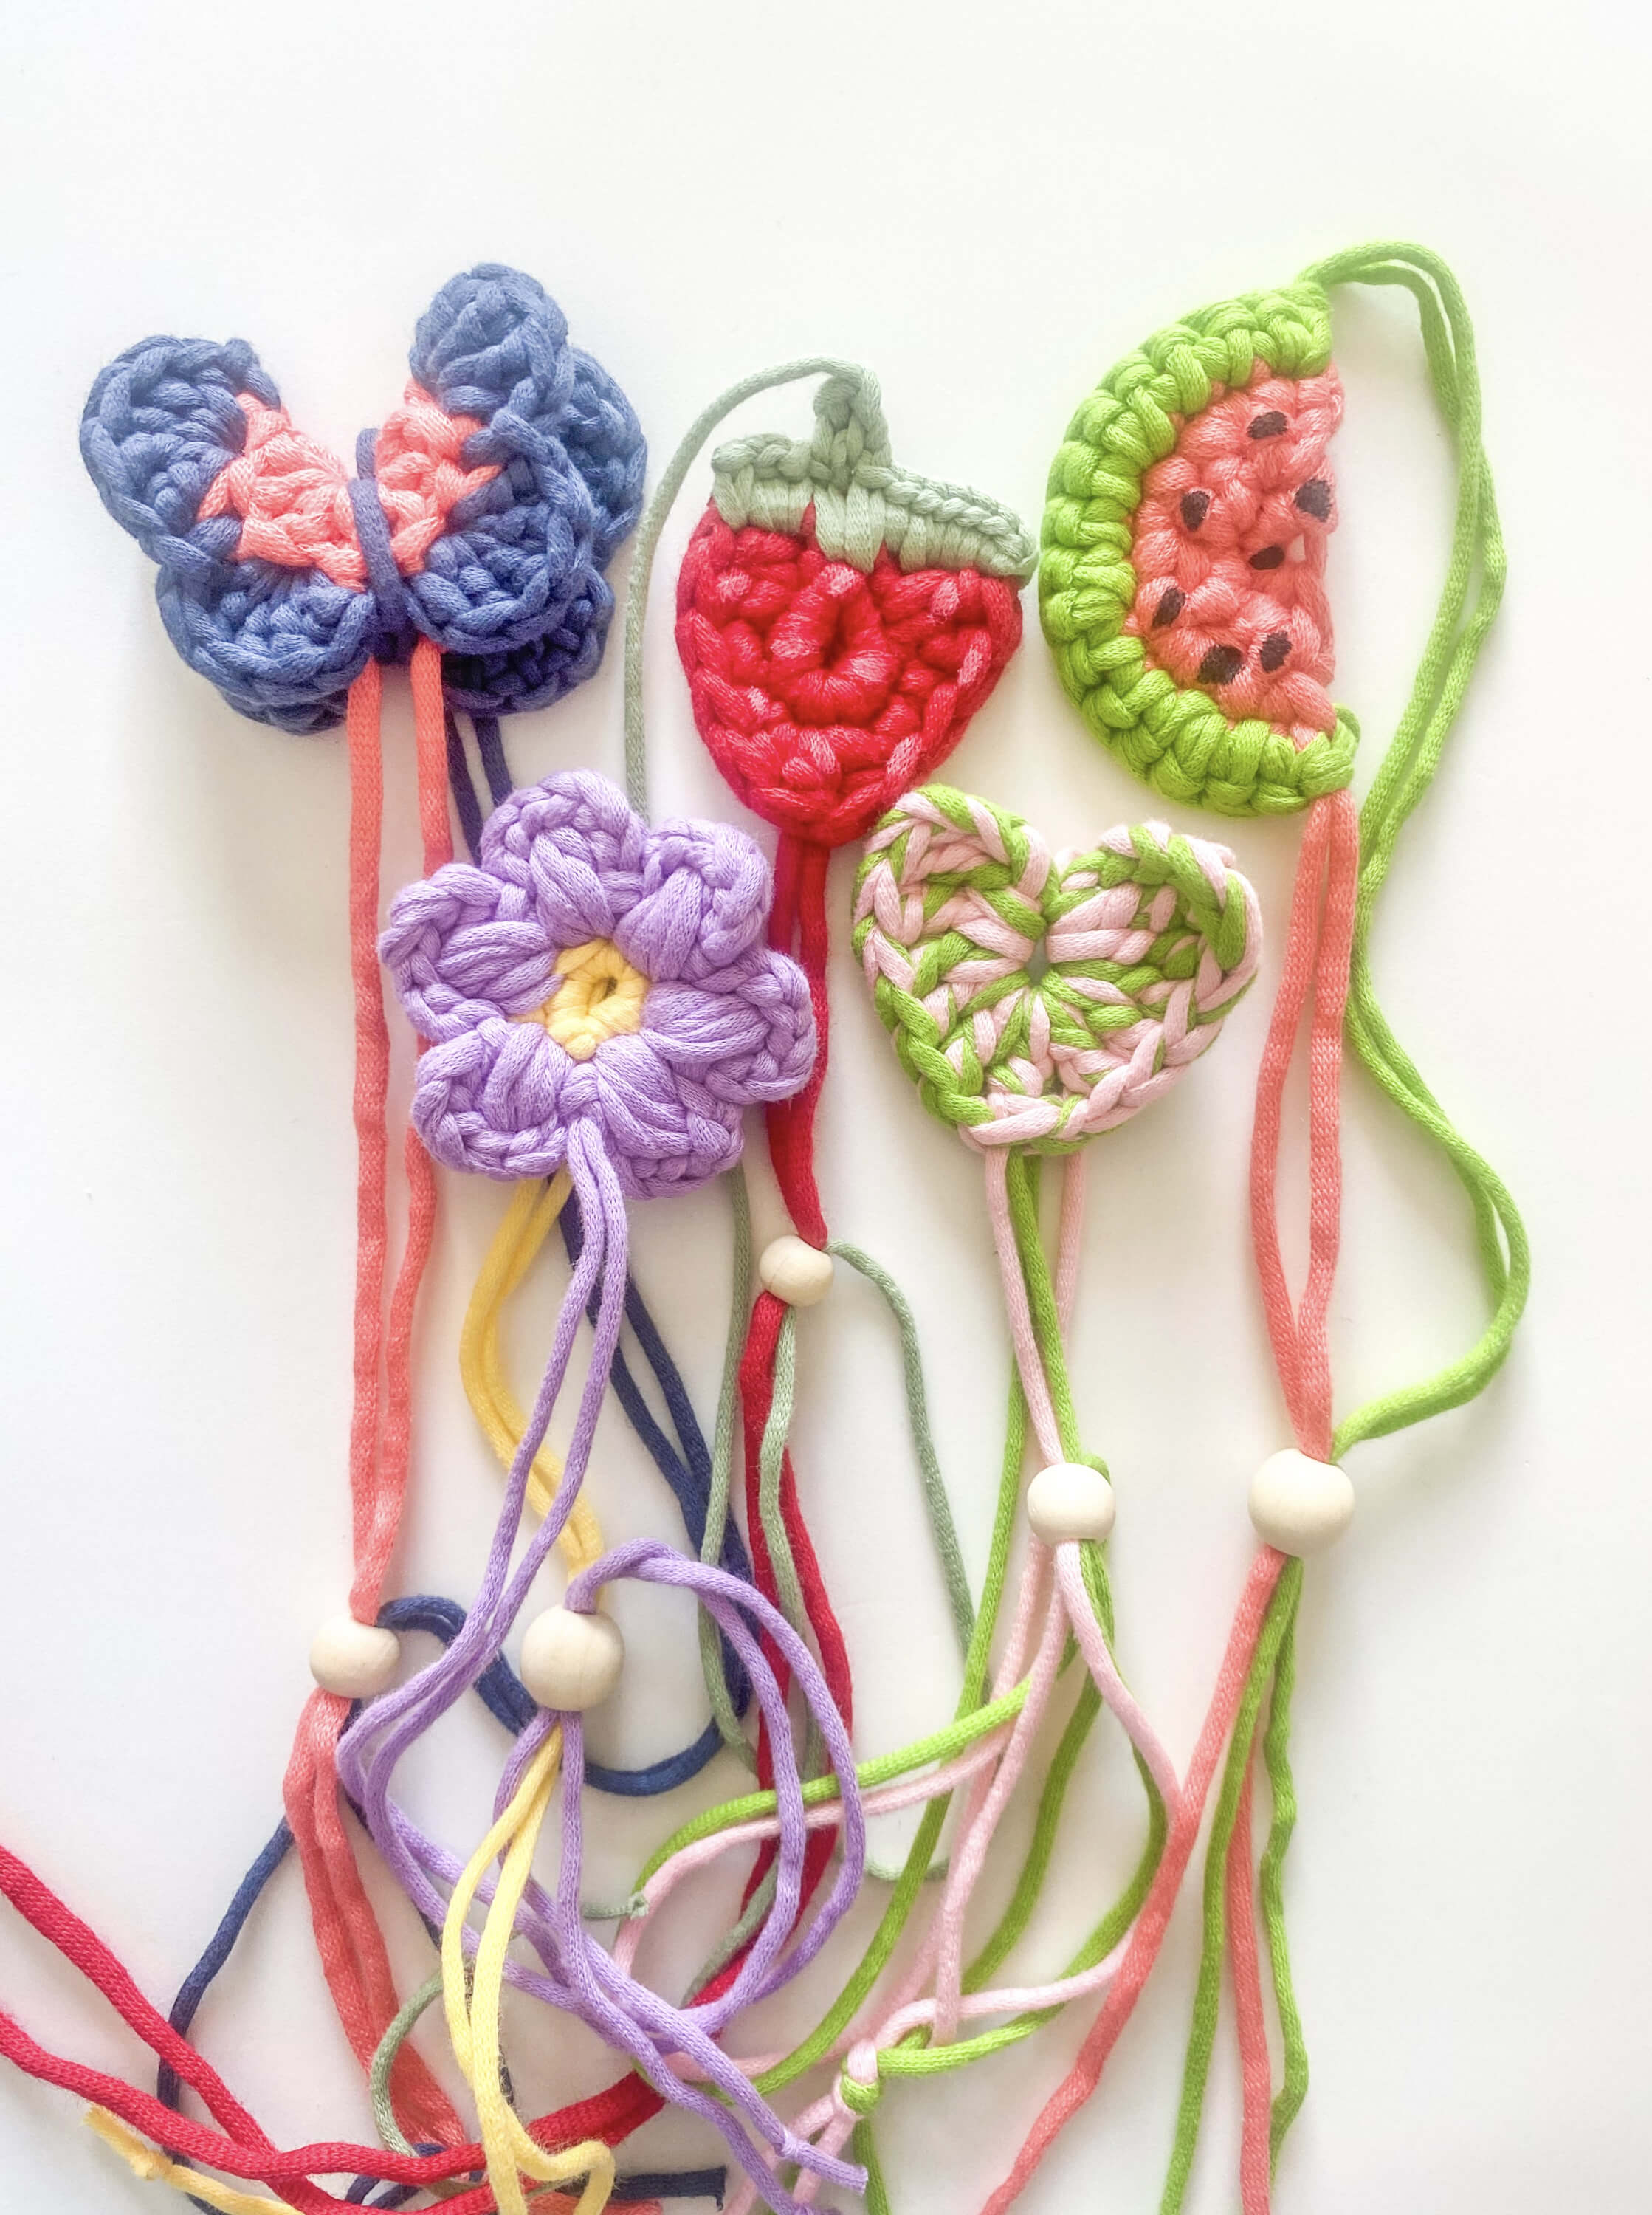
Do you have a craft fair coming up and need so super quick and easy things to sell for cheap?? I GOT YOU! These are gorgeous, super quick, and so useful.
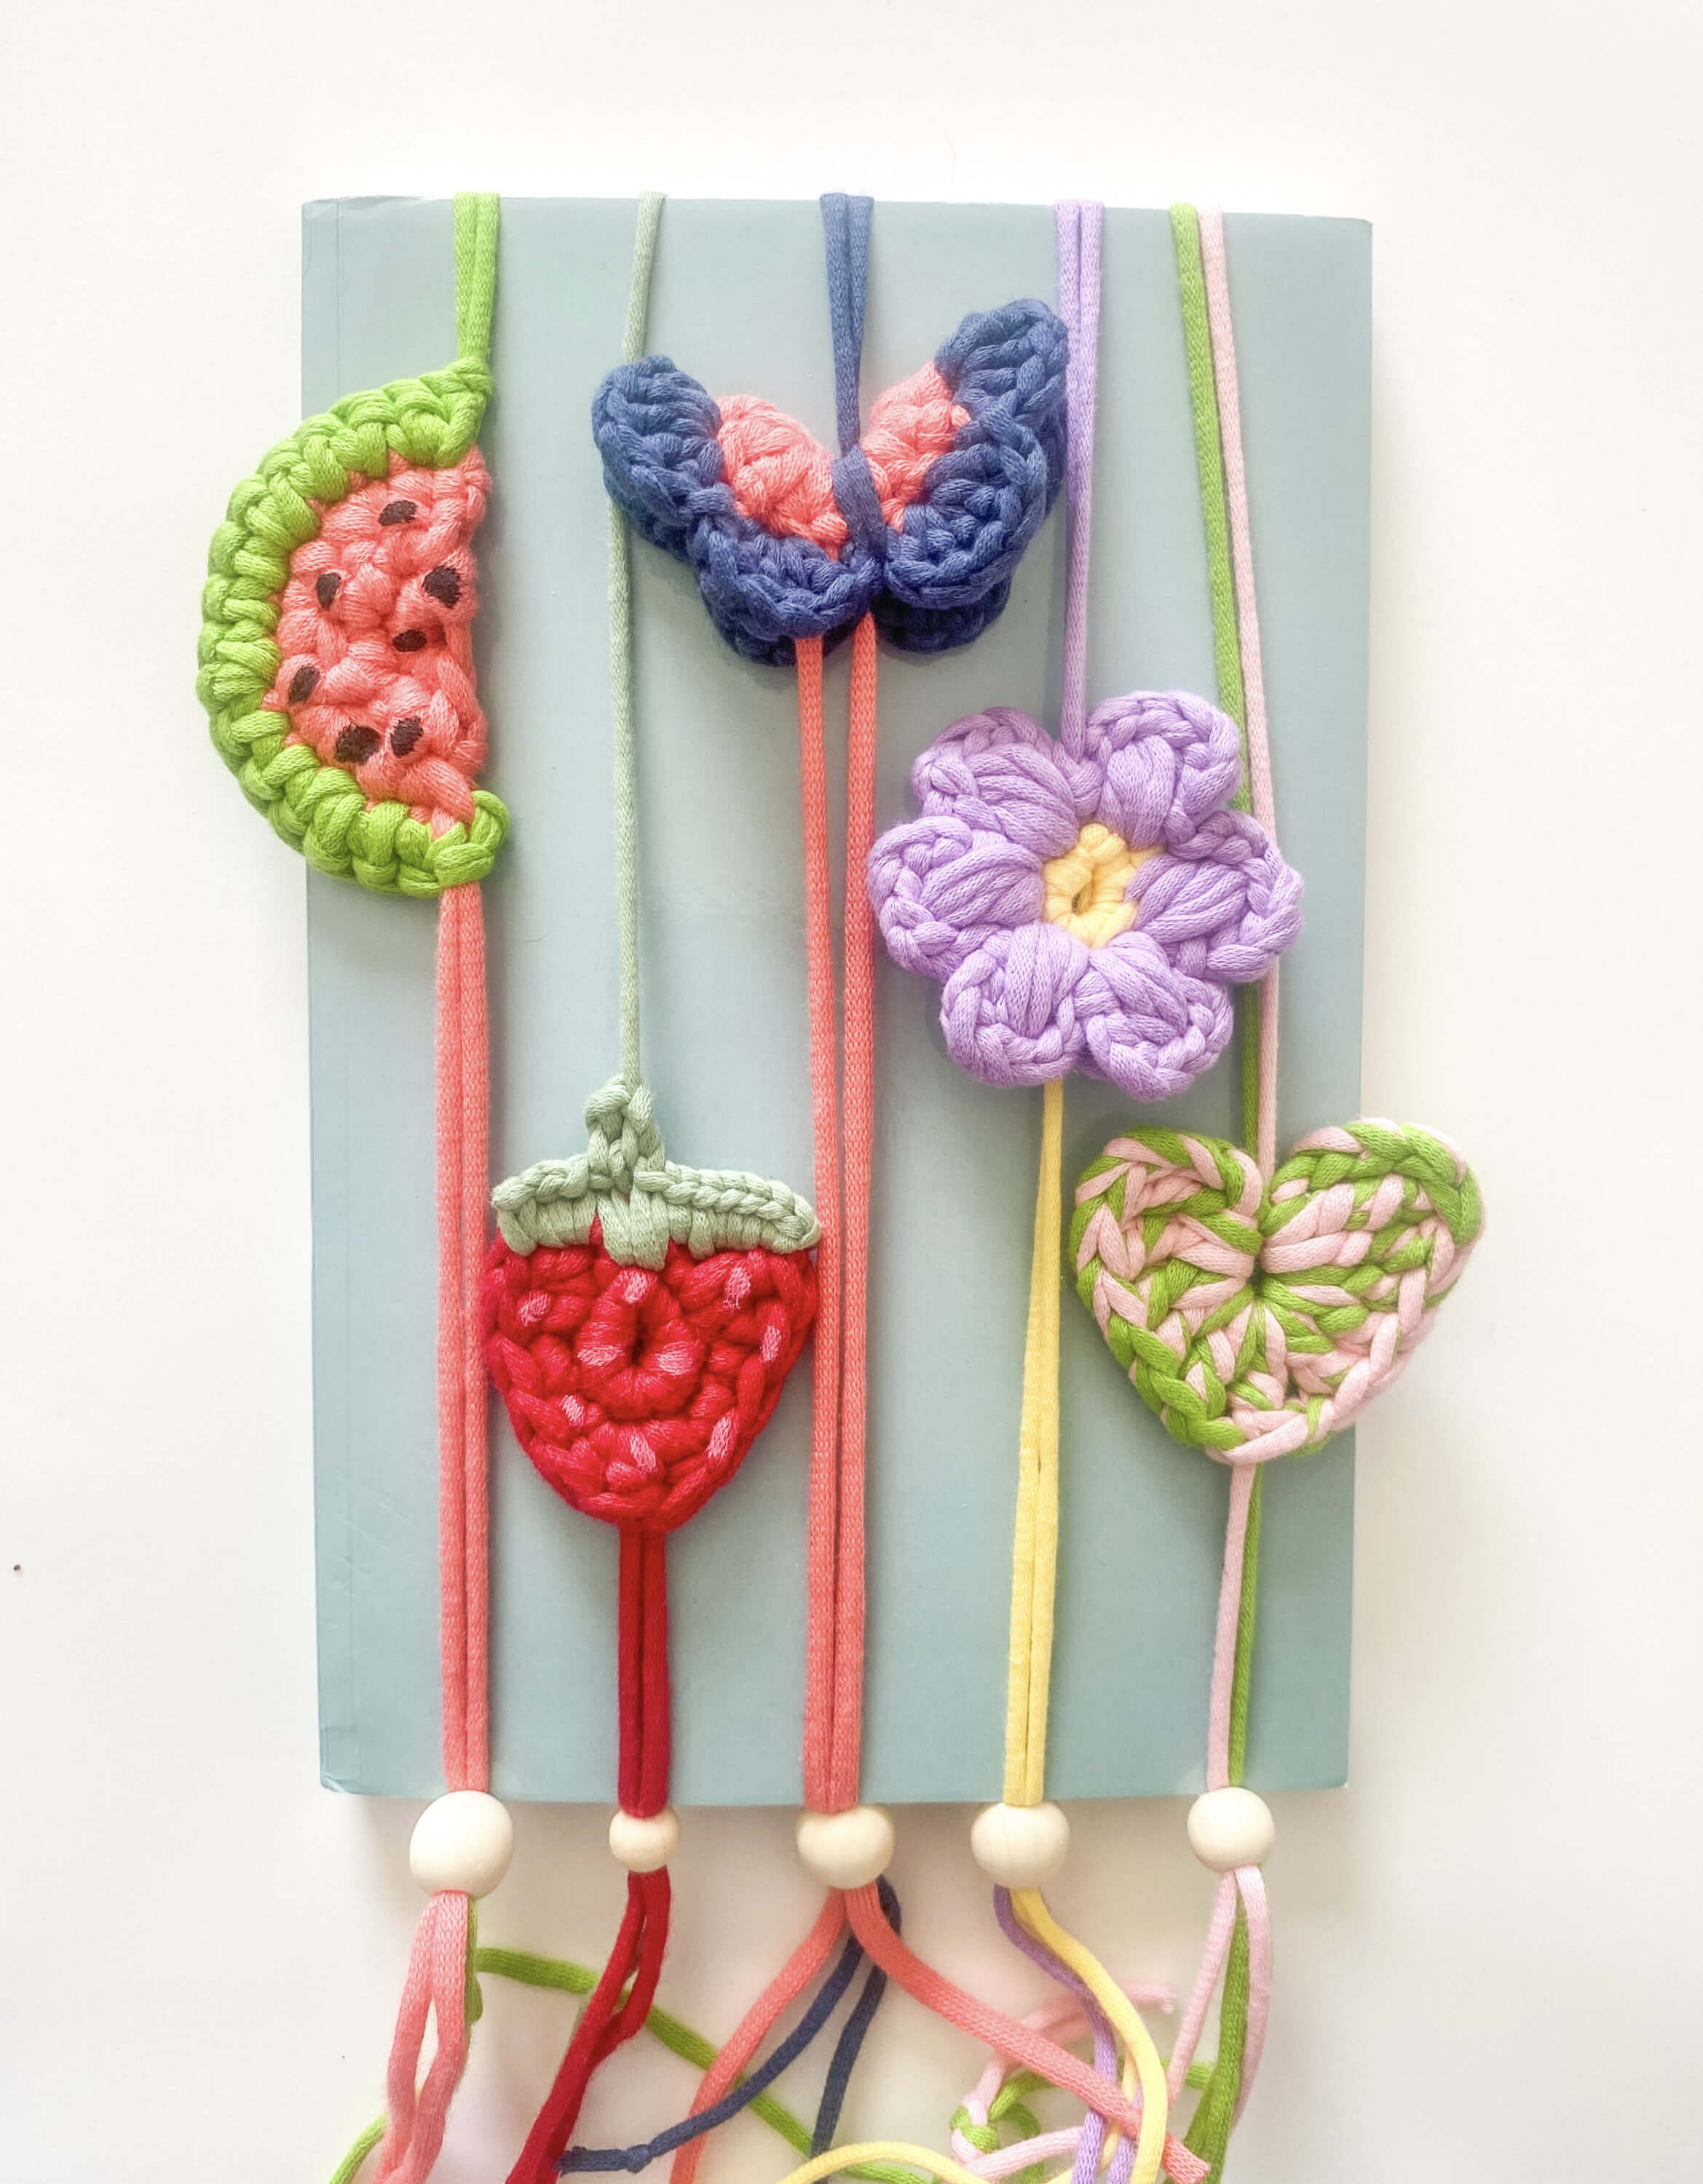
You will need t-shirt style yarn or the easy peasy yarn that's available on Amazon. I use this kind, because you can get a variety of colors. You will also need a bead to pull the yarn strands through.
There are 5 different styles that I use. Some are quicker to make than others, but all take less than 20 minutes! I sell them for $4 each or 3 for $10.
Without further adieu, here they are!
Hook: 3.5 mm
Yarn: t-shirt or easy peasy- I use two strands held together as one.
Bead
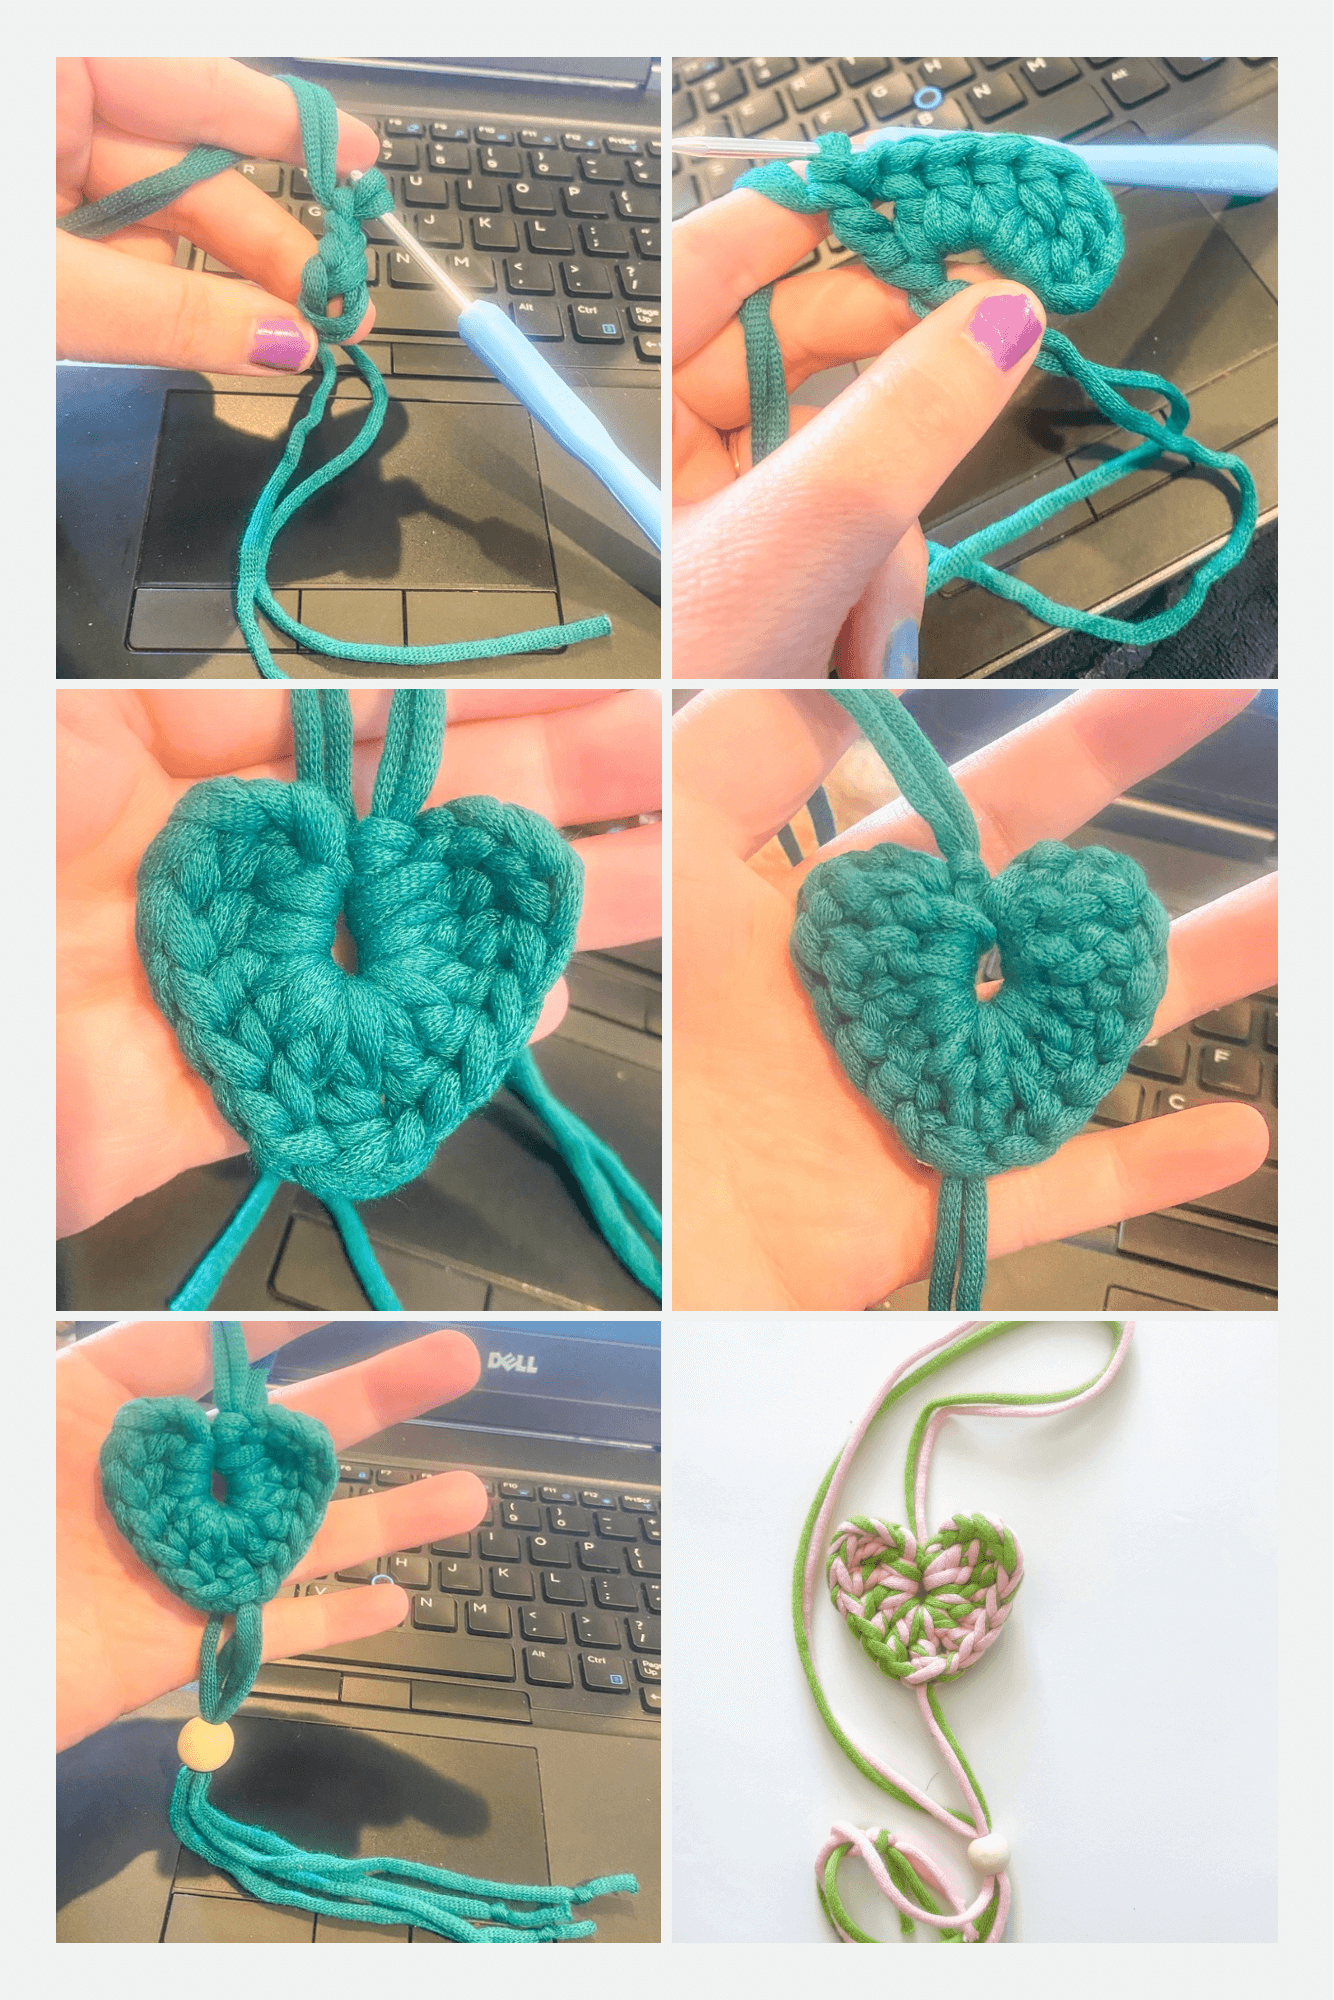
Heart
Leaving a tail that is 12 inches long, working in the magic ring.
Rnd 1:ch3, 2tr, 3dc, ch1, tr, ch1, 3dc, 2tr, ch3, slst inside the magic ring. (11)
Cut a tail 15 inches long.
Weave the shorter strands through the yarn until they come out at the bottom of the heart. Weave in the other small ends. Add the bead and tie knots at the end of the strands. Make sure the strands of yarn in the bead are big enough that the bead can be pulled tight and stay.
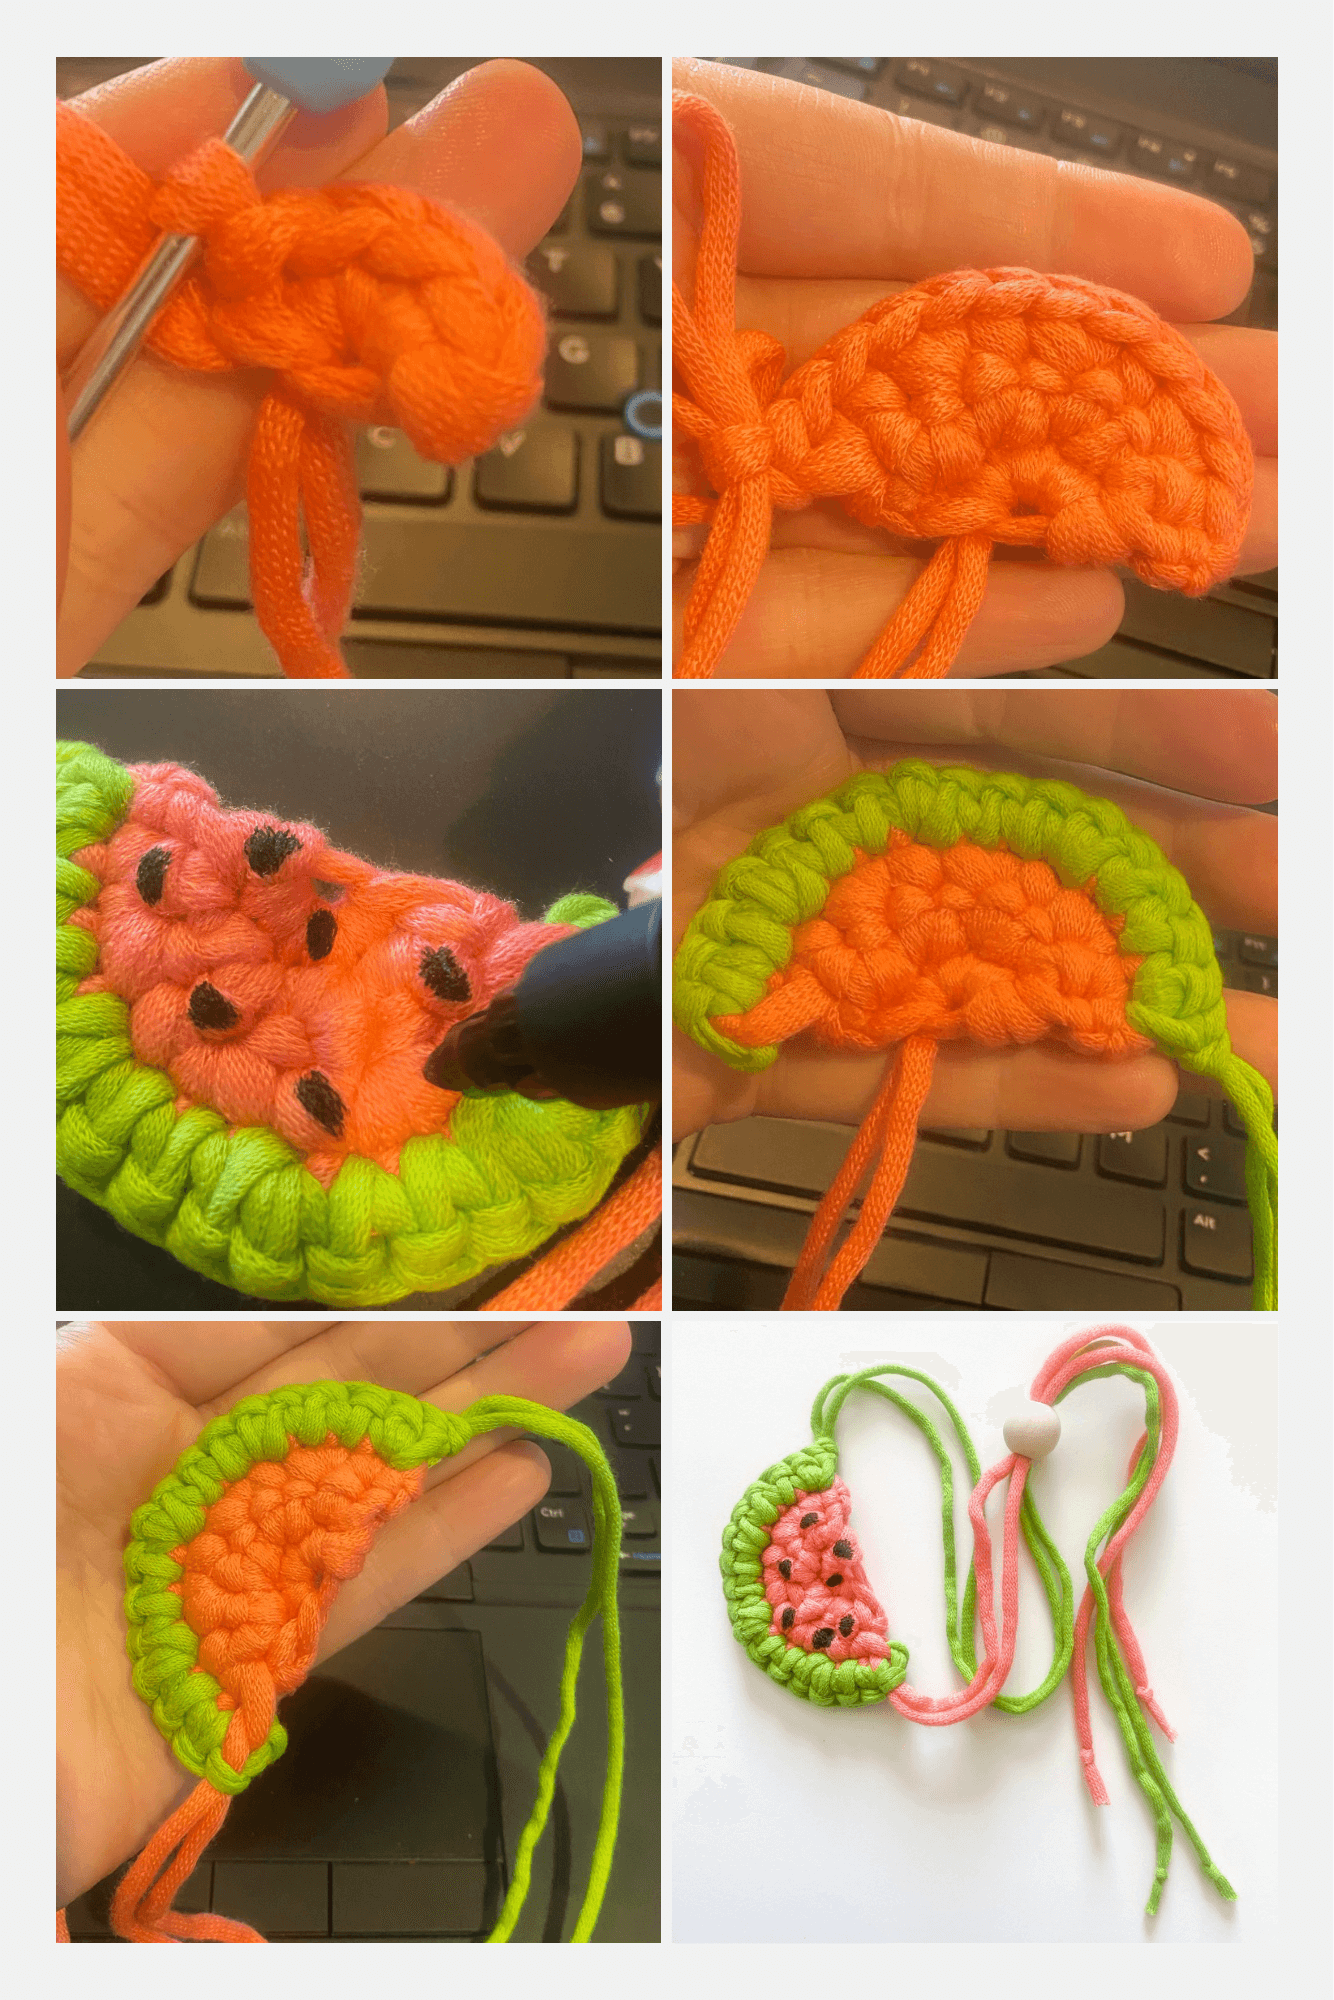
Watermelon
Start with pink yarn.
Leave a tail that is 12 inches long, working in the magic ring.
R1: ch1, sc4 in magic ring, turn (4)
R2: ch1, incx4, turn (8)
R3: ch1, (sc, inc)x4, turn (12)
Fasten off. Connect green
R4: ch1, (2sc, inc)x4, (16)
Fasten off leaving a tail 15 inches long.
Weave the pink tail to the opposite end of the watermelon like you see in the picture. Weave in the other small ends. Add the bead and tie knots at the end of the strands. Make sure the strands of yarn in the bead are big enough that the bead can be pulled tight and stay. Use a marker to make the seeds.
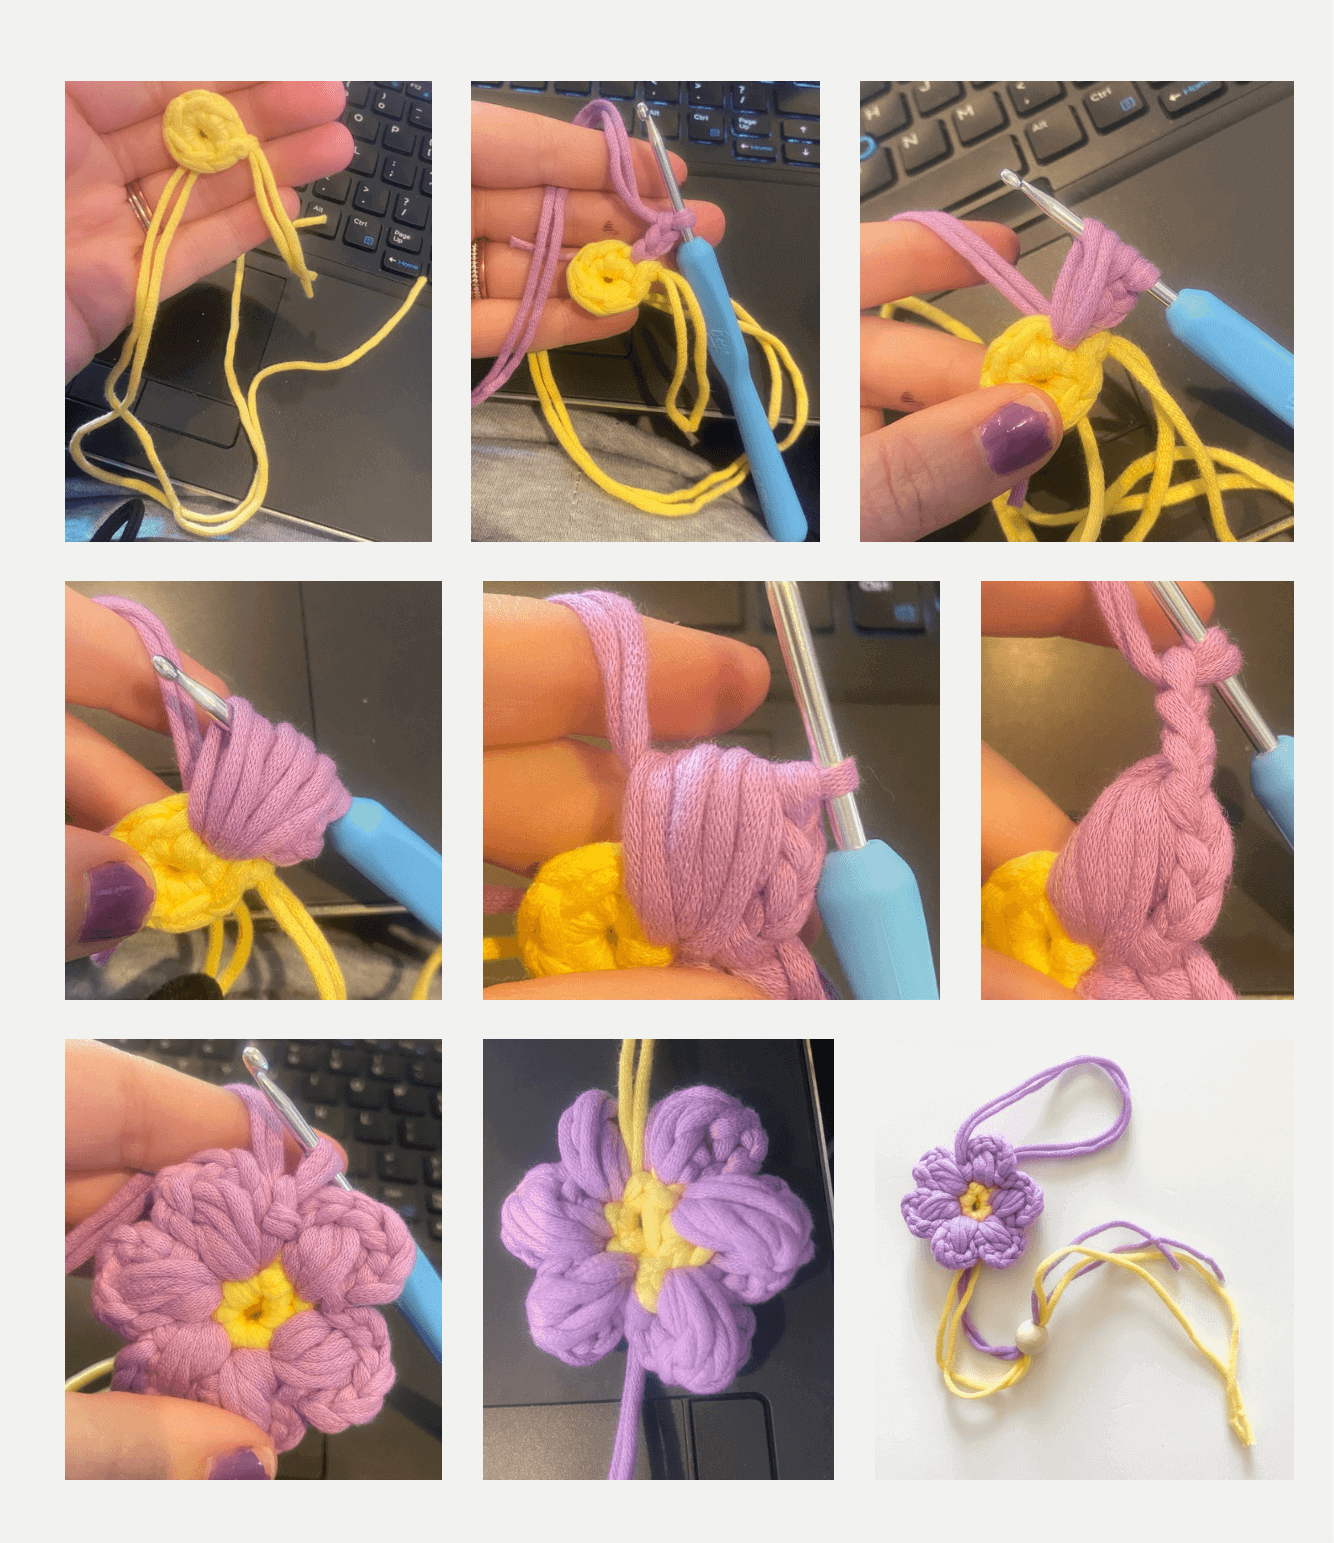
Flower
Start with yellow yarn
Leave a tail that is 12 inches long, working in the magic ring.
Rnd1: ch1, sc6 in magic ring, slst to join (6)
Fasten off yellow and switch to flower color yarn.
Rnd2: ch3, now you will make a puff stitch (pf), (yo, insert into the same stitch, yo, pull up a loop as high as the ch3 like you see in the pic)x3, yo, pull through all the loops on the hook, ch3 slst into the next stitch. Repeat R2 5 more times
Fasten off. Connect green
R4: ch1, (2sc, inc)x4, (16)
Fasten off leaving a tail 15 inches long.
Weave the yellow tail to the opposite end of the flower like you see in the picture. Add the bead and tie knots at the end of the strands. Weave in the other small ends. Make sure the strands of yarn in the bead are big enough that the bead can be pulled tight and stay. Use a marker to make the seeds.
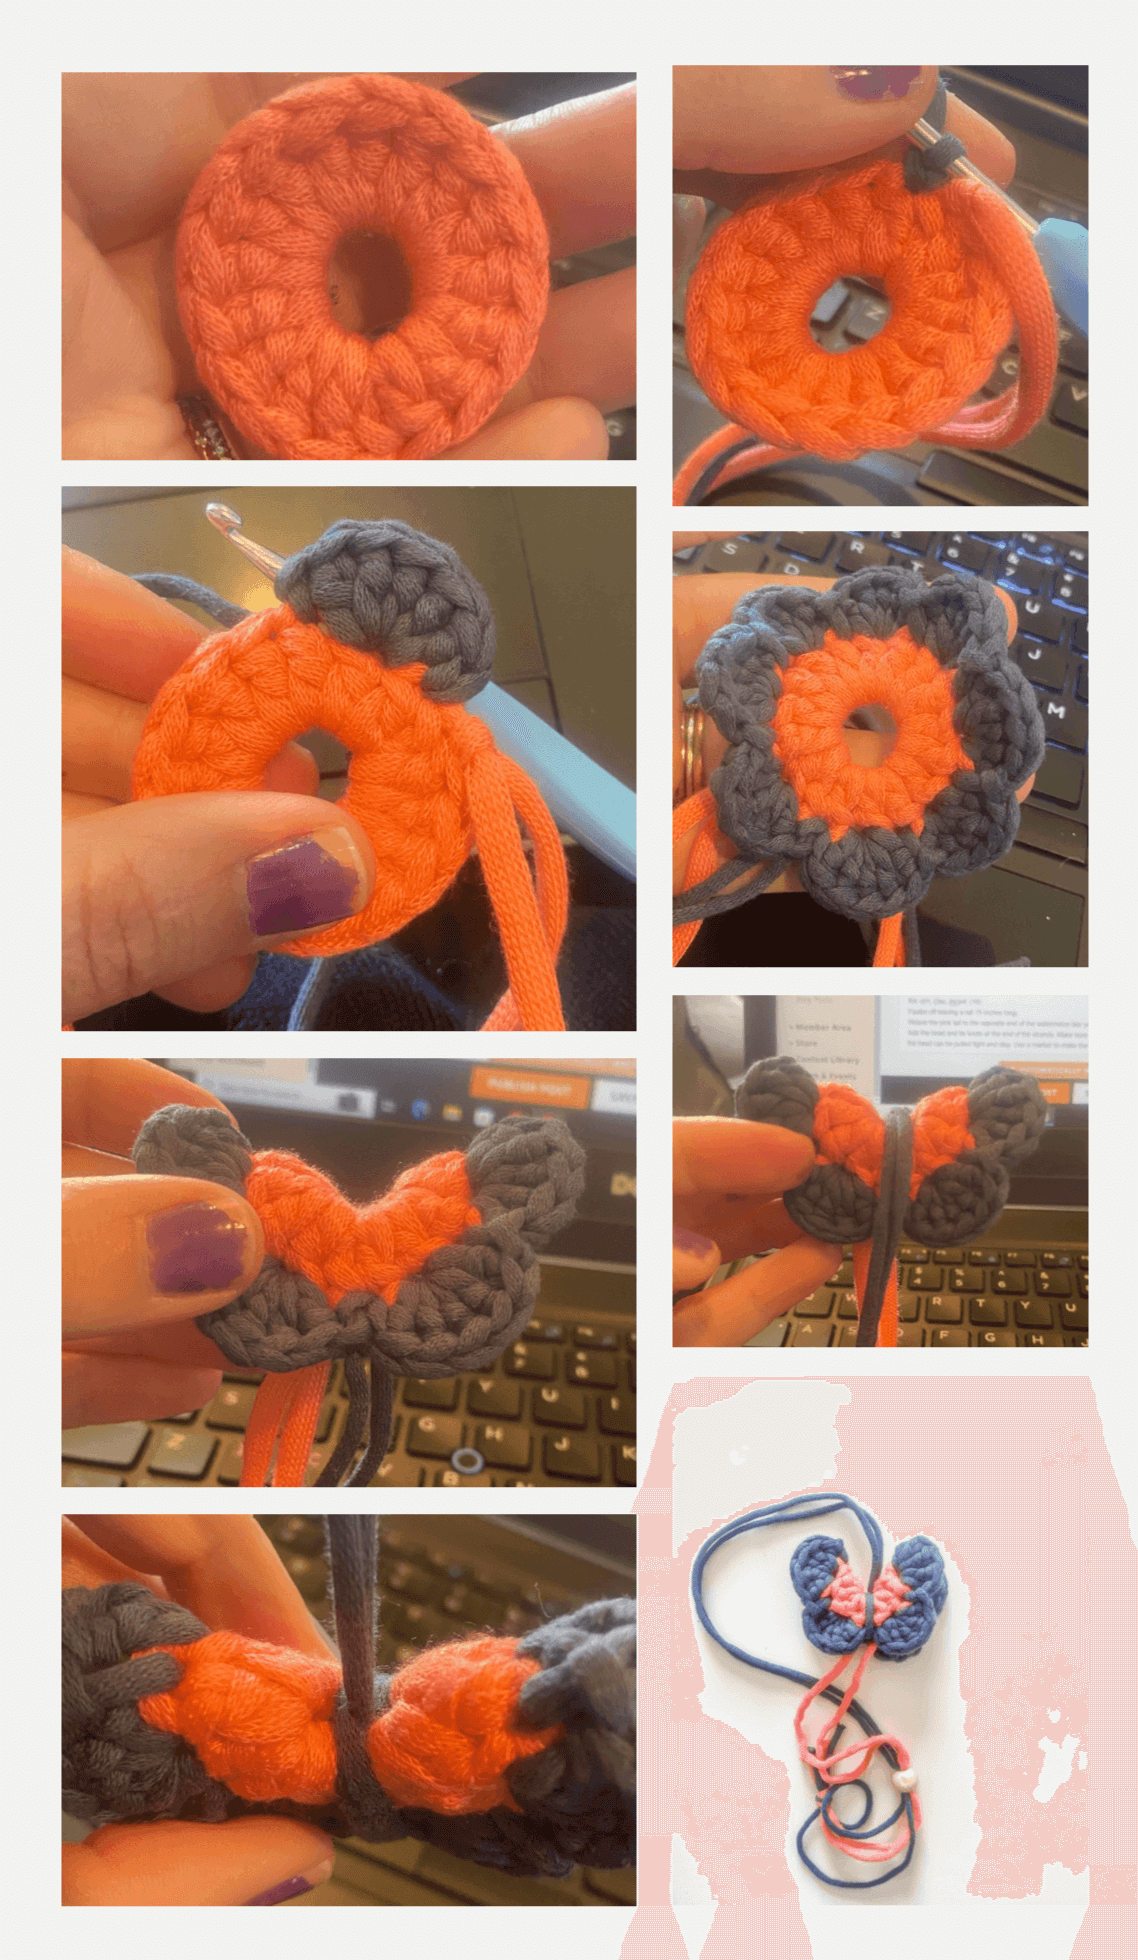
Butterfly
Start with first color, DON'T use 2 strands held together, only use 1 strand of yarn for this one.
Leave a tail that is 12 inches long, working in the magic ring.
Rnd1: ch2, dc16 in magic ring, slst to join (16)
Fasten off leaving 12 inches for the tail
Connect your second color, leaving a tail 16 inches long.
R2: ch1, (dc5 in next stitch, slst in next, dc5 in next, slst in next)x3,
Fasten off leaving a 16 inch tail.
You should have something that looks like this. Fold it in half and wrap two strands from the second color around the middle to create the butterfly. Pull the two strands up through the middle. Add the bead and tie knots at the end of the strands. Make sure the strands of yarn in the bead are big enough that the bead can be pulled tight and stay. Use a marker to make the seeds.
Strawberry
Start with red
Leave a tail that is 12 inches long, working in the magic ring.
Rnd1: ch1, 7sc, slst to join (7)
Rnd2: ch2, dcinc, 2sc, (hdc, dc, hdc) in next, , 2sc, dcinc, ch2, slst to join (11)
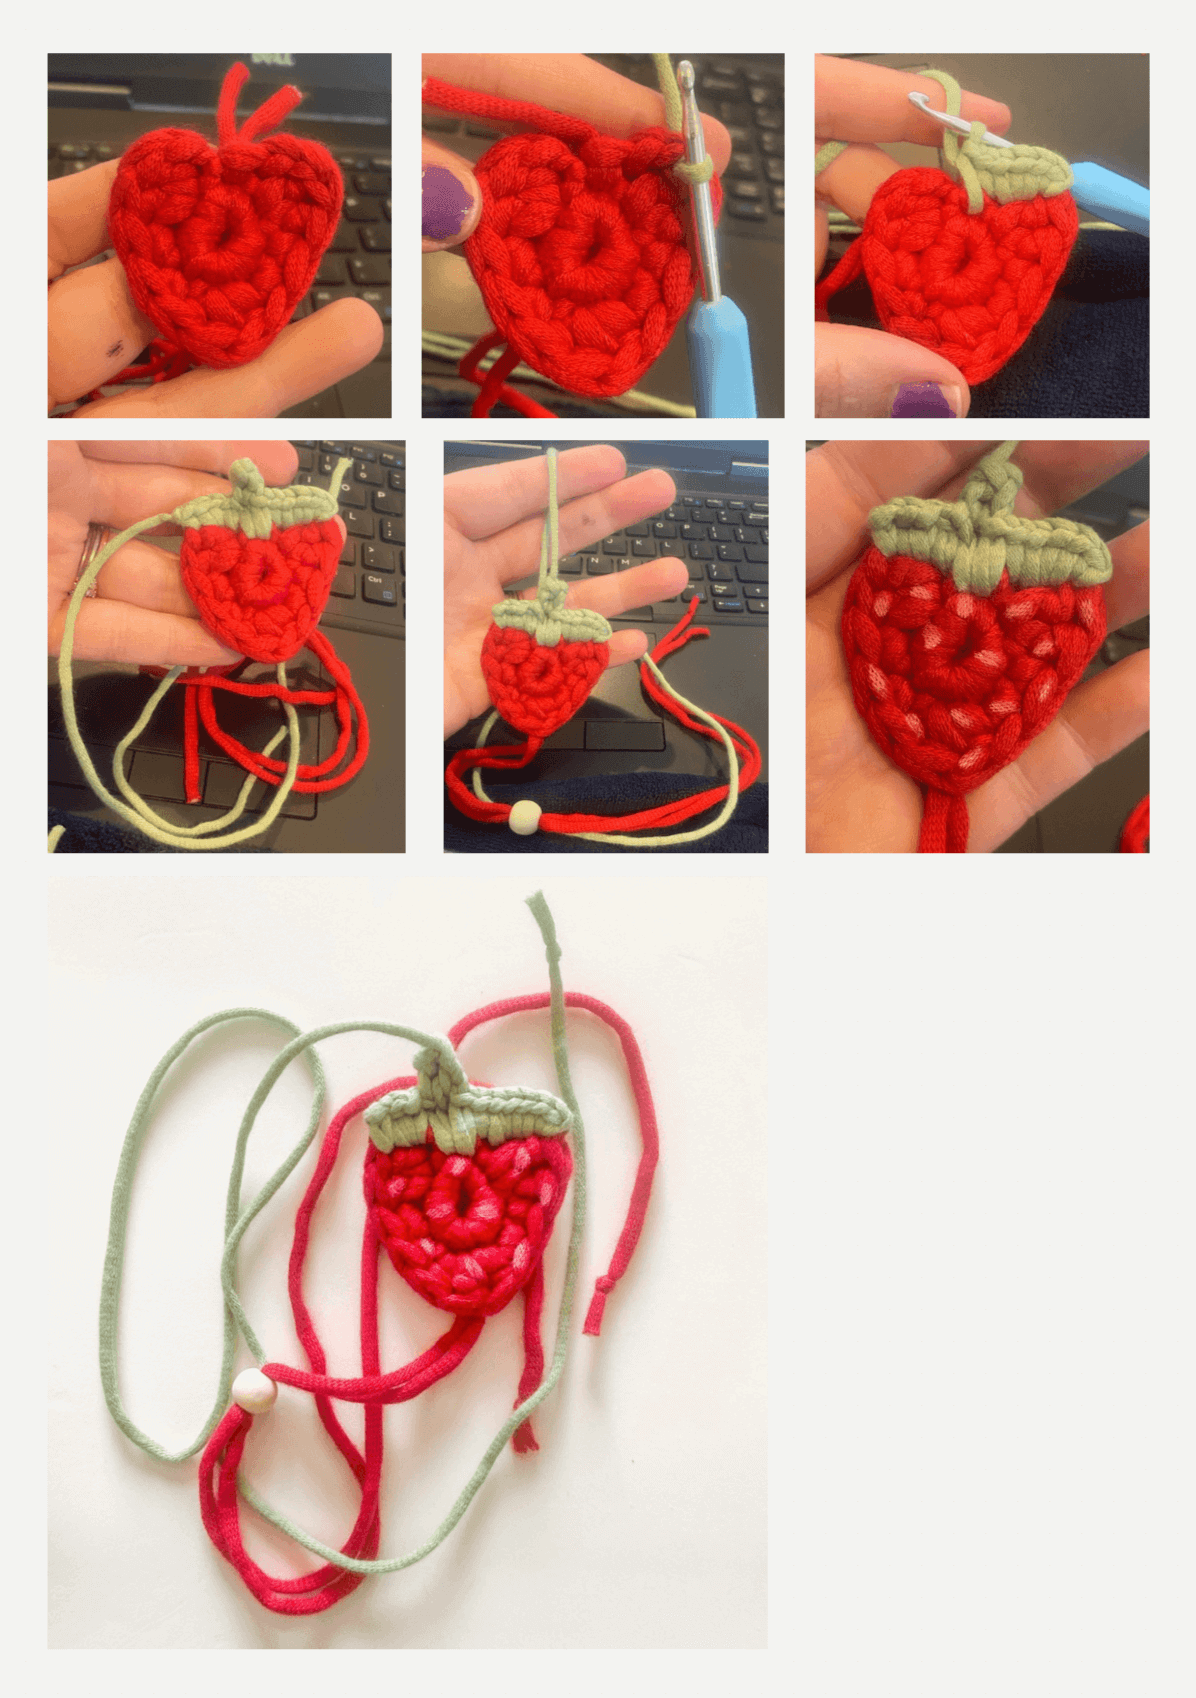
Fasten off red and connect ONE strand of green like you see in the picture.
R1: ch1, sc across the top of the strawberry. Do it as many times as you need to cover the red, only go to the middle, like the picture, ch3, sc into second from hook, sc in next chain space, sc across the second half of the strawberry, like the picture.
Fasten off leaving a tail 15 inches long.
Weave the red strands to the bottom of the strawberry, and weave the green strand to the top of the stem, like you see in the picture. Add the bead and tie knots at the end of the strands. Weave in the other small ends. Make sure the strands of yarn in the bead are big enough that the bead can be pulled tight and stay. Use a marker to make the seeds.
I hope you love them!
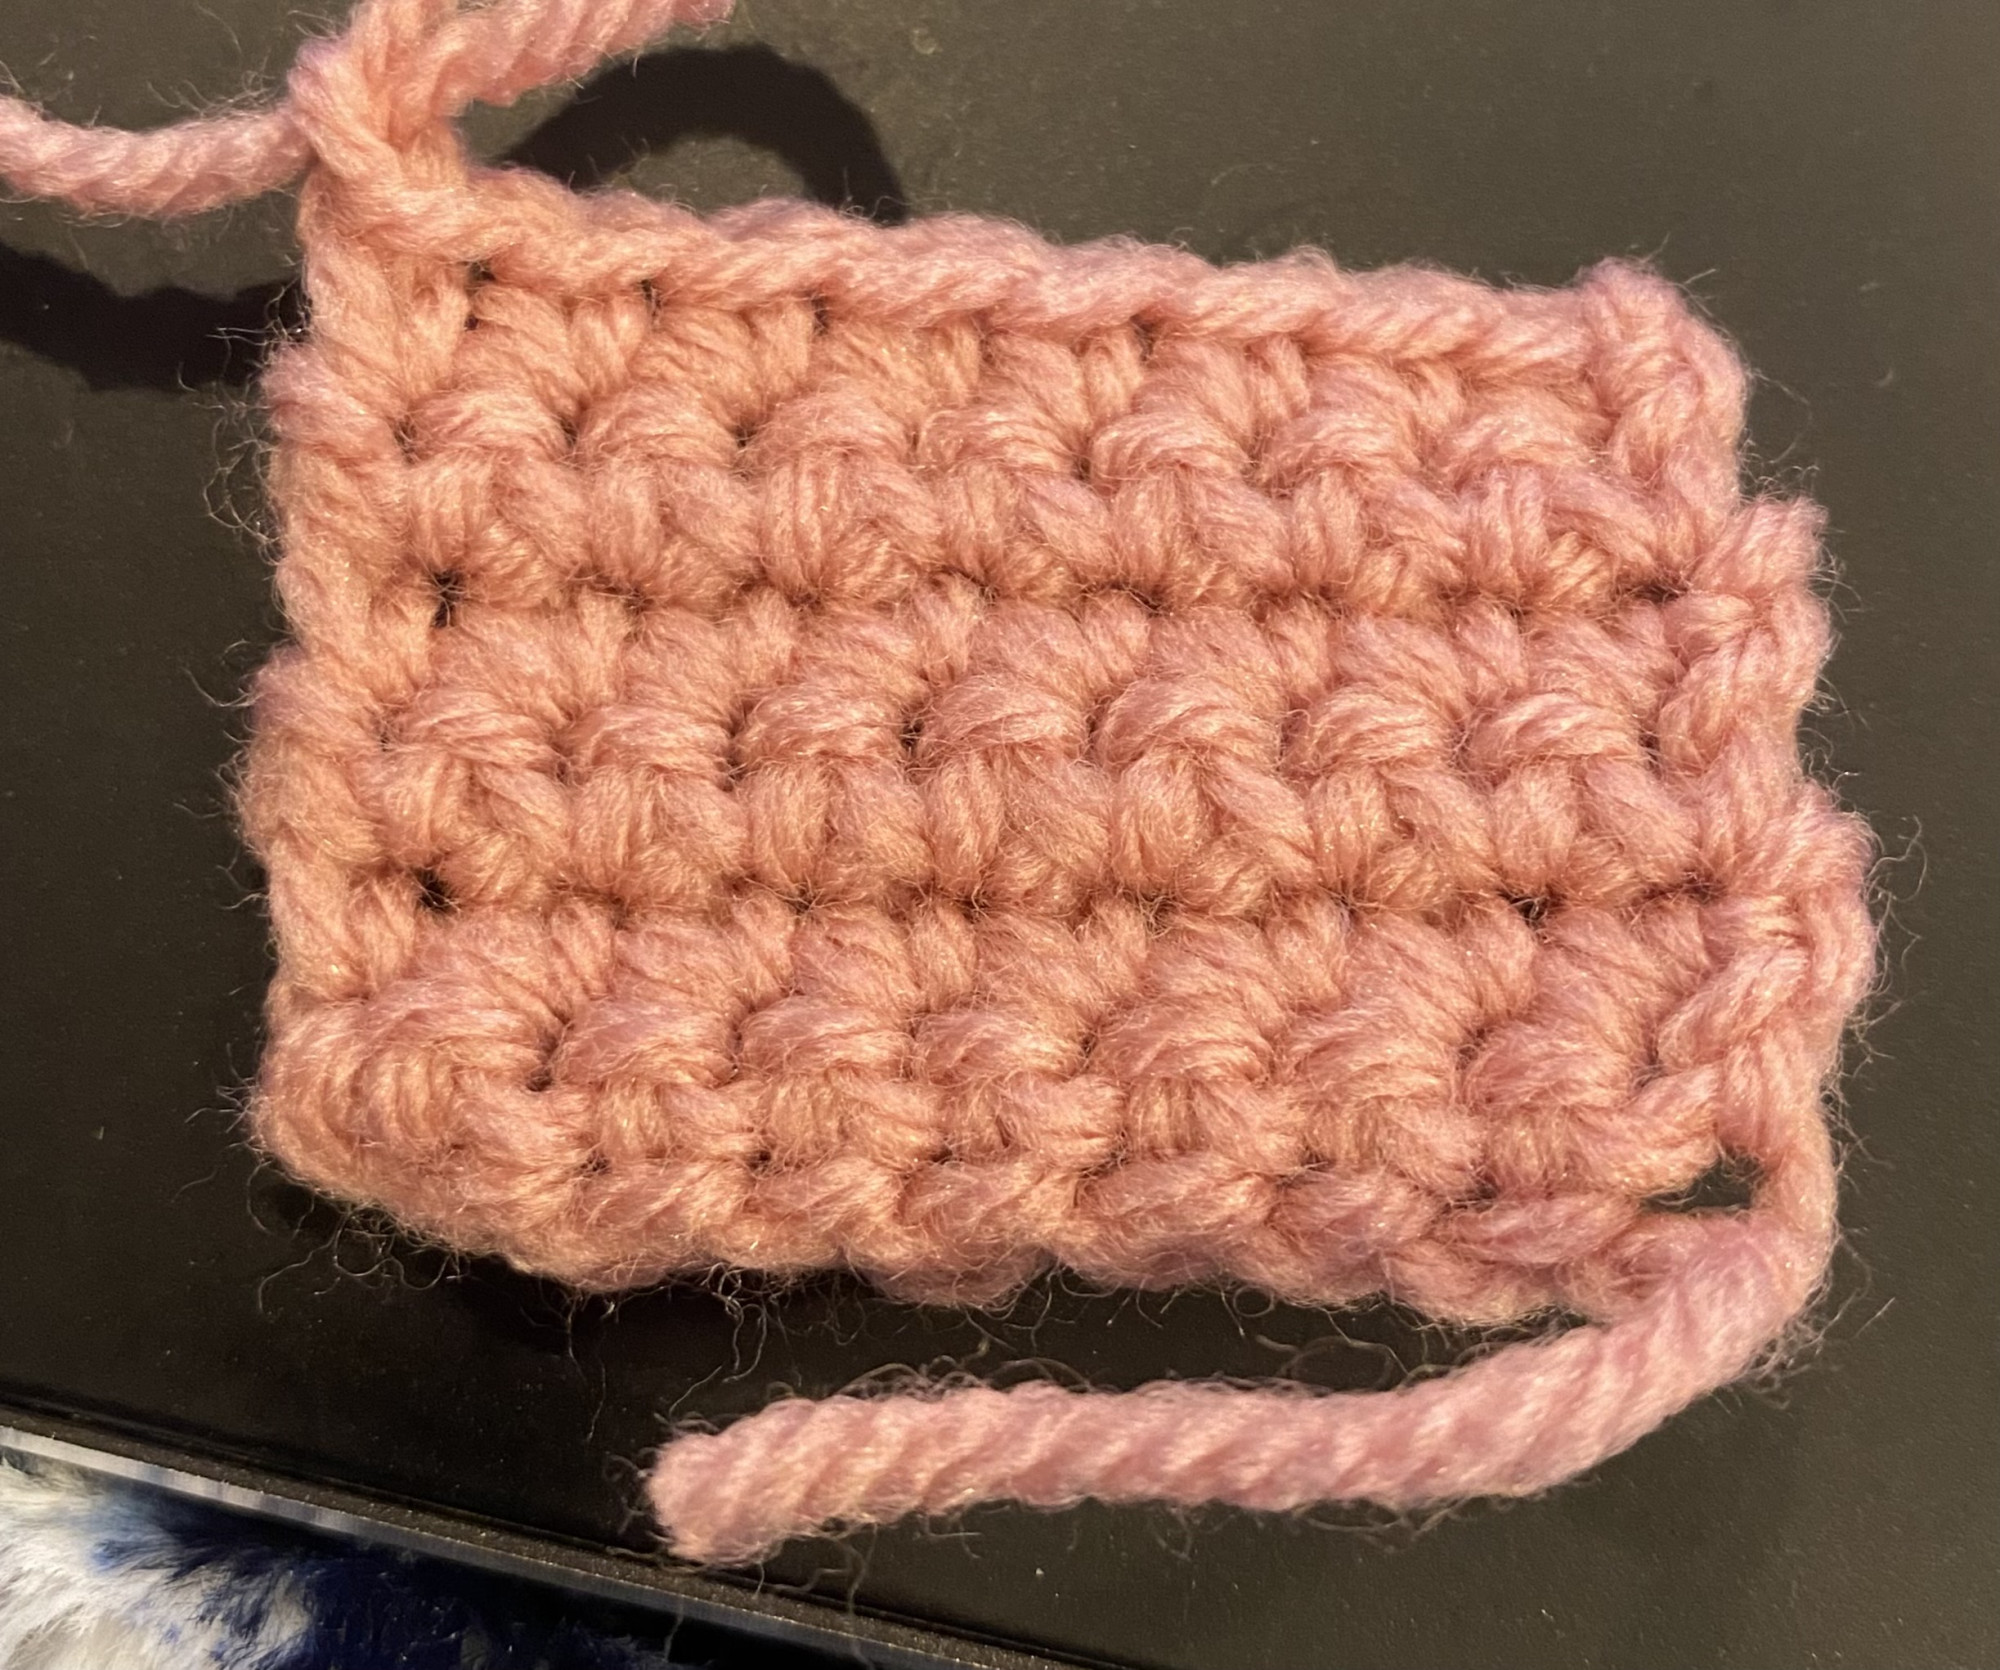
Are you ready to learn how to crochet and read crochet patterns? Well, you're in luck because that is exactly what we will be doing in the next few posts. Today we are focusing on STARTING your crochet projects.
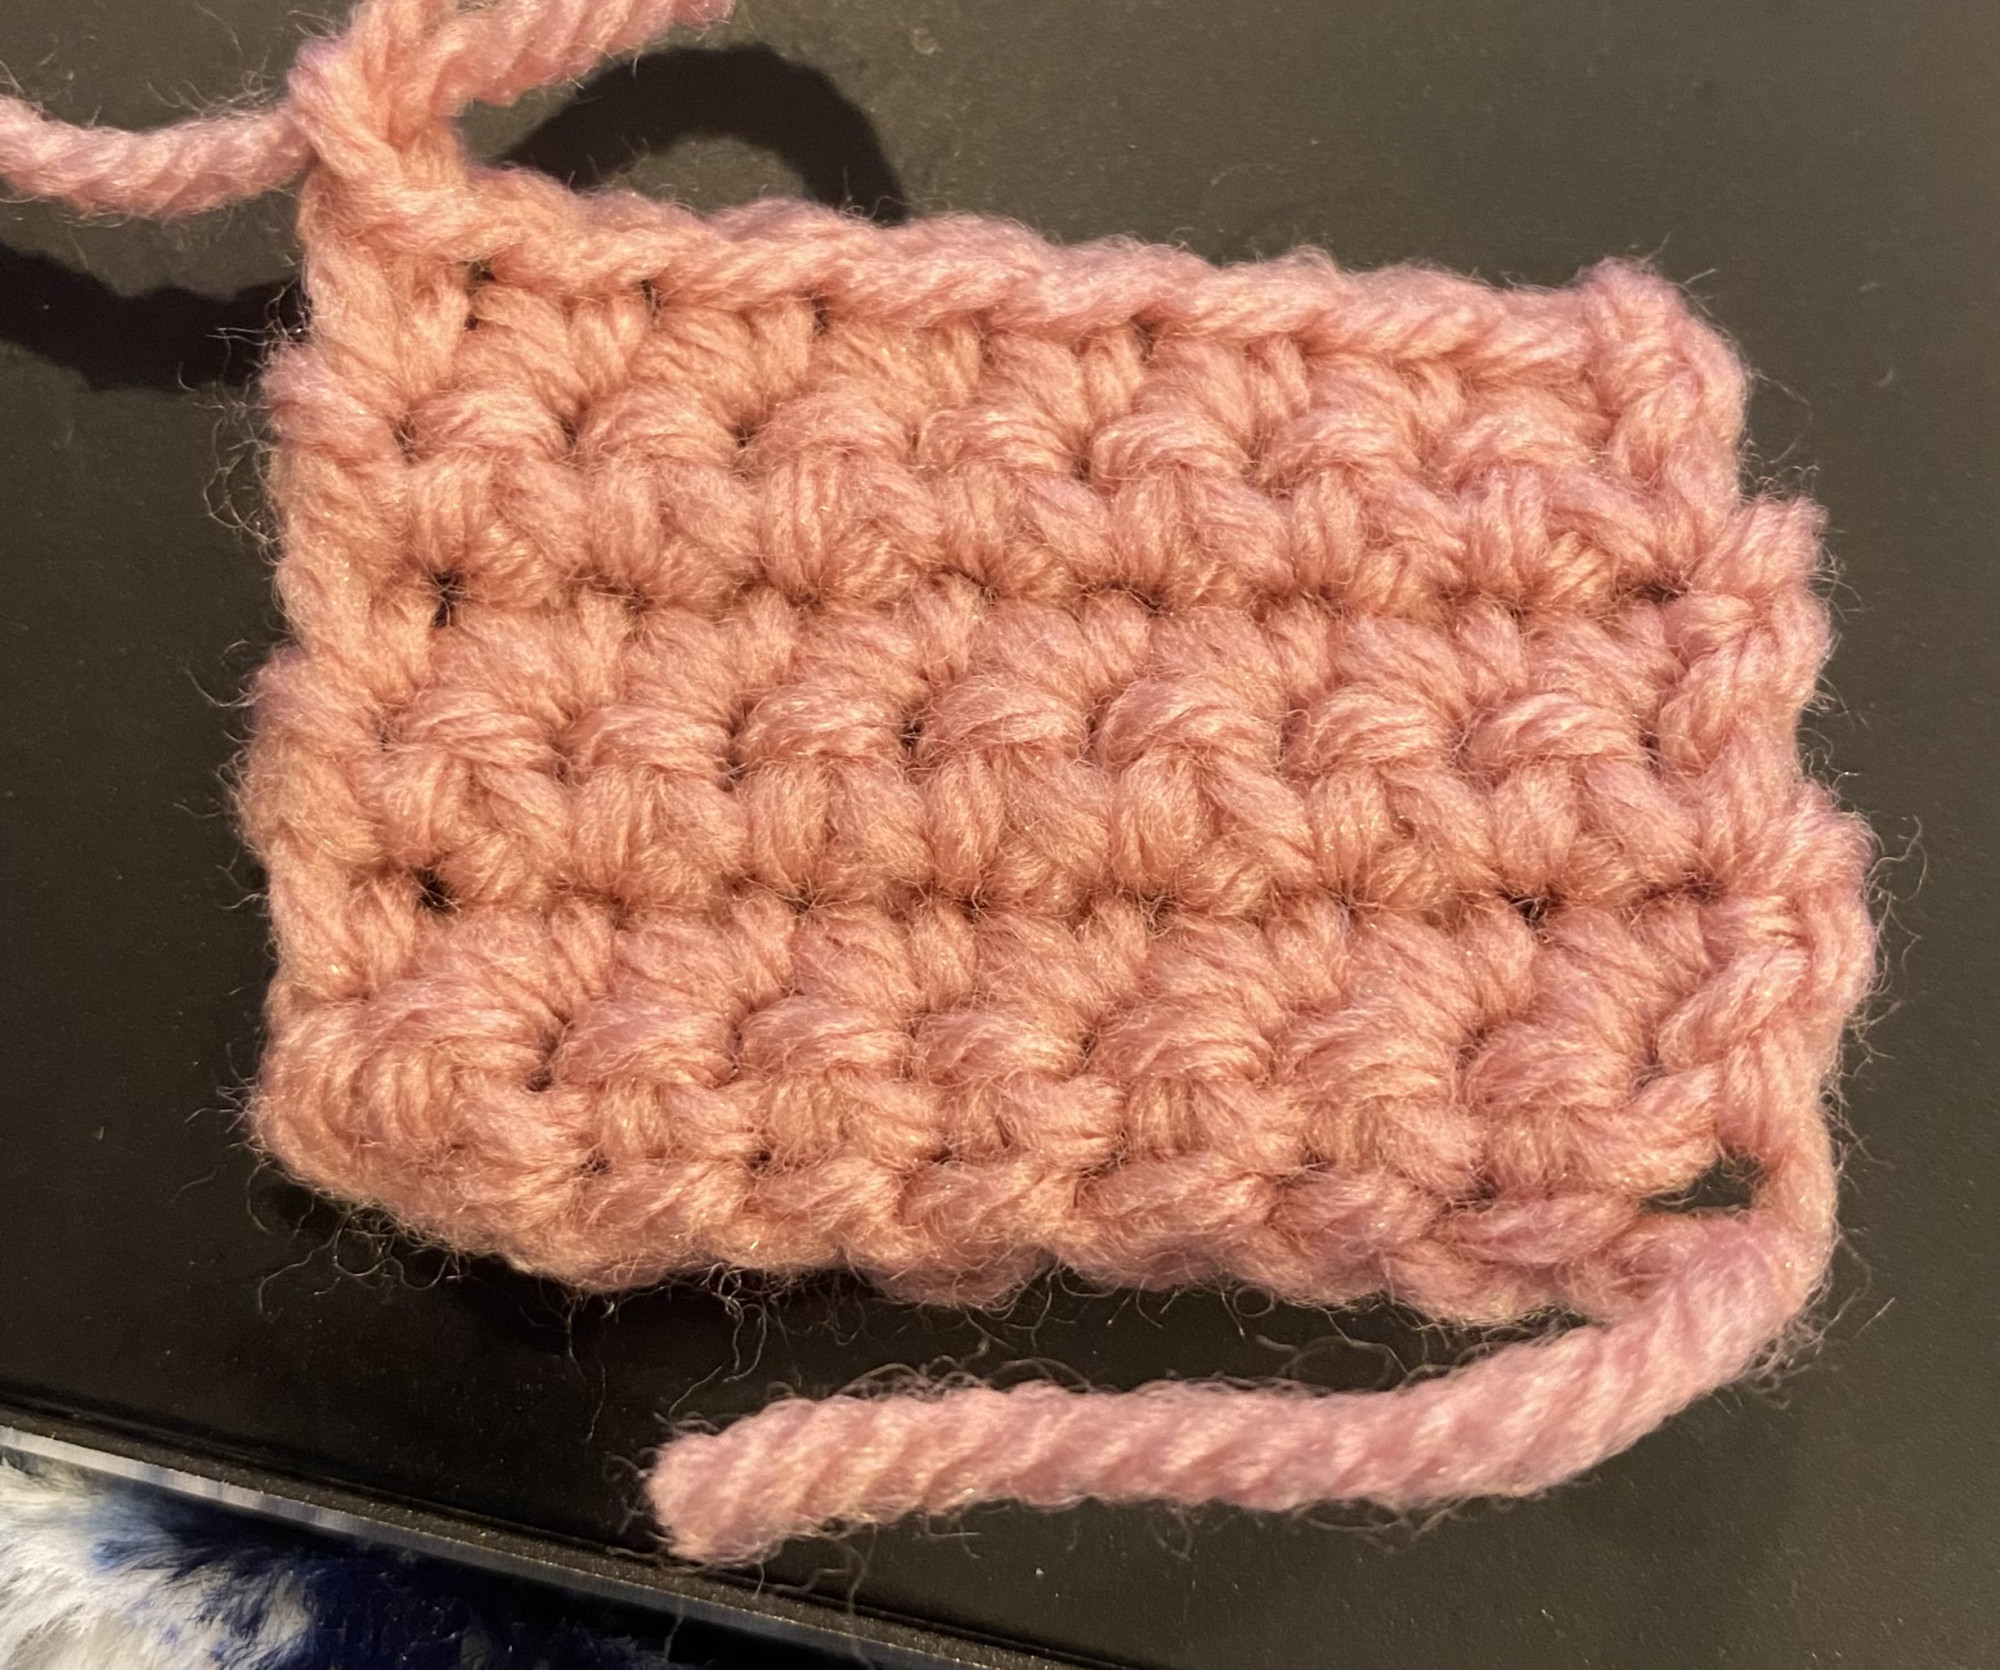
- Working in a line - Chain stitch. This creates a square or rectangle.
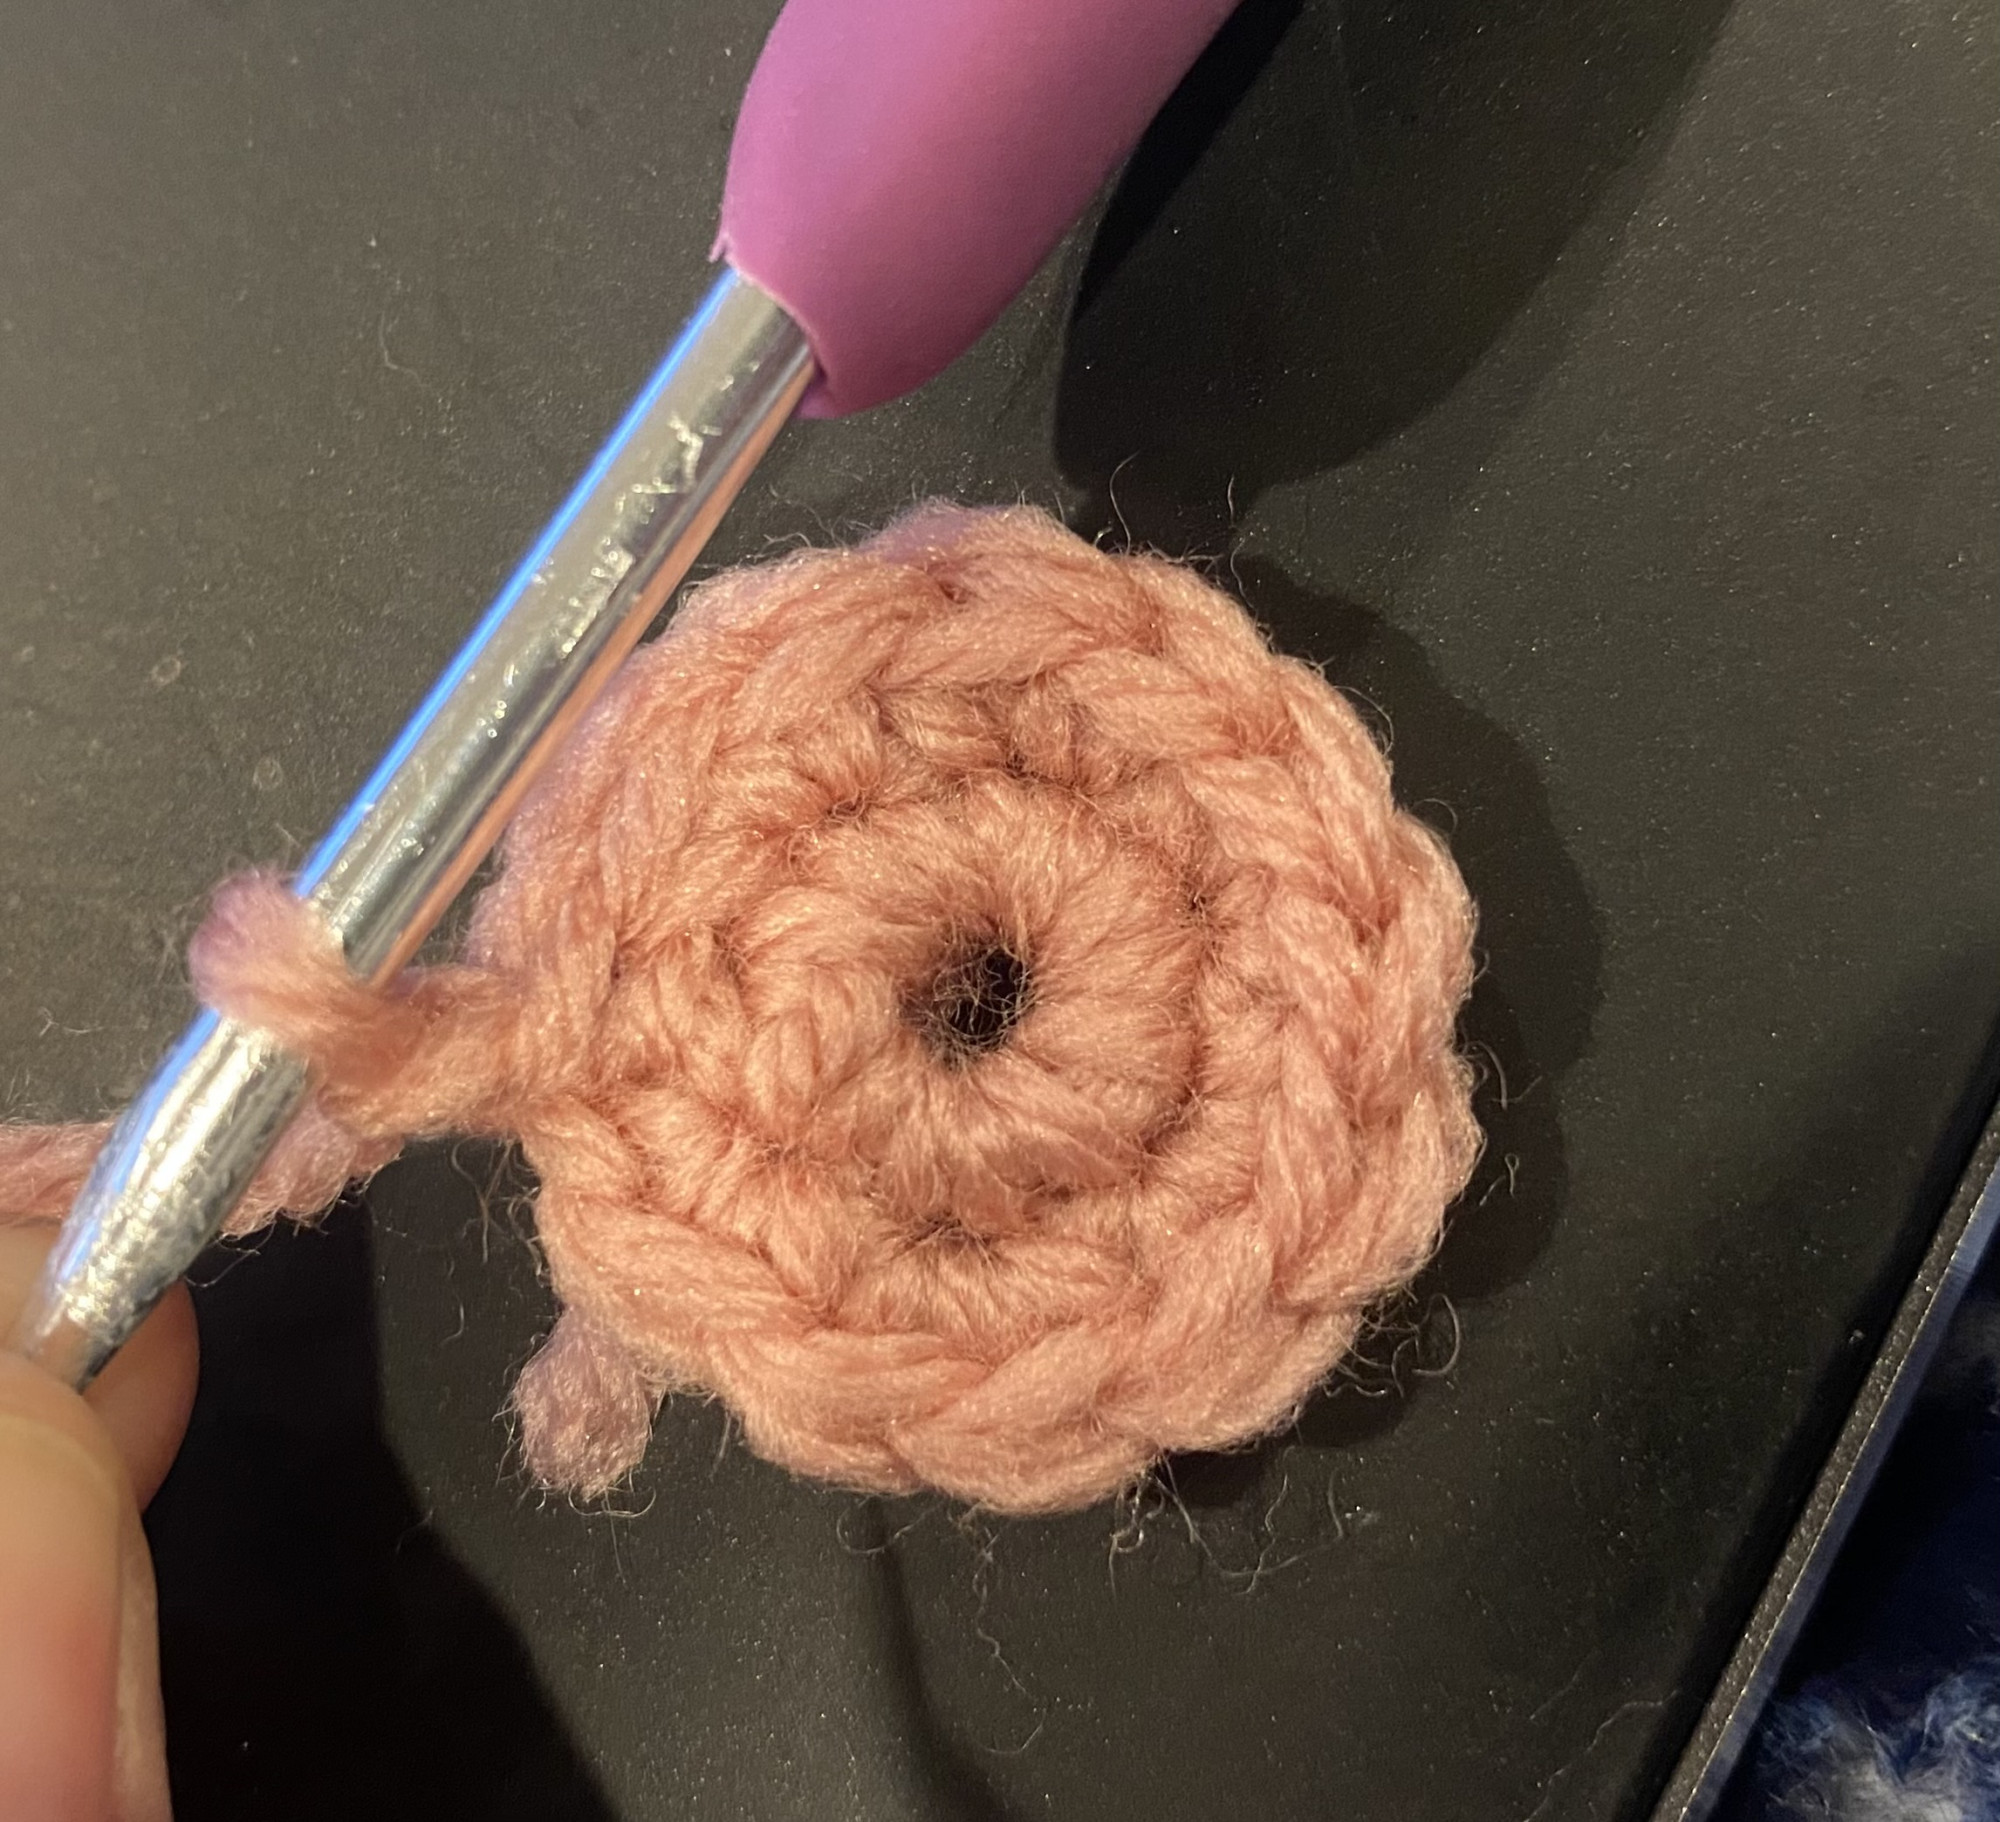
- Working in a circle - Chain stitch.
- Working in a circle - Magic circle
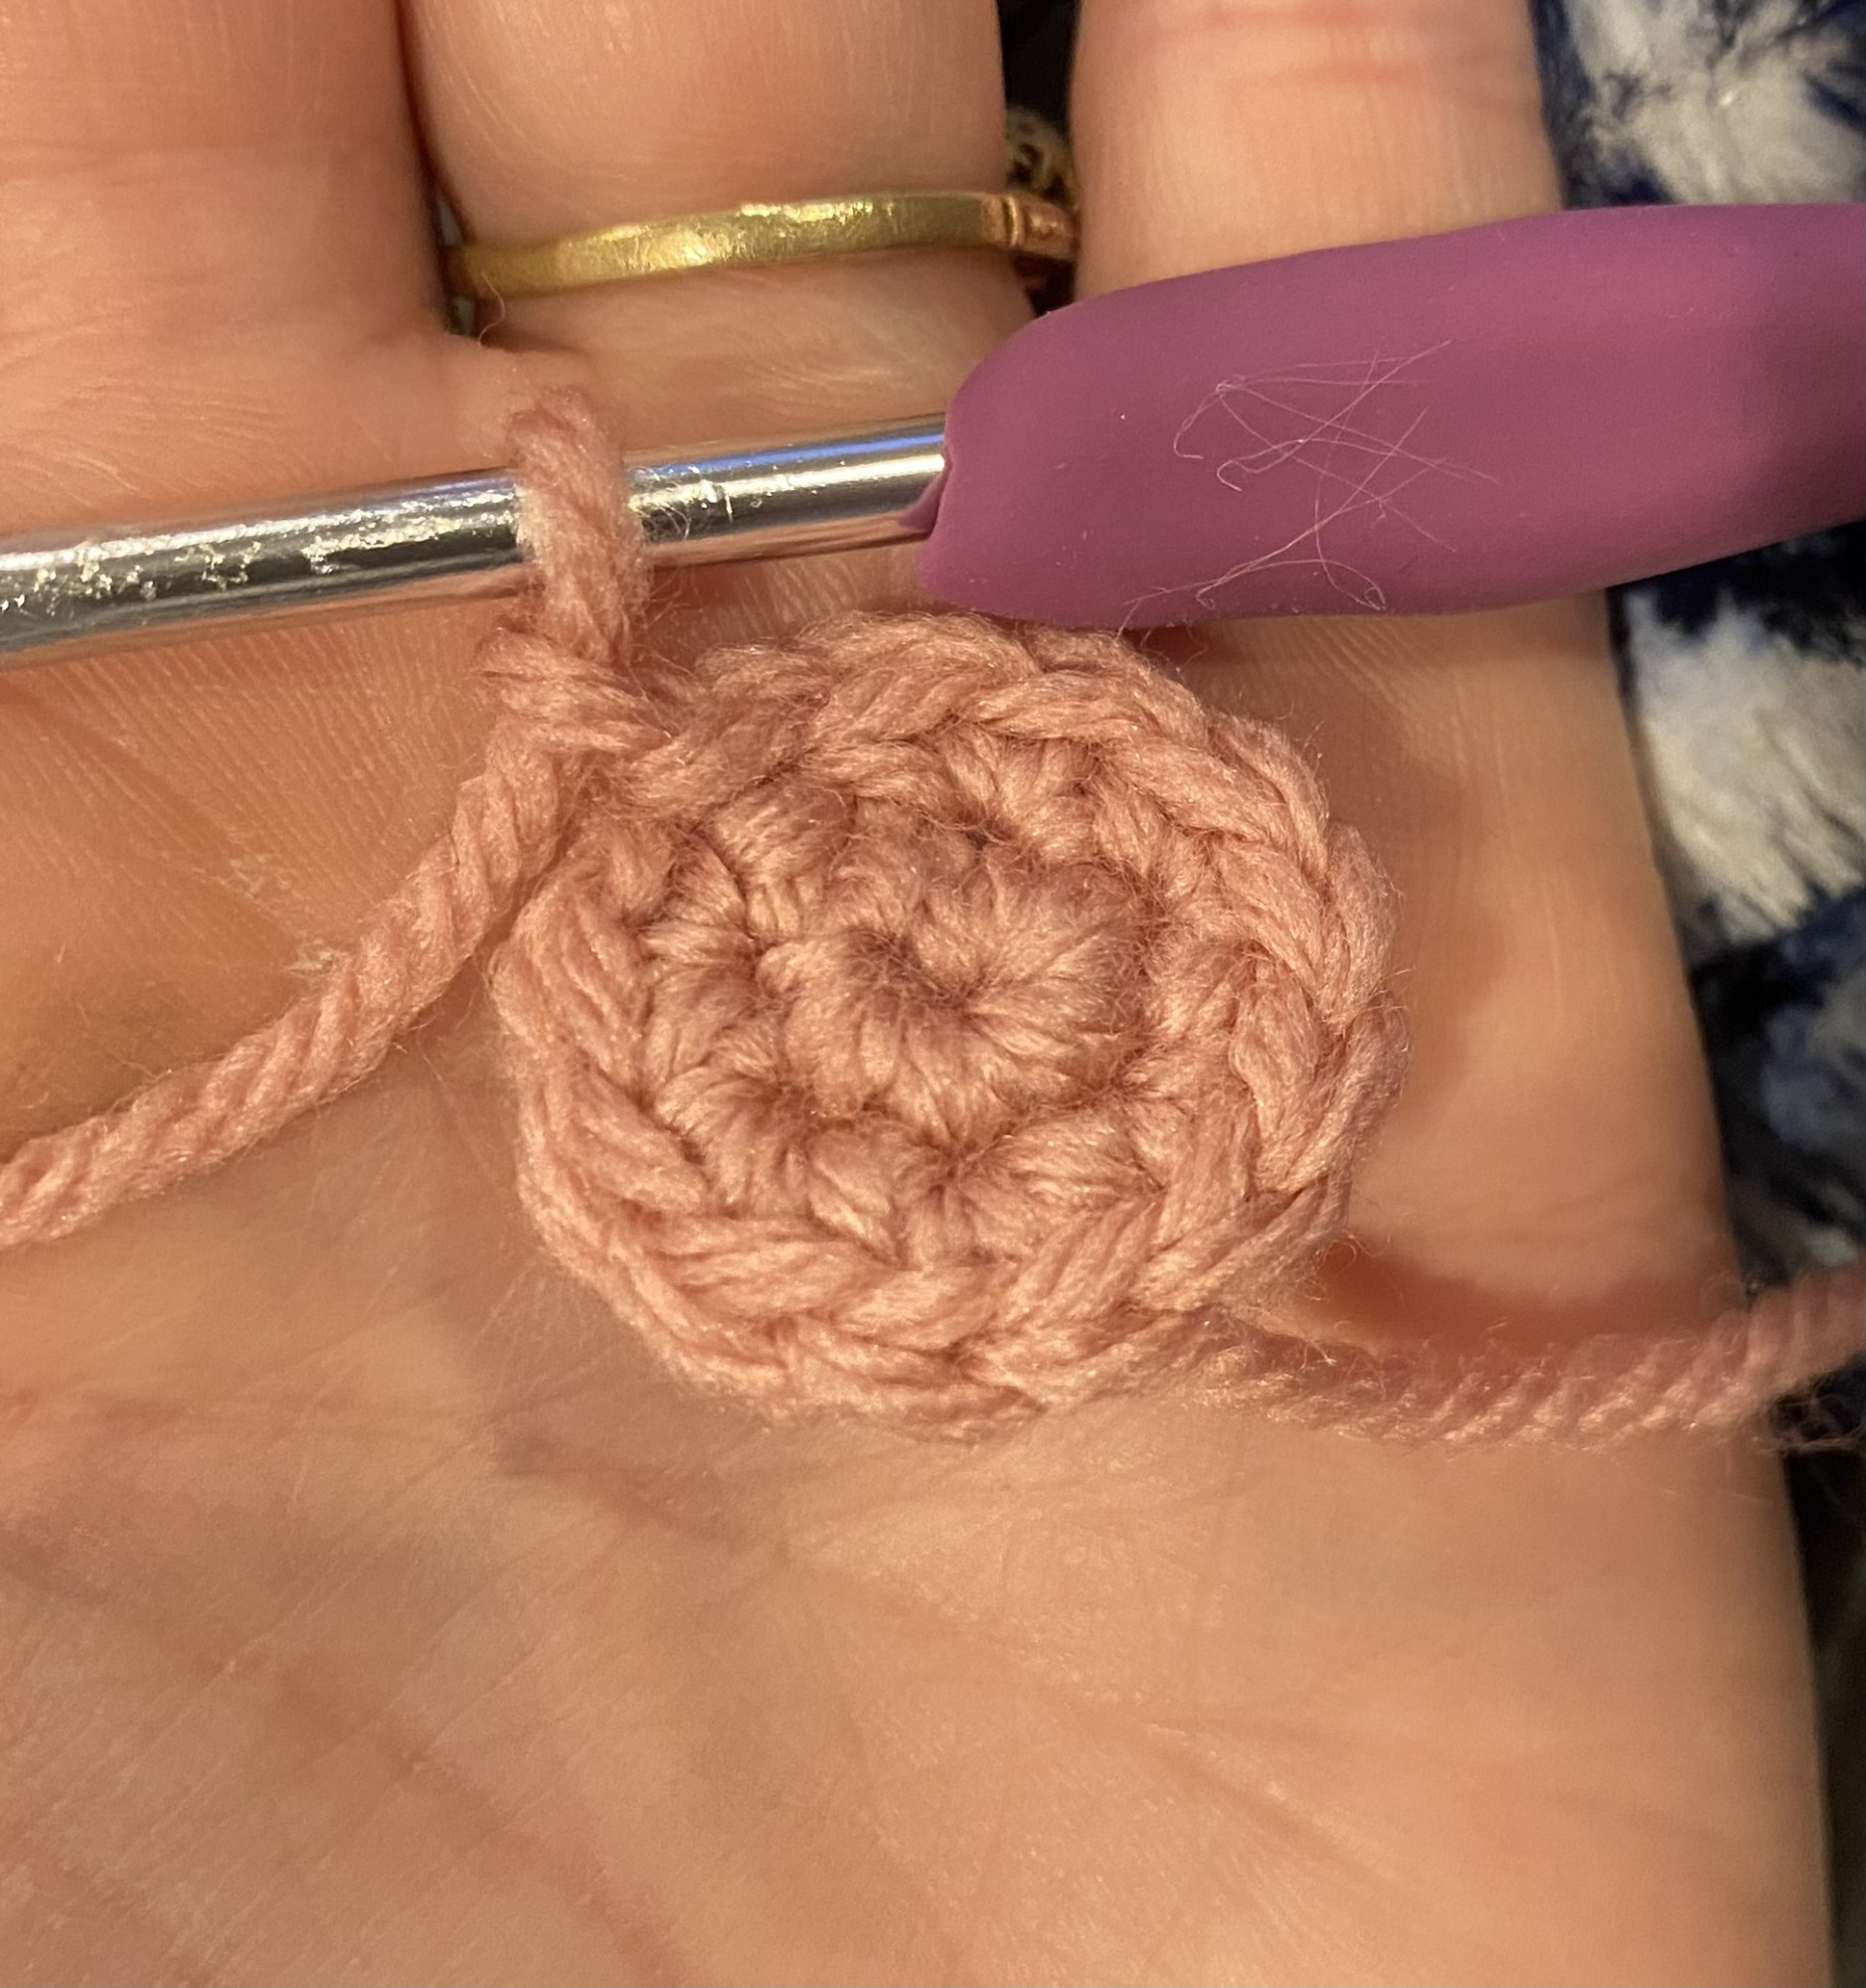
There are two basic shapes you can make with these stitches. If you start off with a long chain, you will end up making a rectangle. If you want to make a circle, you will either use the magic circle or make a small chain and then hook it to itself, making a tiny circle. If none of that makes sense, that's ok, let me explain each in more detail.
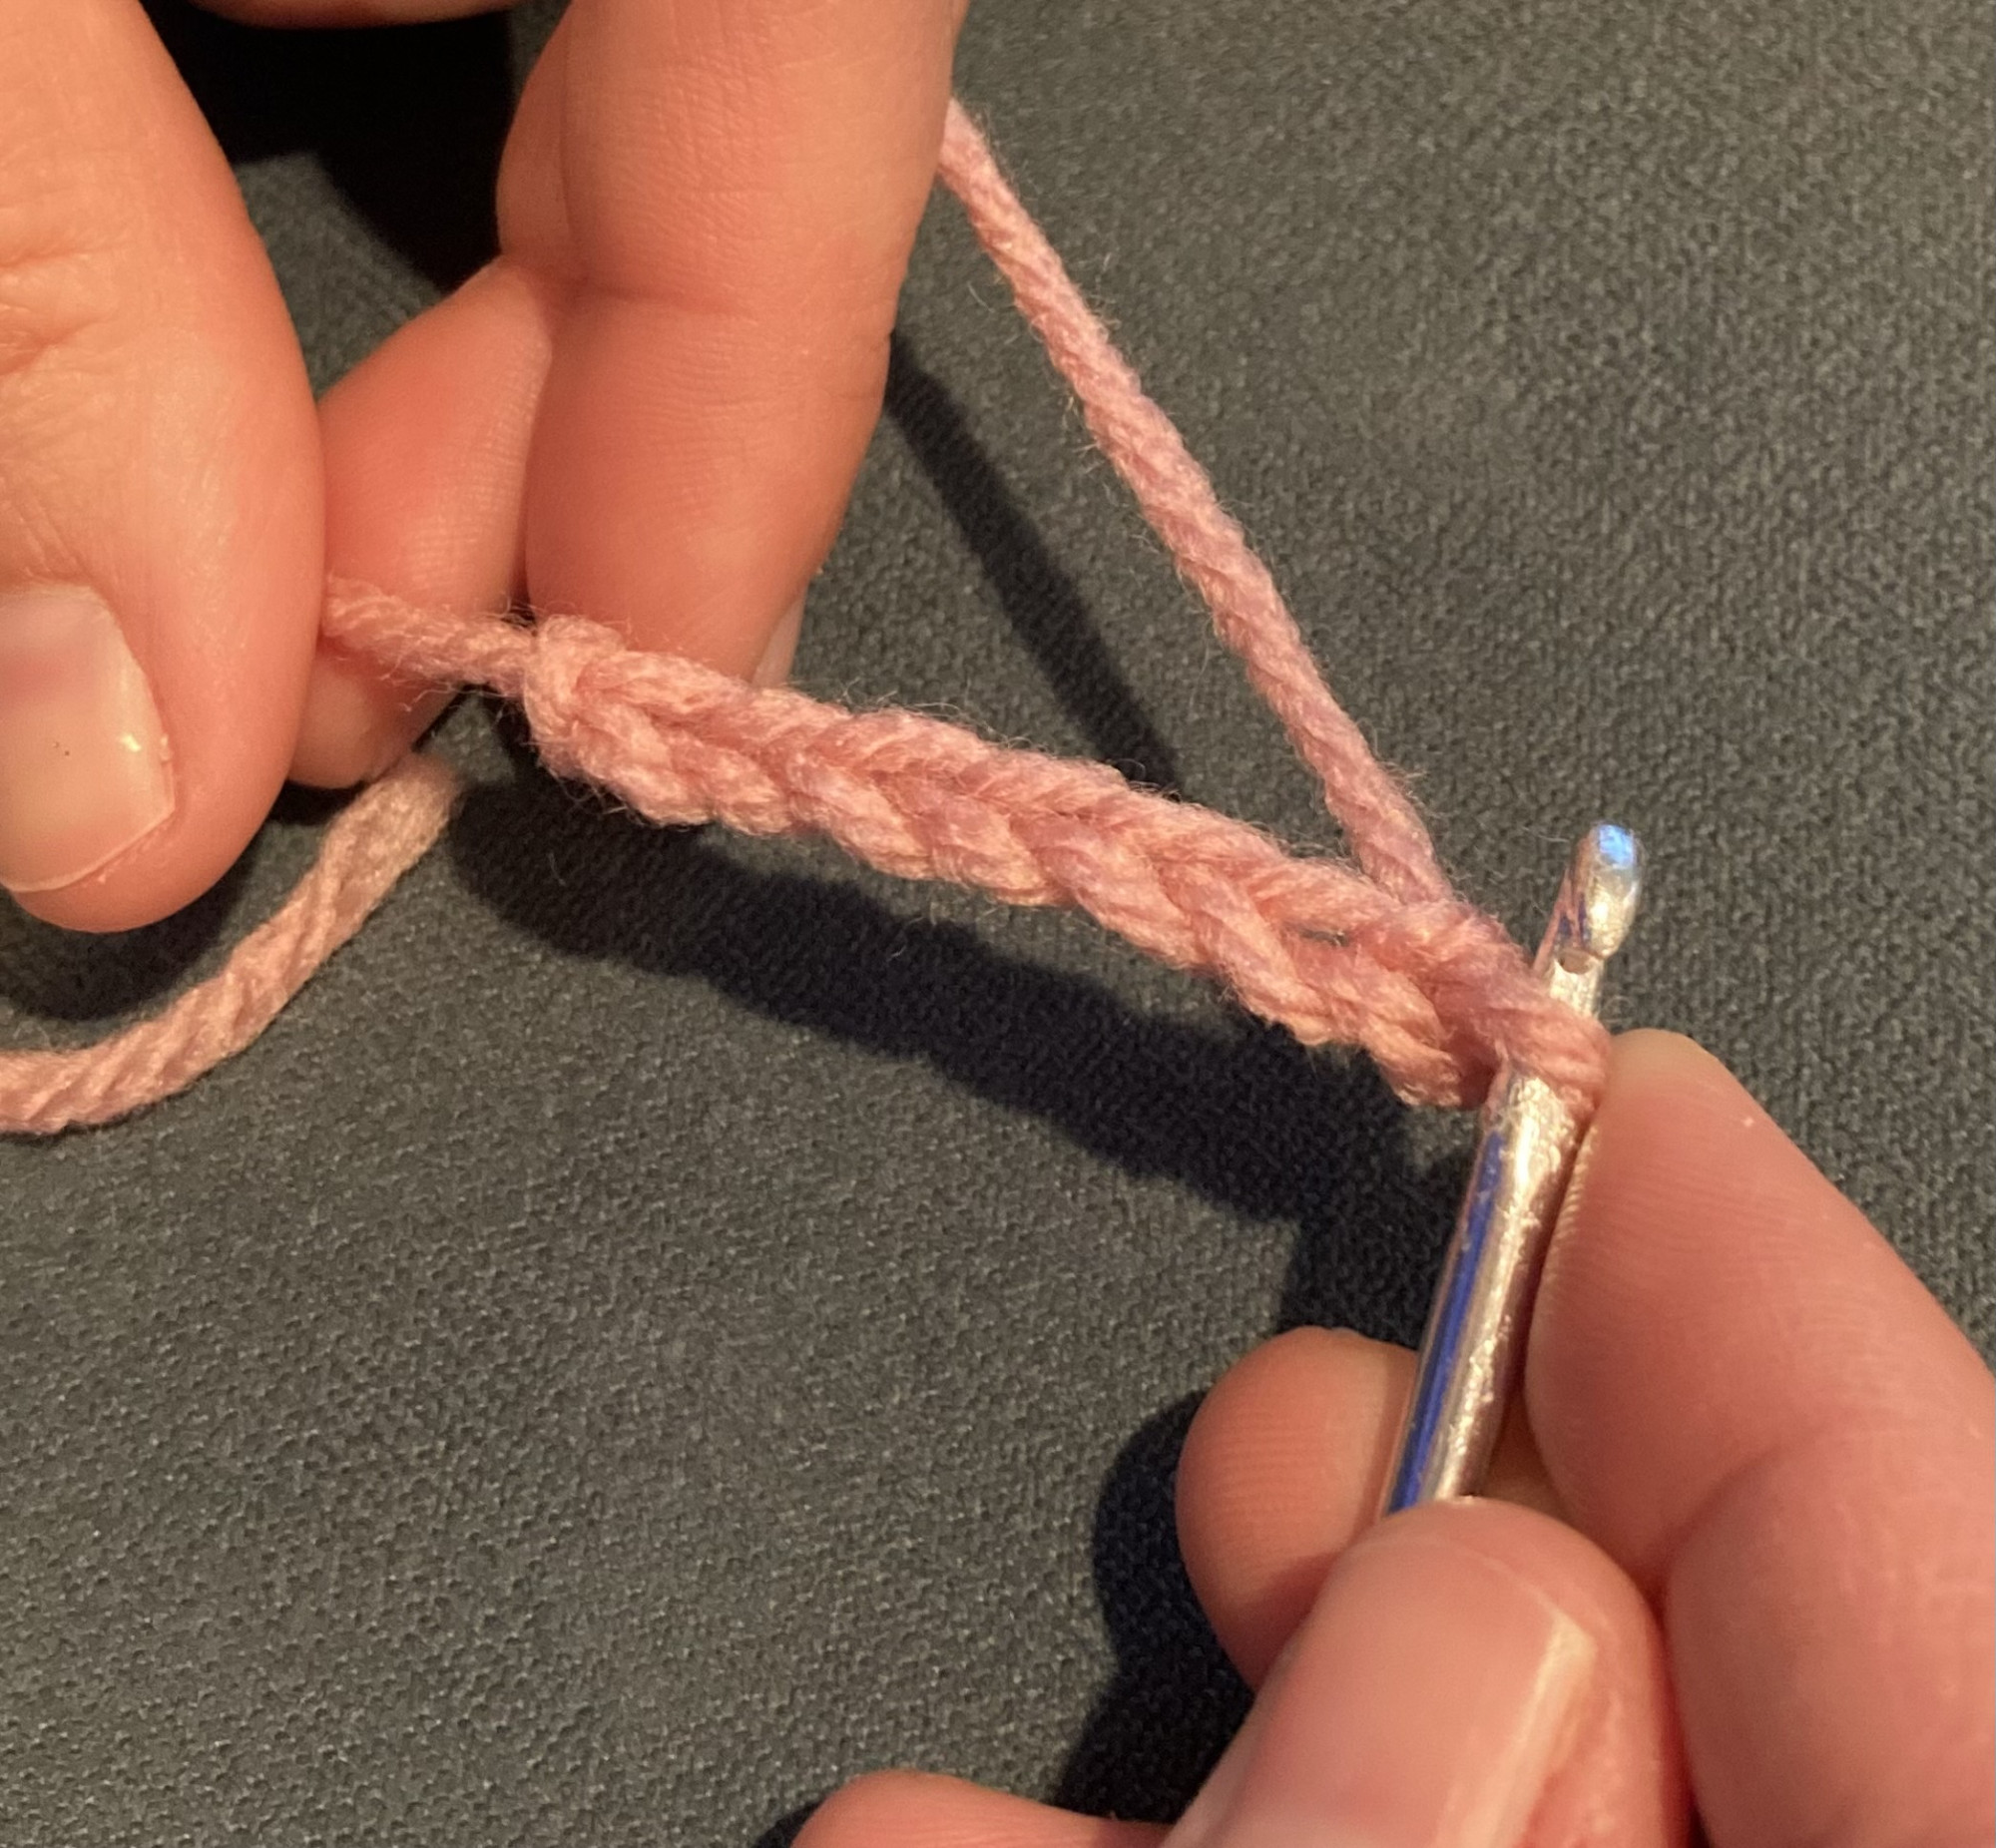
Chain Stitch-in a line
When looking at a pattern, this stitch is abbreviated to "ch" with a number after it. That number shows how many "chains" you will make in your chain.
To make these chains, you will 1. create a pretzel shape with the yarn on your finger, as you can see in the picture.
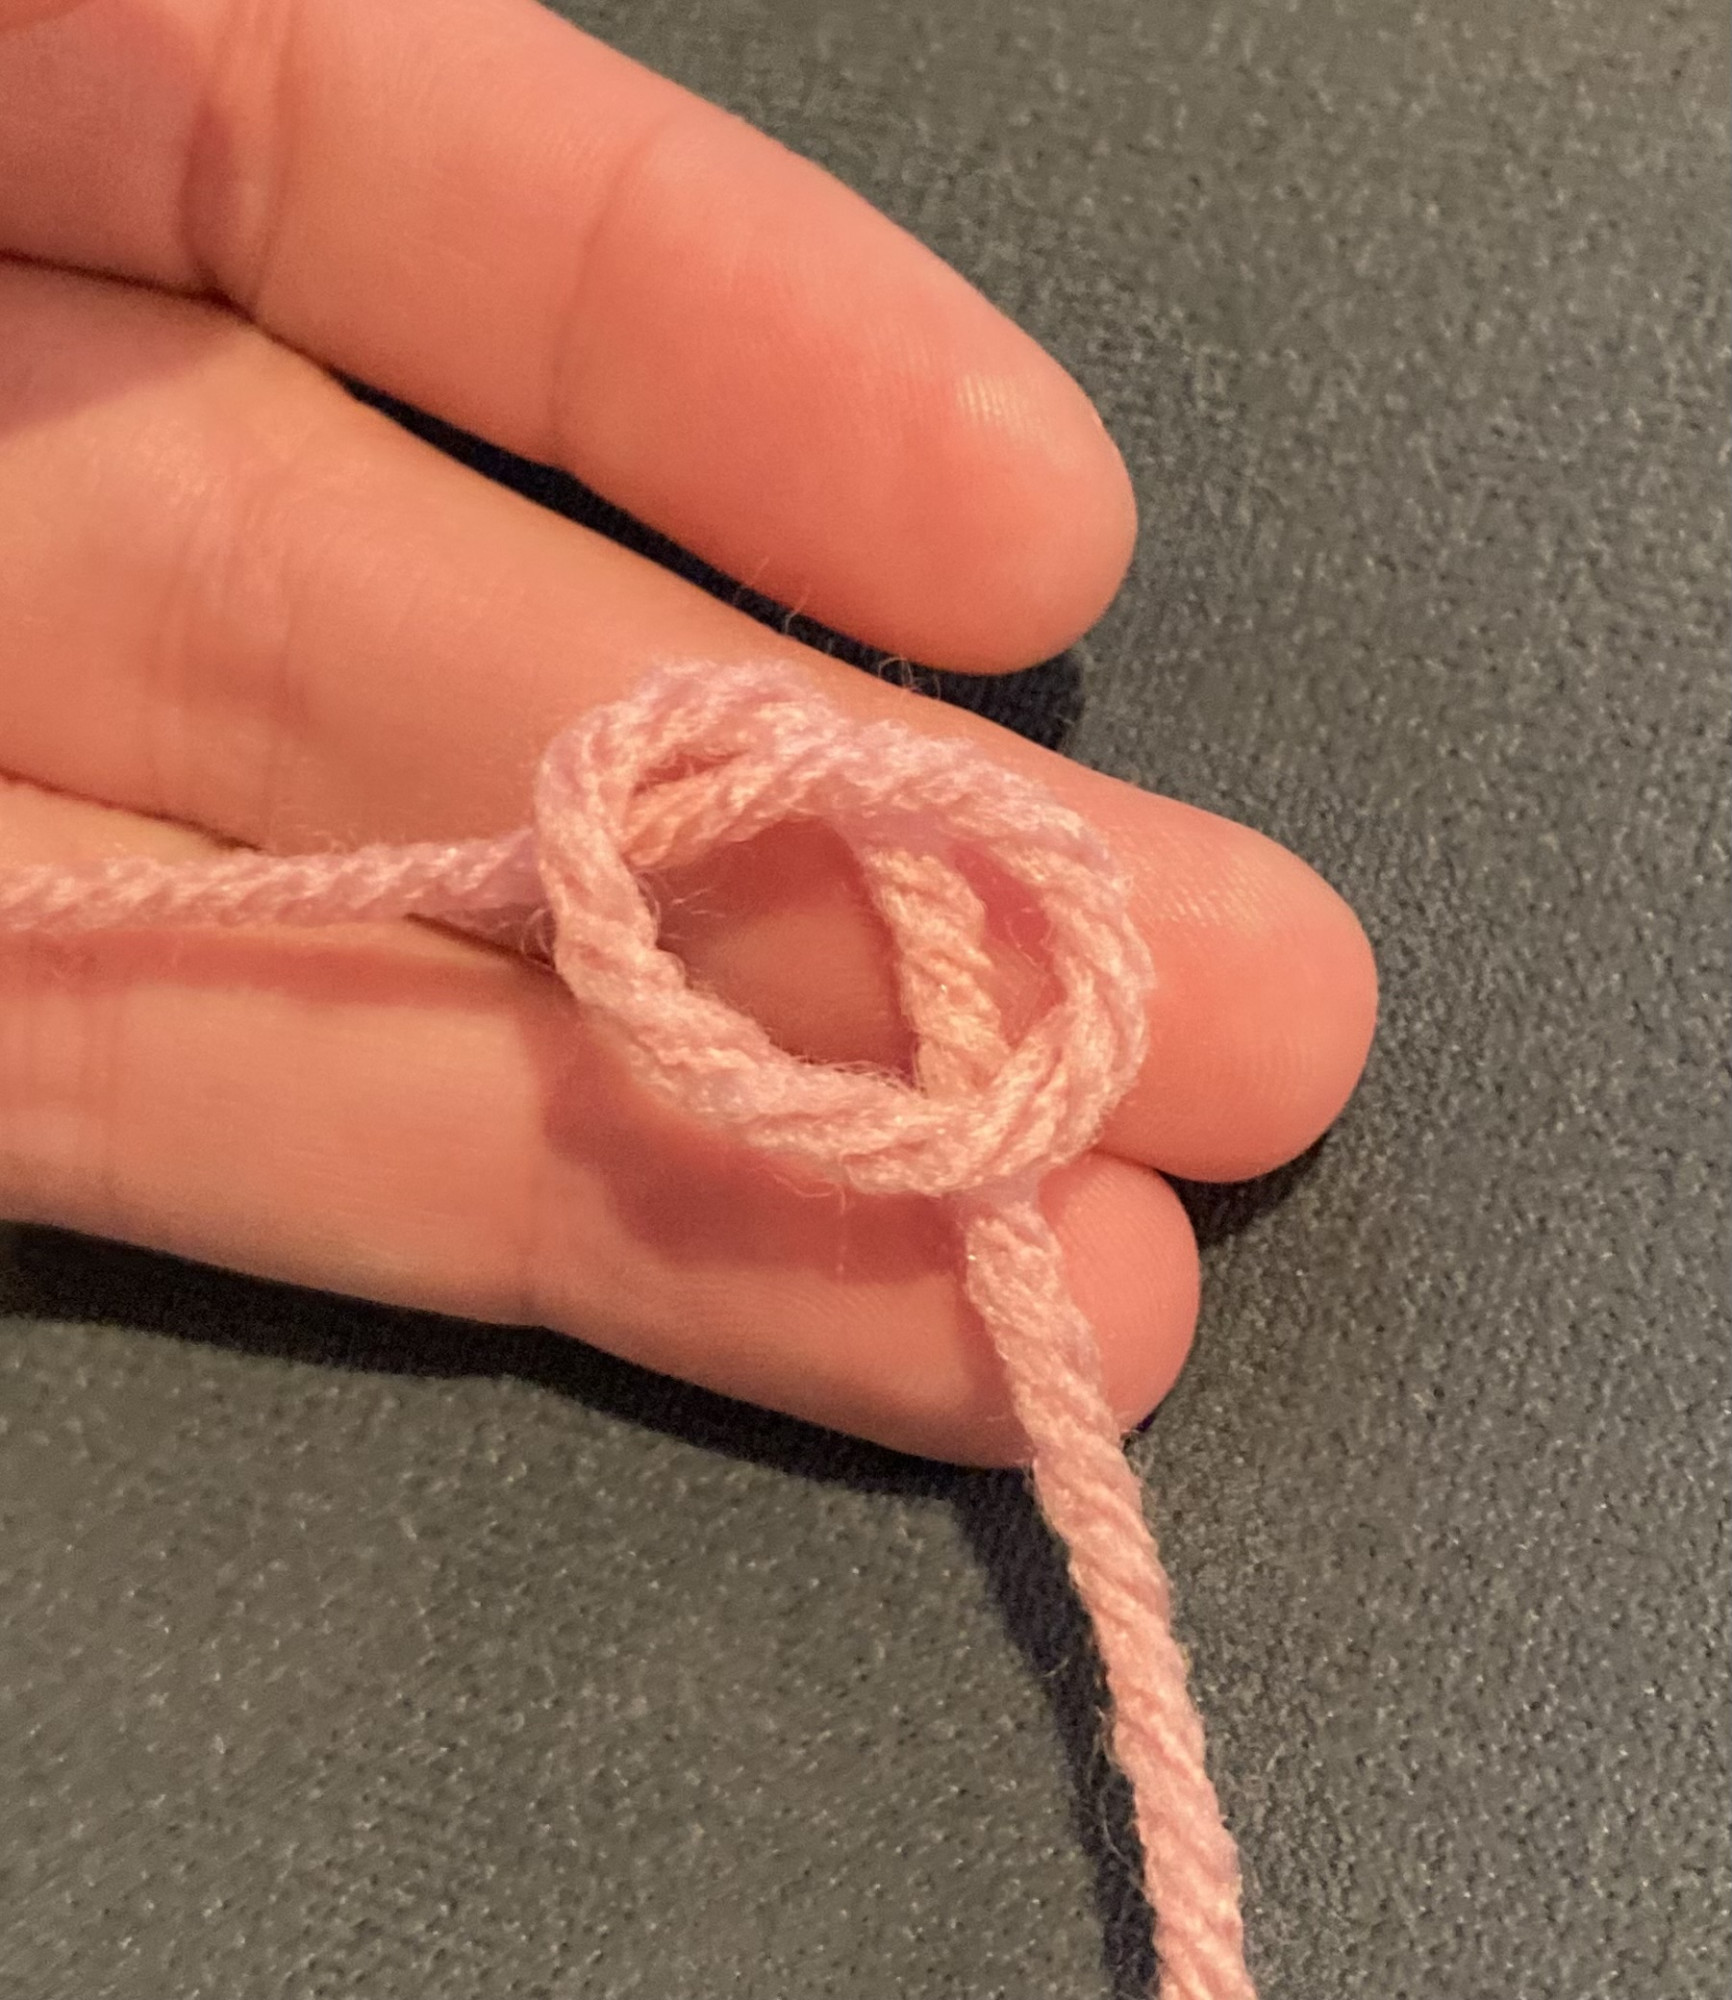
2. Use the hook to pull up a loop from the middle of the pretzel.
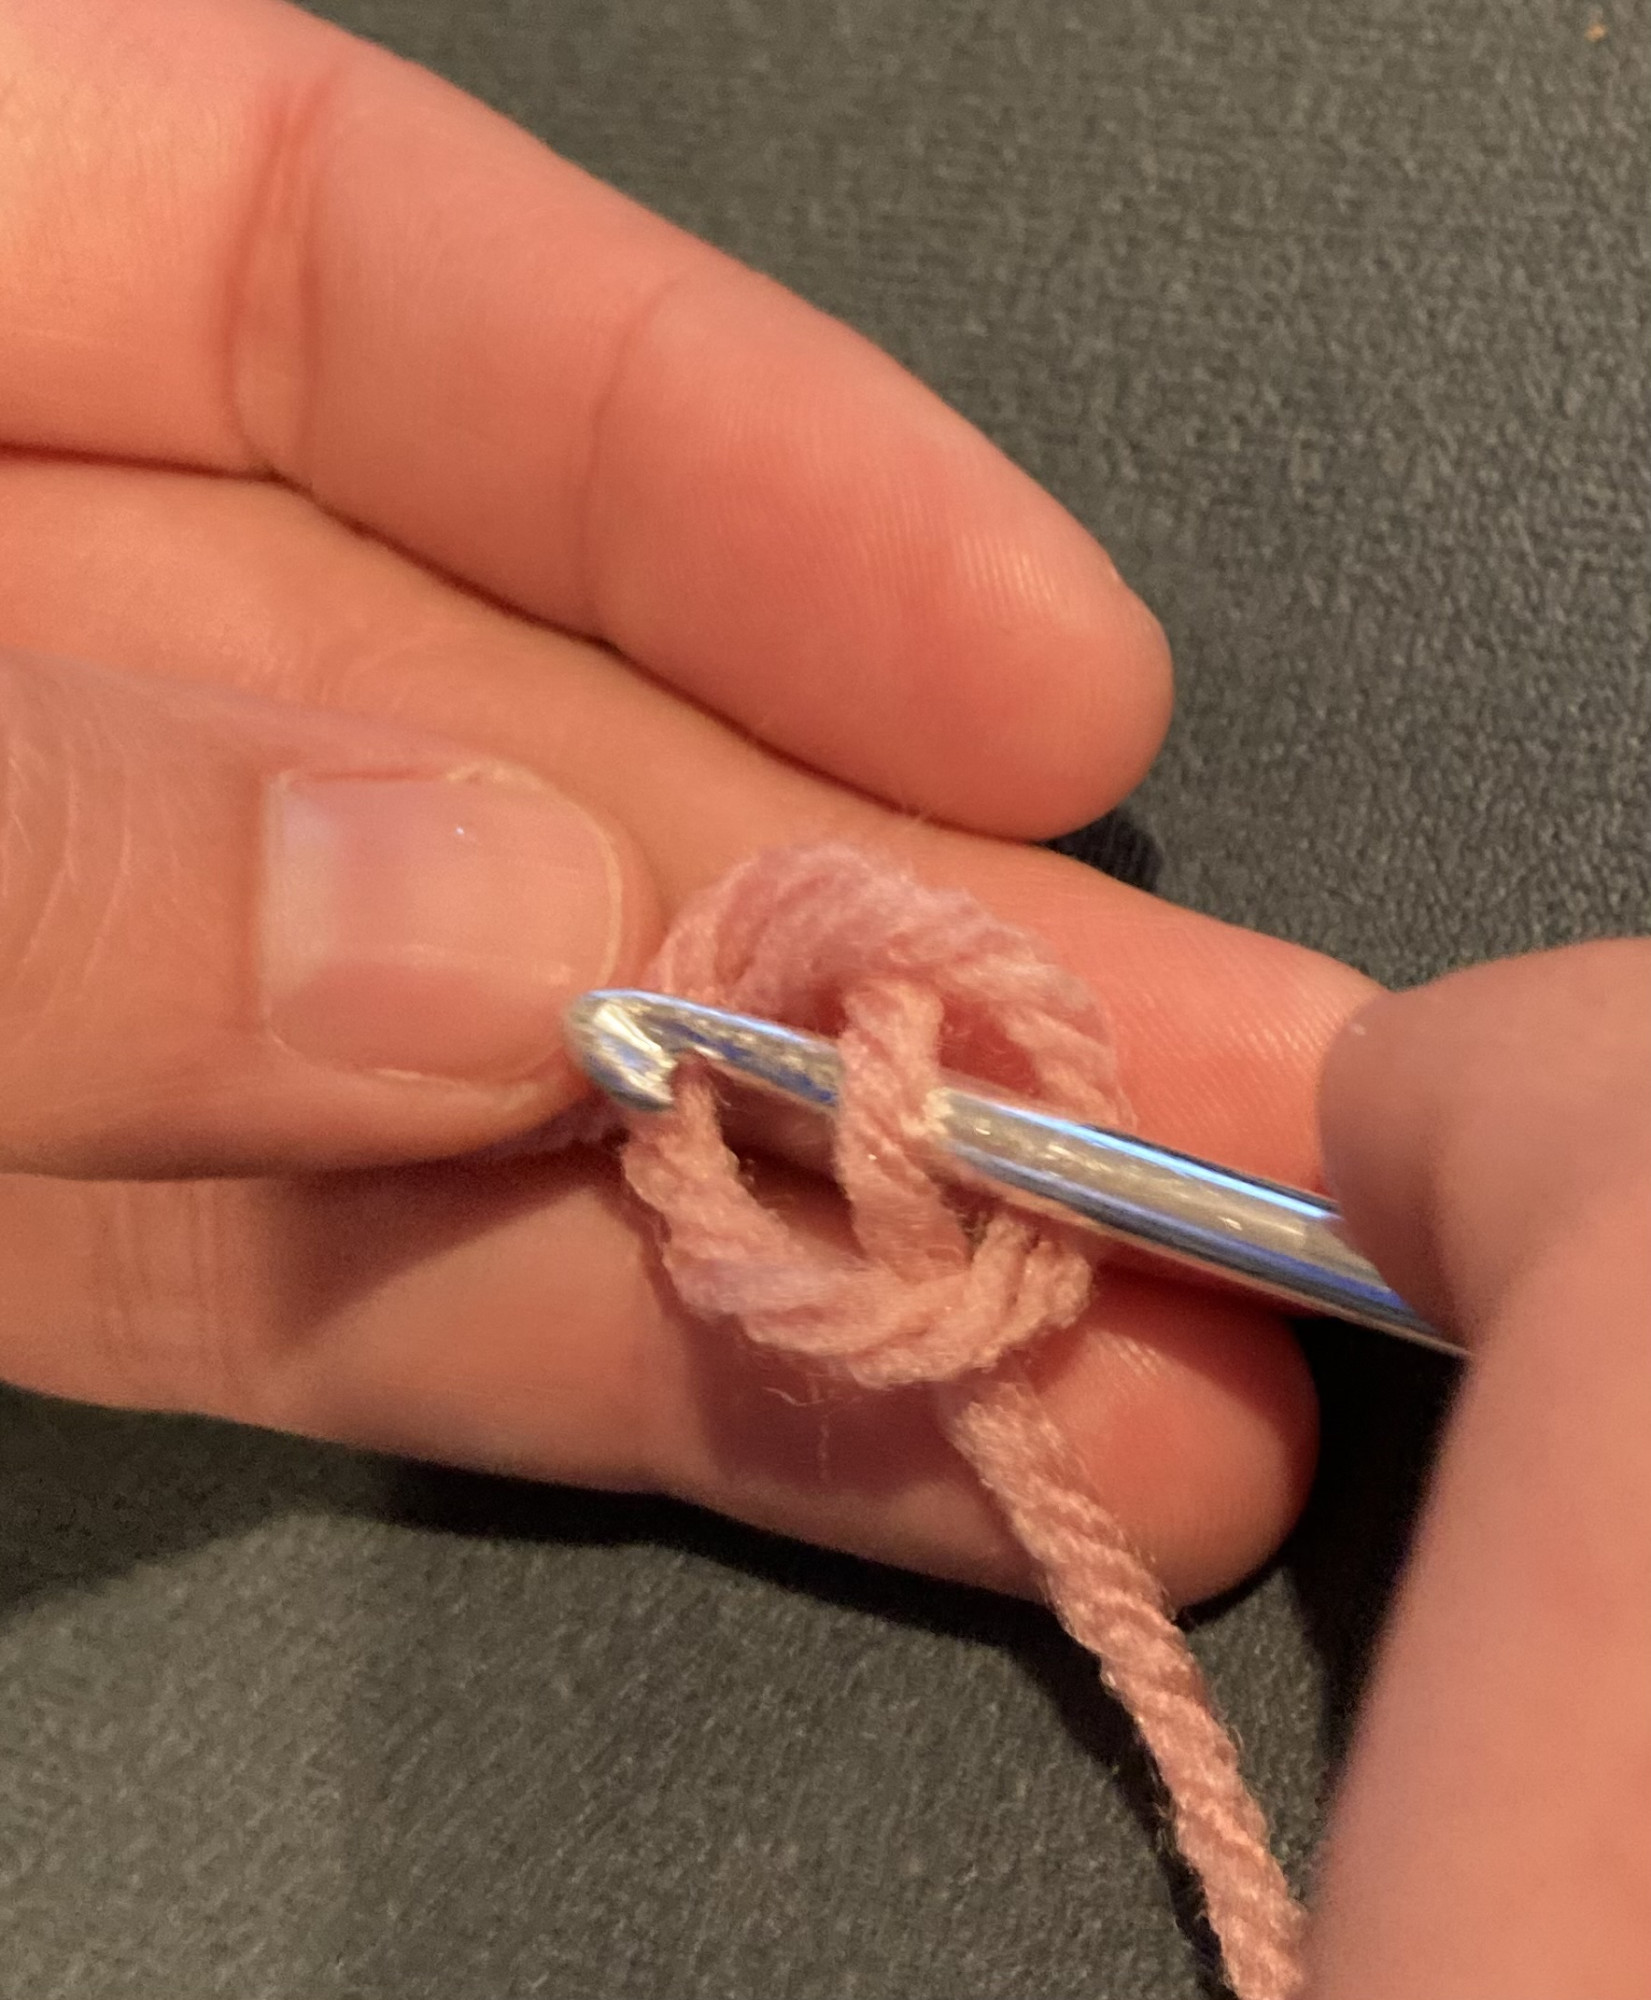
3. Wrap the yarn around the hook and pull it through the loop.
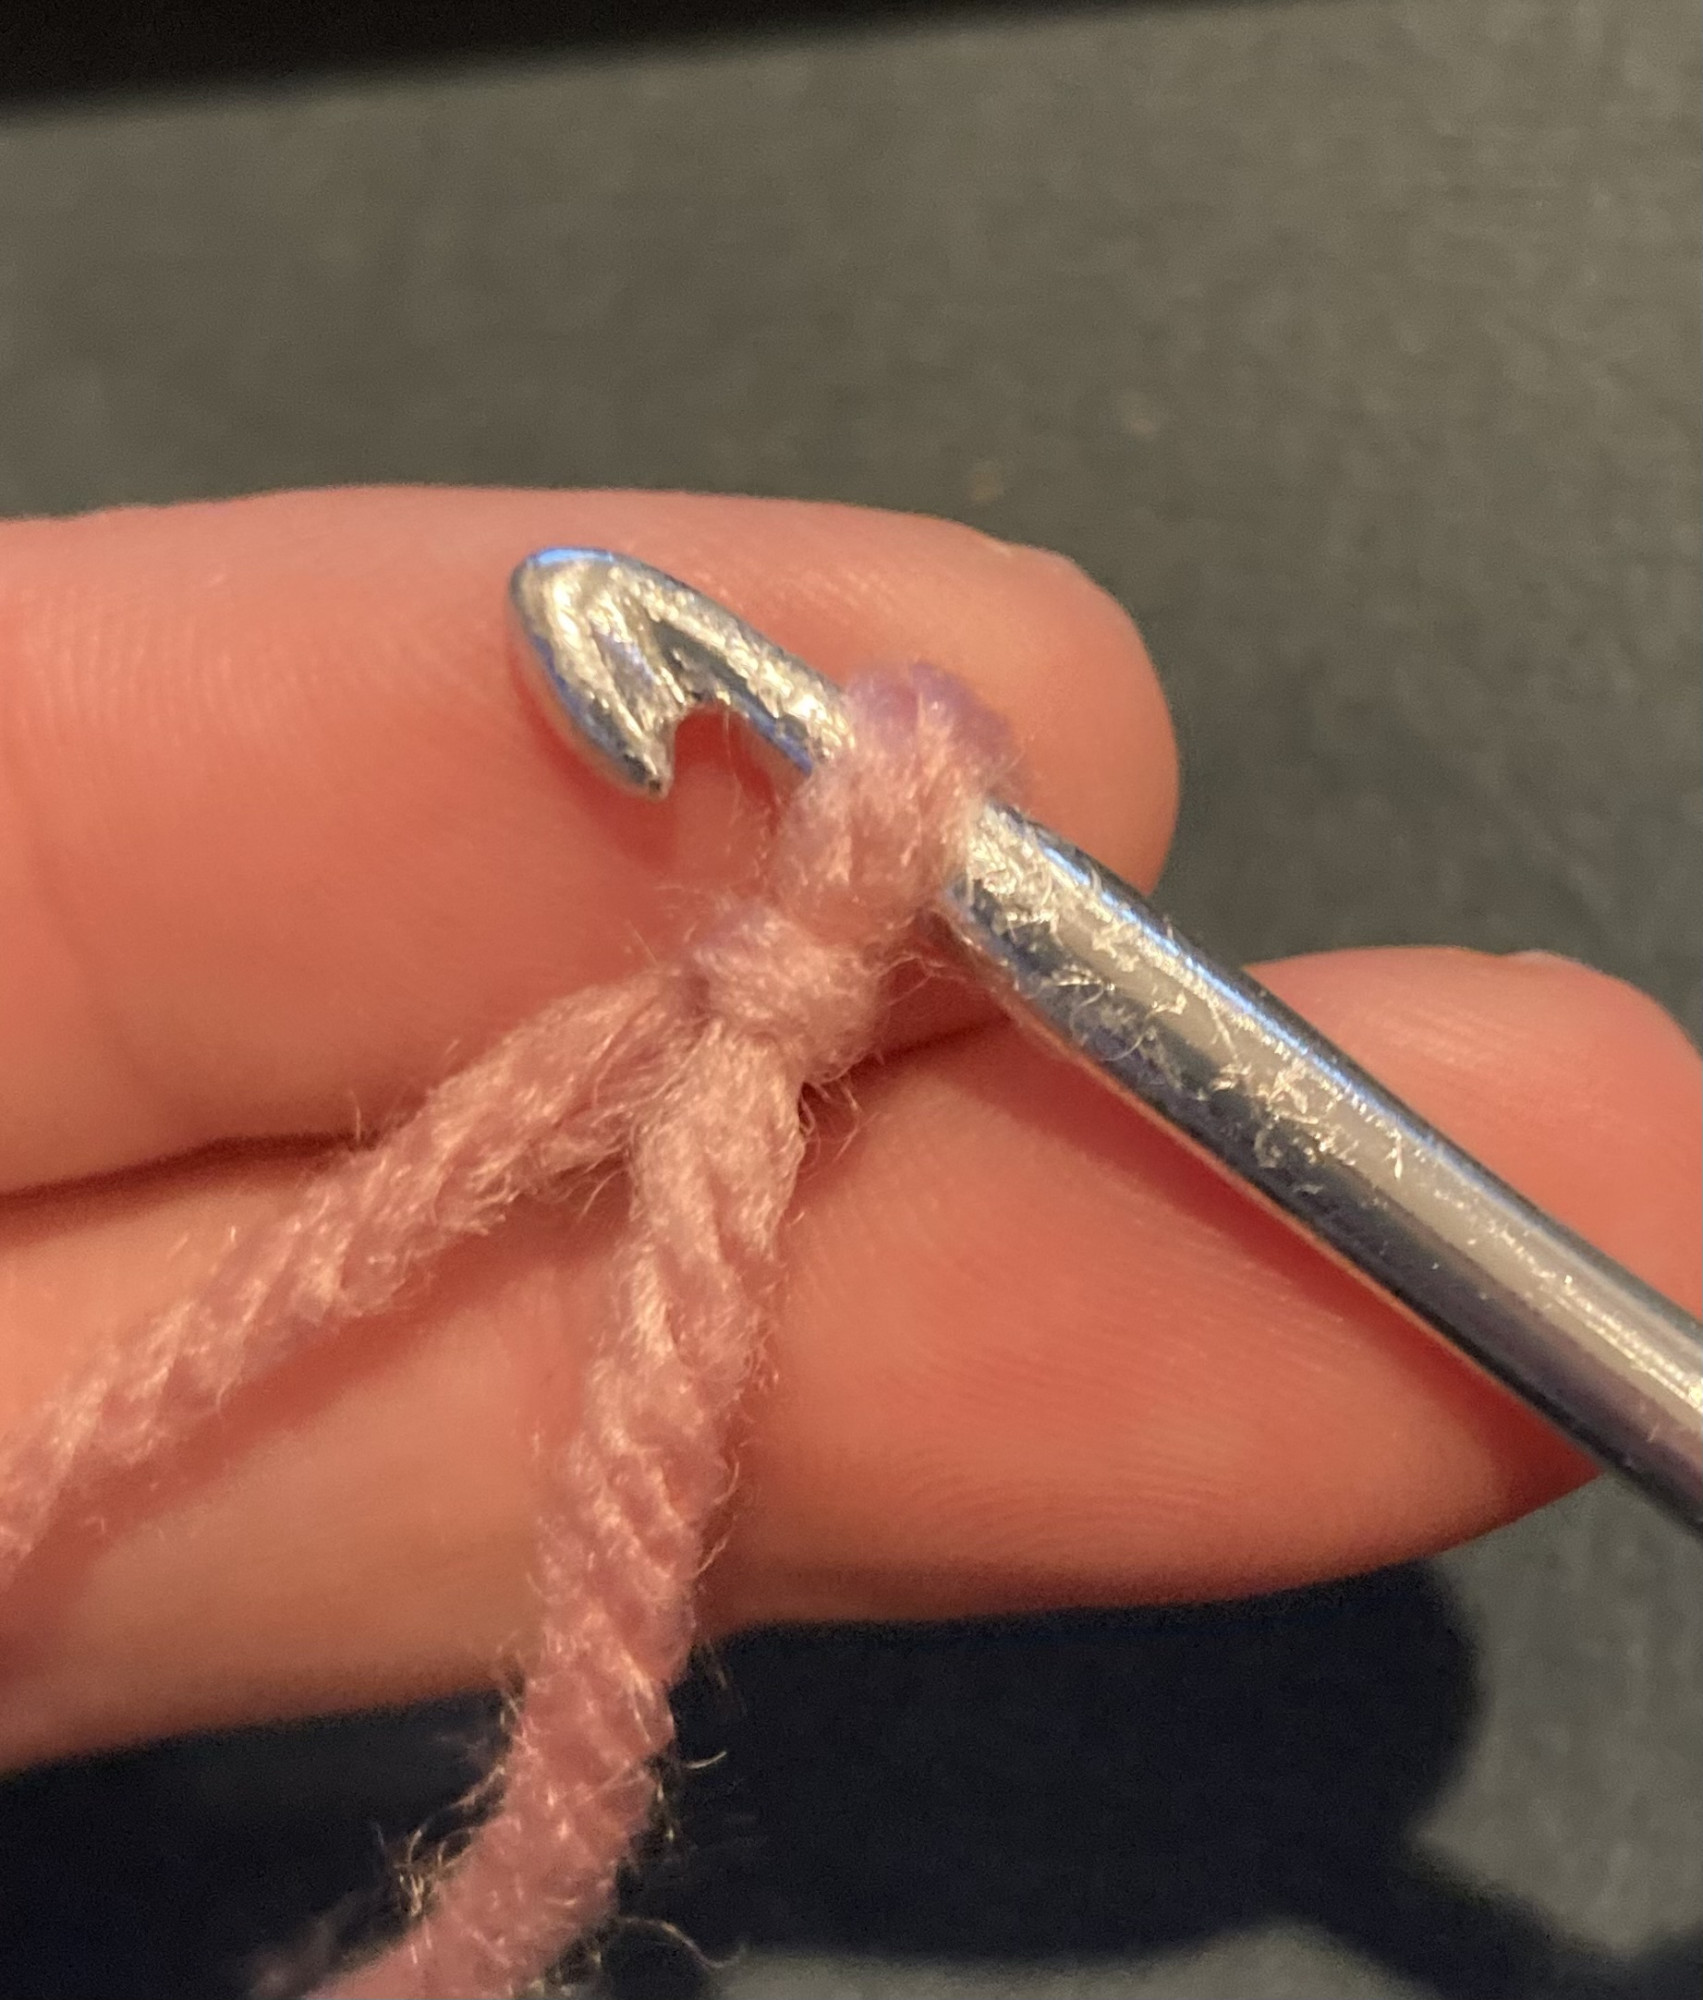
This is your first chain. Repeat 2 and 3 as many times as the pattern calls for. Now that you have the chain, you will work across it crocheting back and forth in lines.
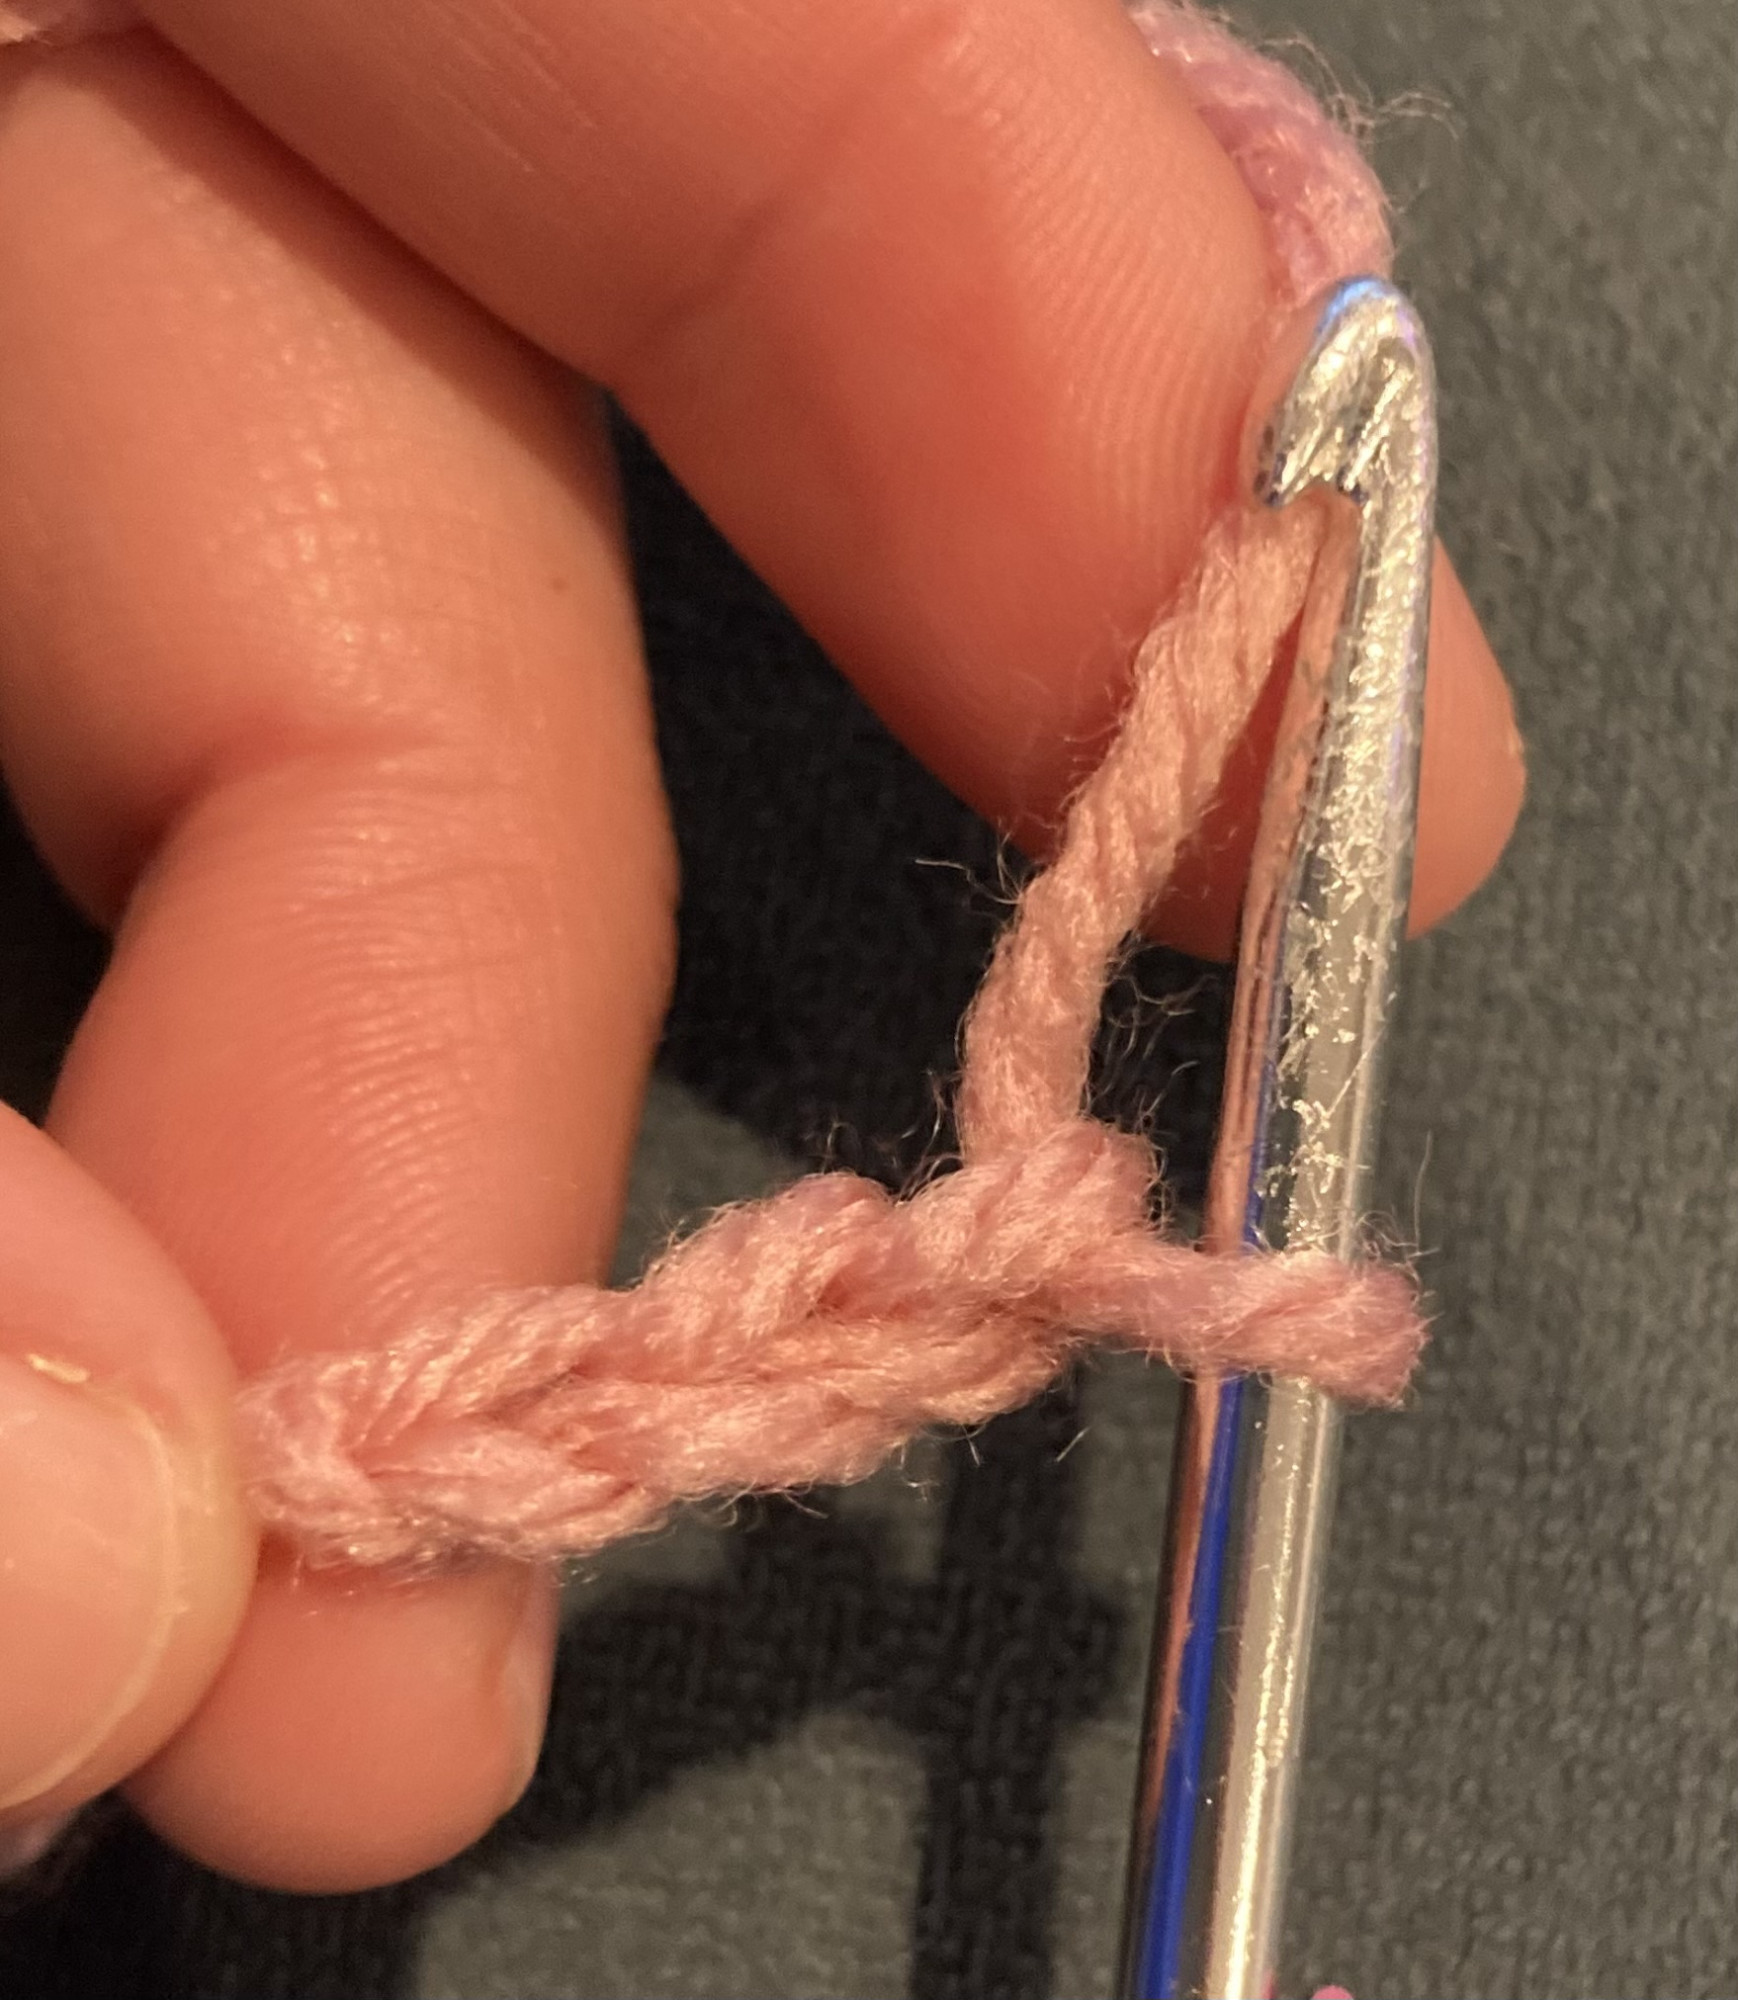
Chain Stitch-for a circle
This time, instead of making a long line and going back and forth across your work, you will create a small chain and connect it together so it ends up being a tiny circle and you will work in the circle.
Again, you will create a pretzel shape with the yarn on your finger, as you can see in the picture.
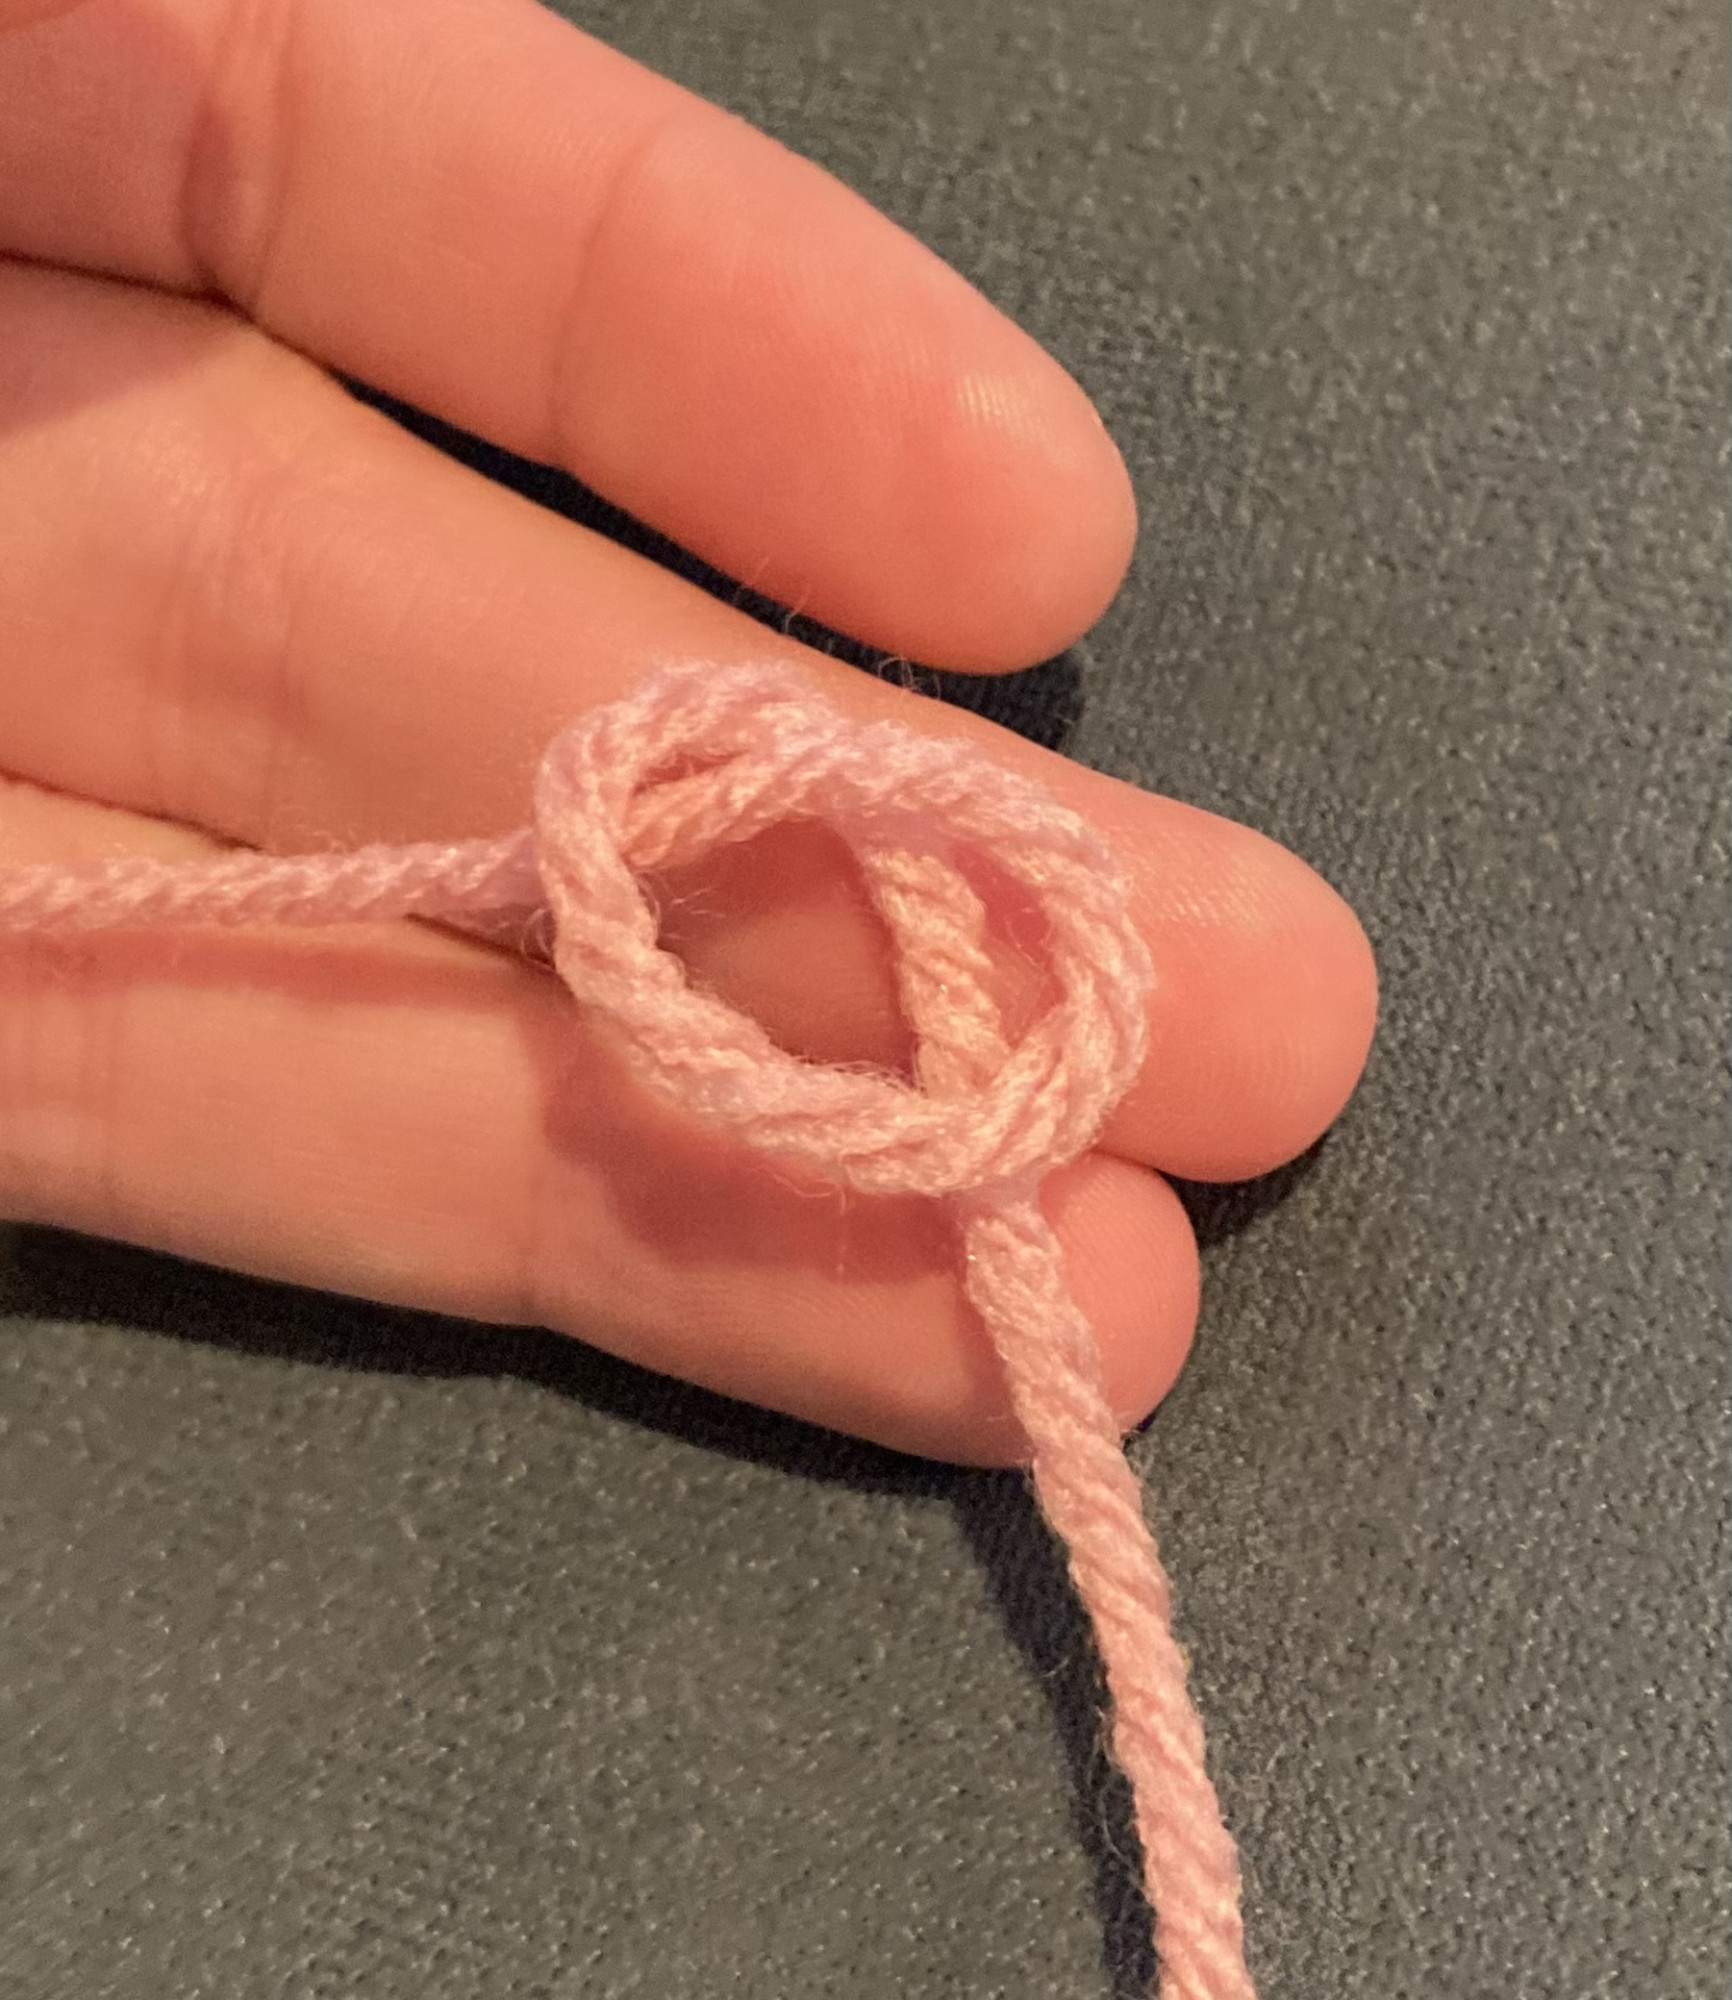
Then use the hook to pull up a loop from the middle of the pretzel.
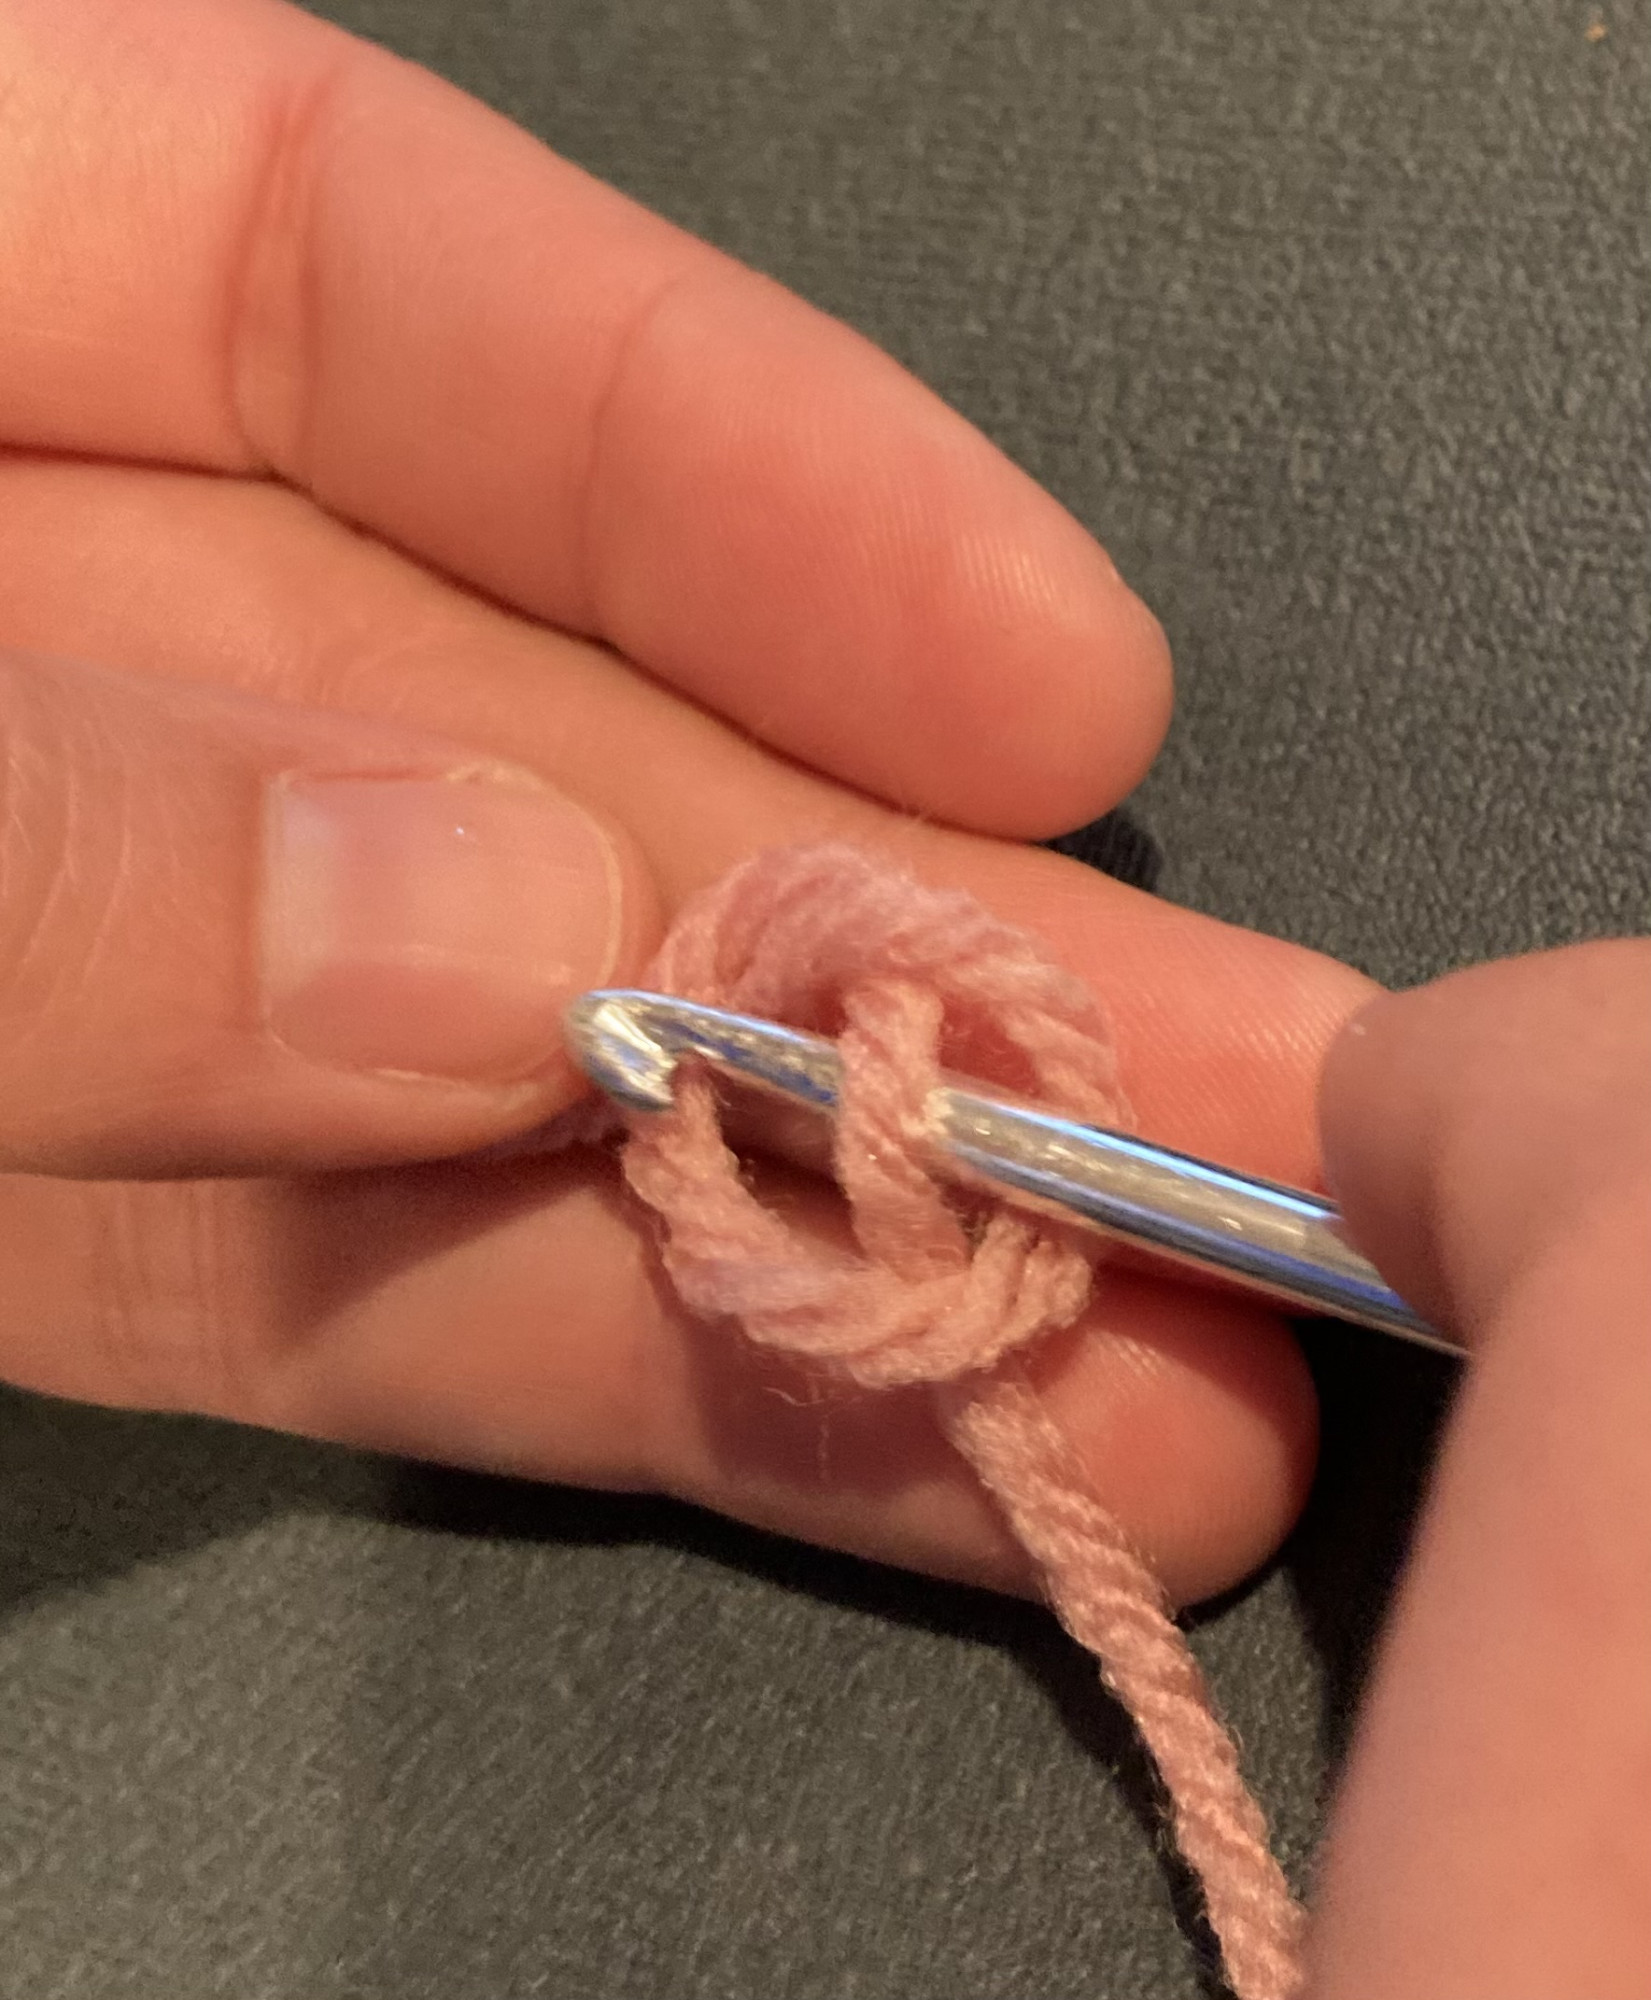
Make three chains and then slip stitch to the first chain. A slip stitch is the same thing you have been doing to create the chains, except with one extra step. You need to insert the hook into the chain space, as you can see, then wrap around the yarn and pull it through both of the loops that are on the hook. You can see this in the picture.
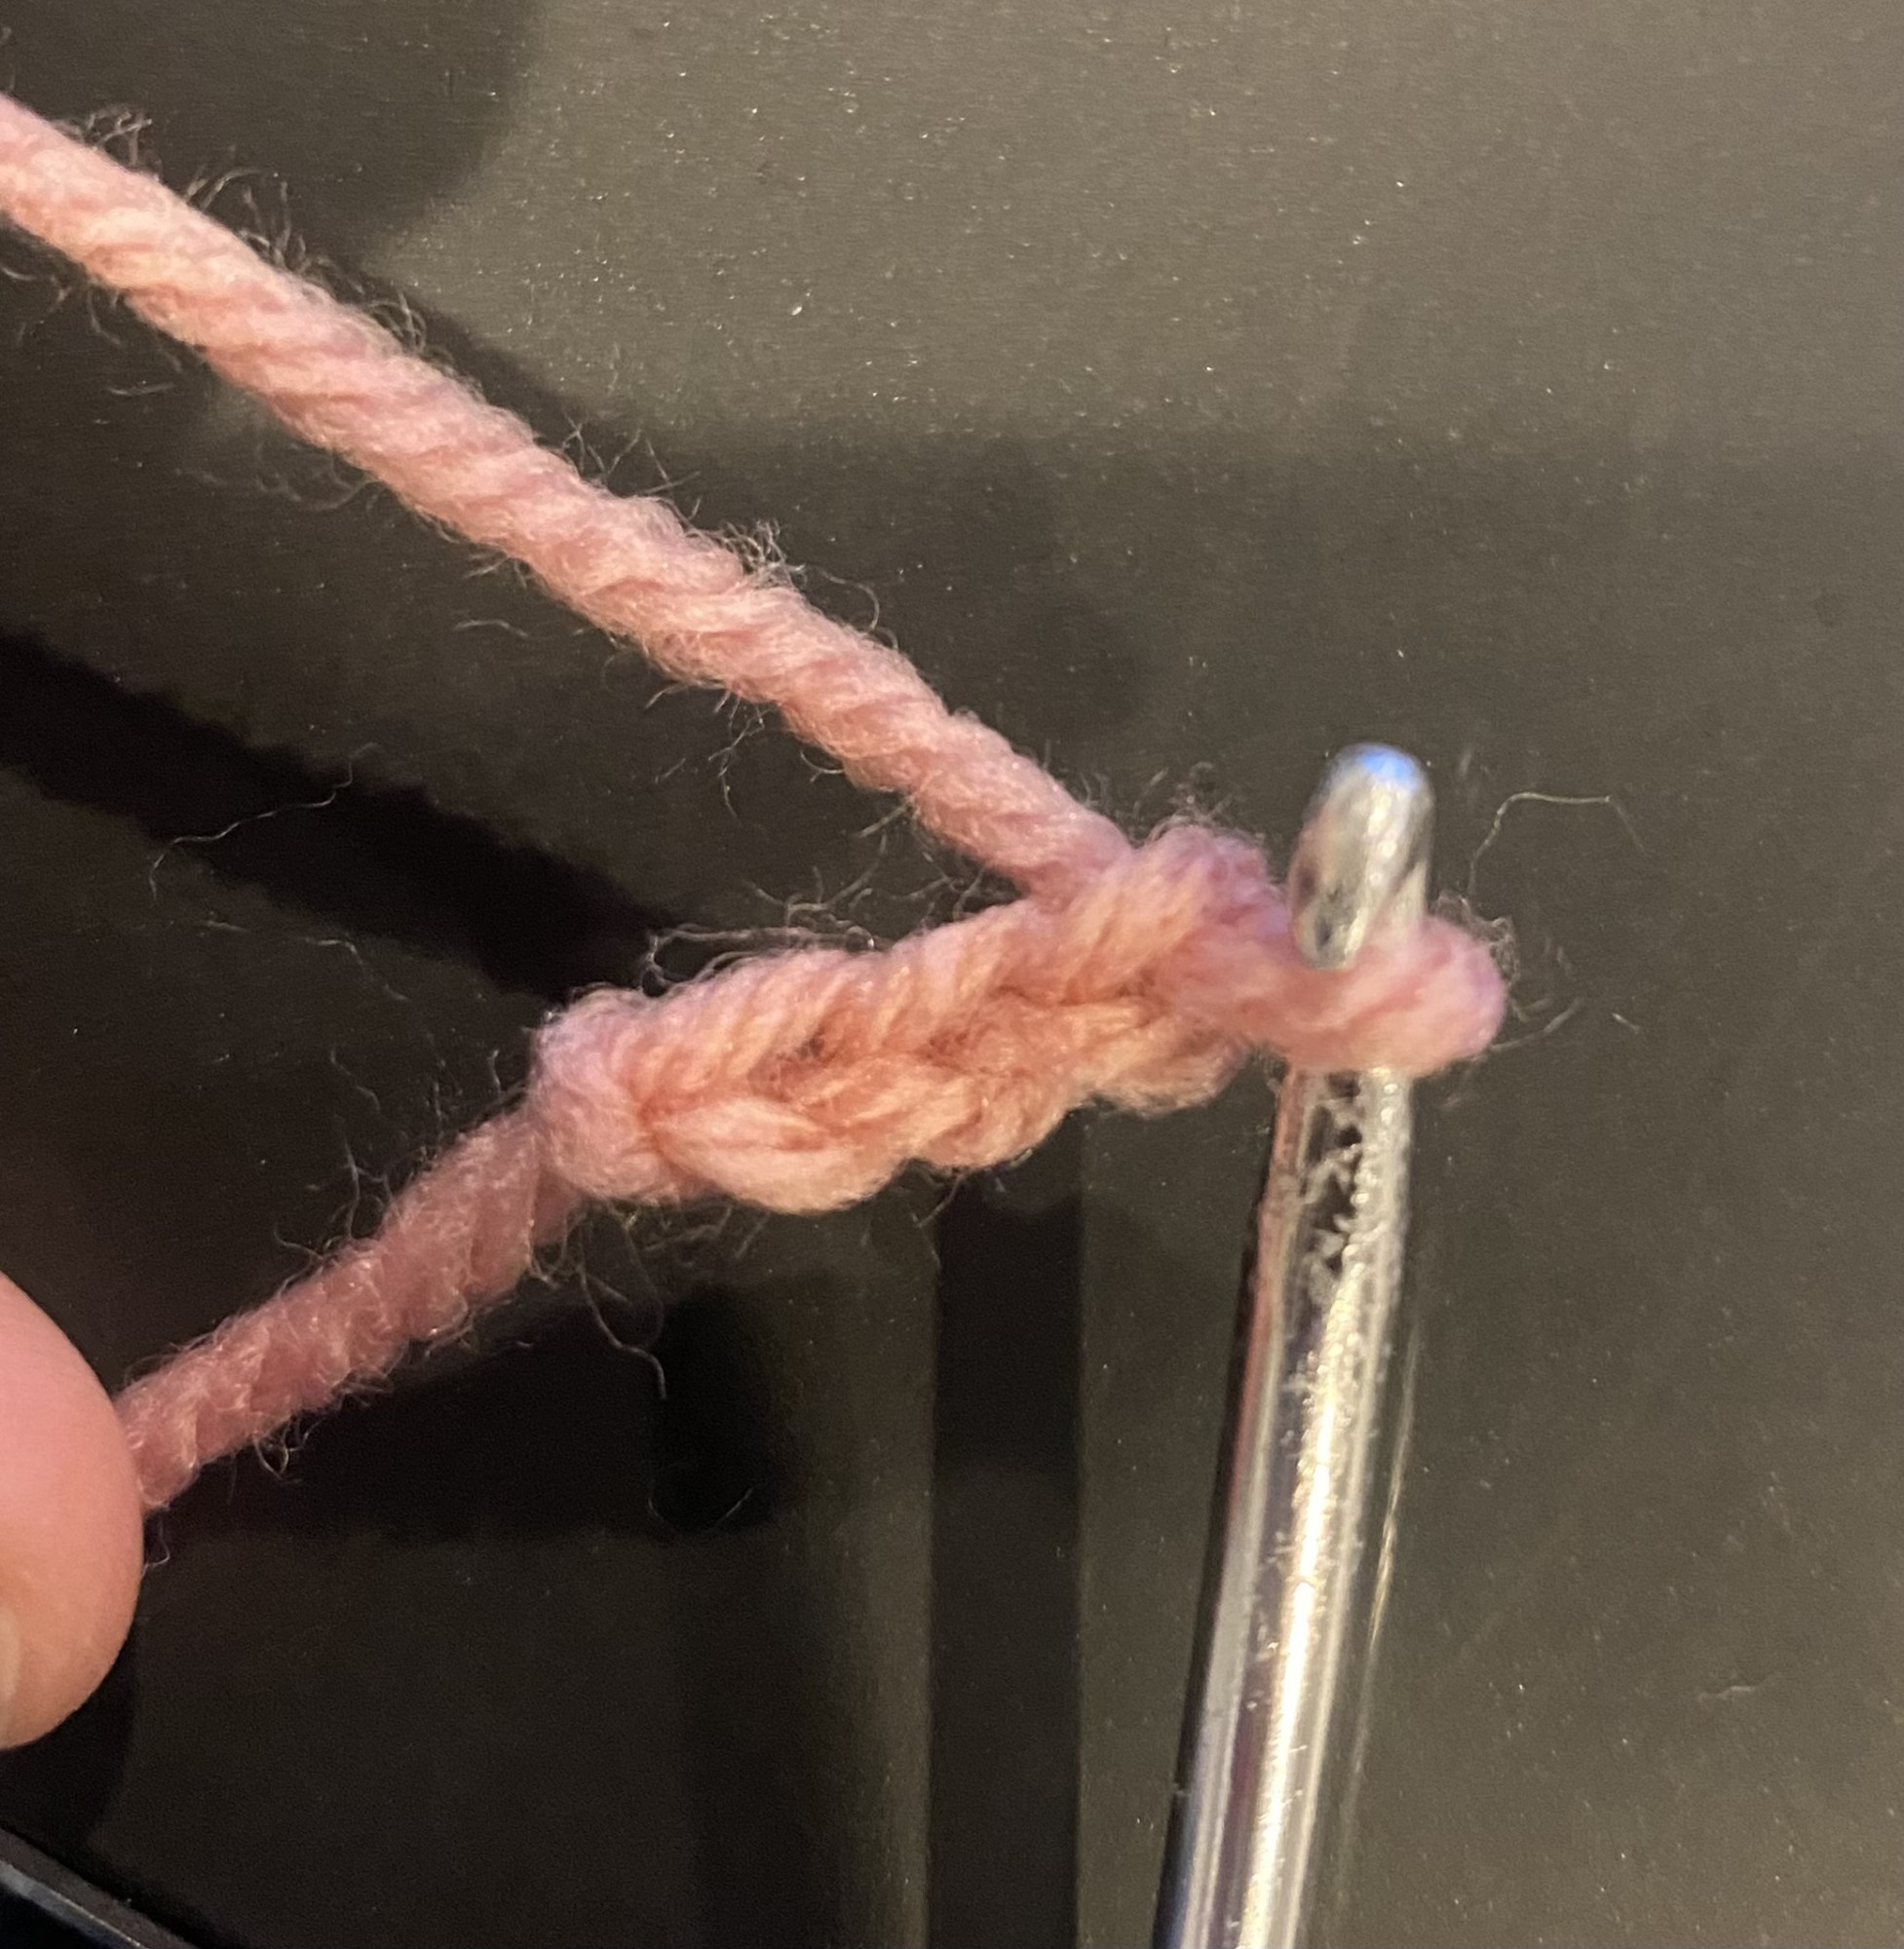
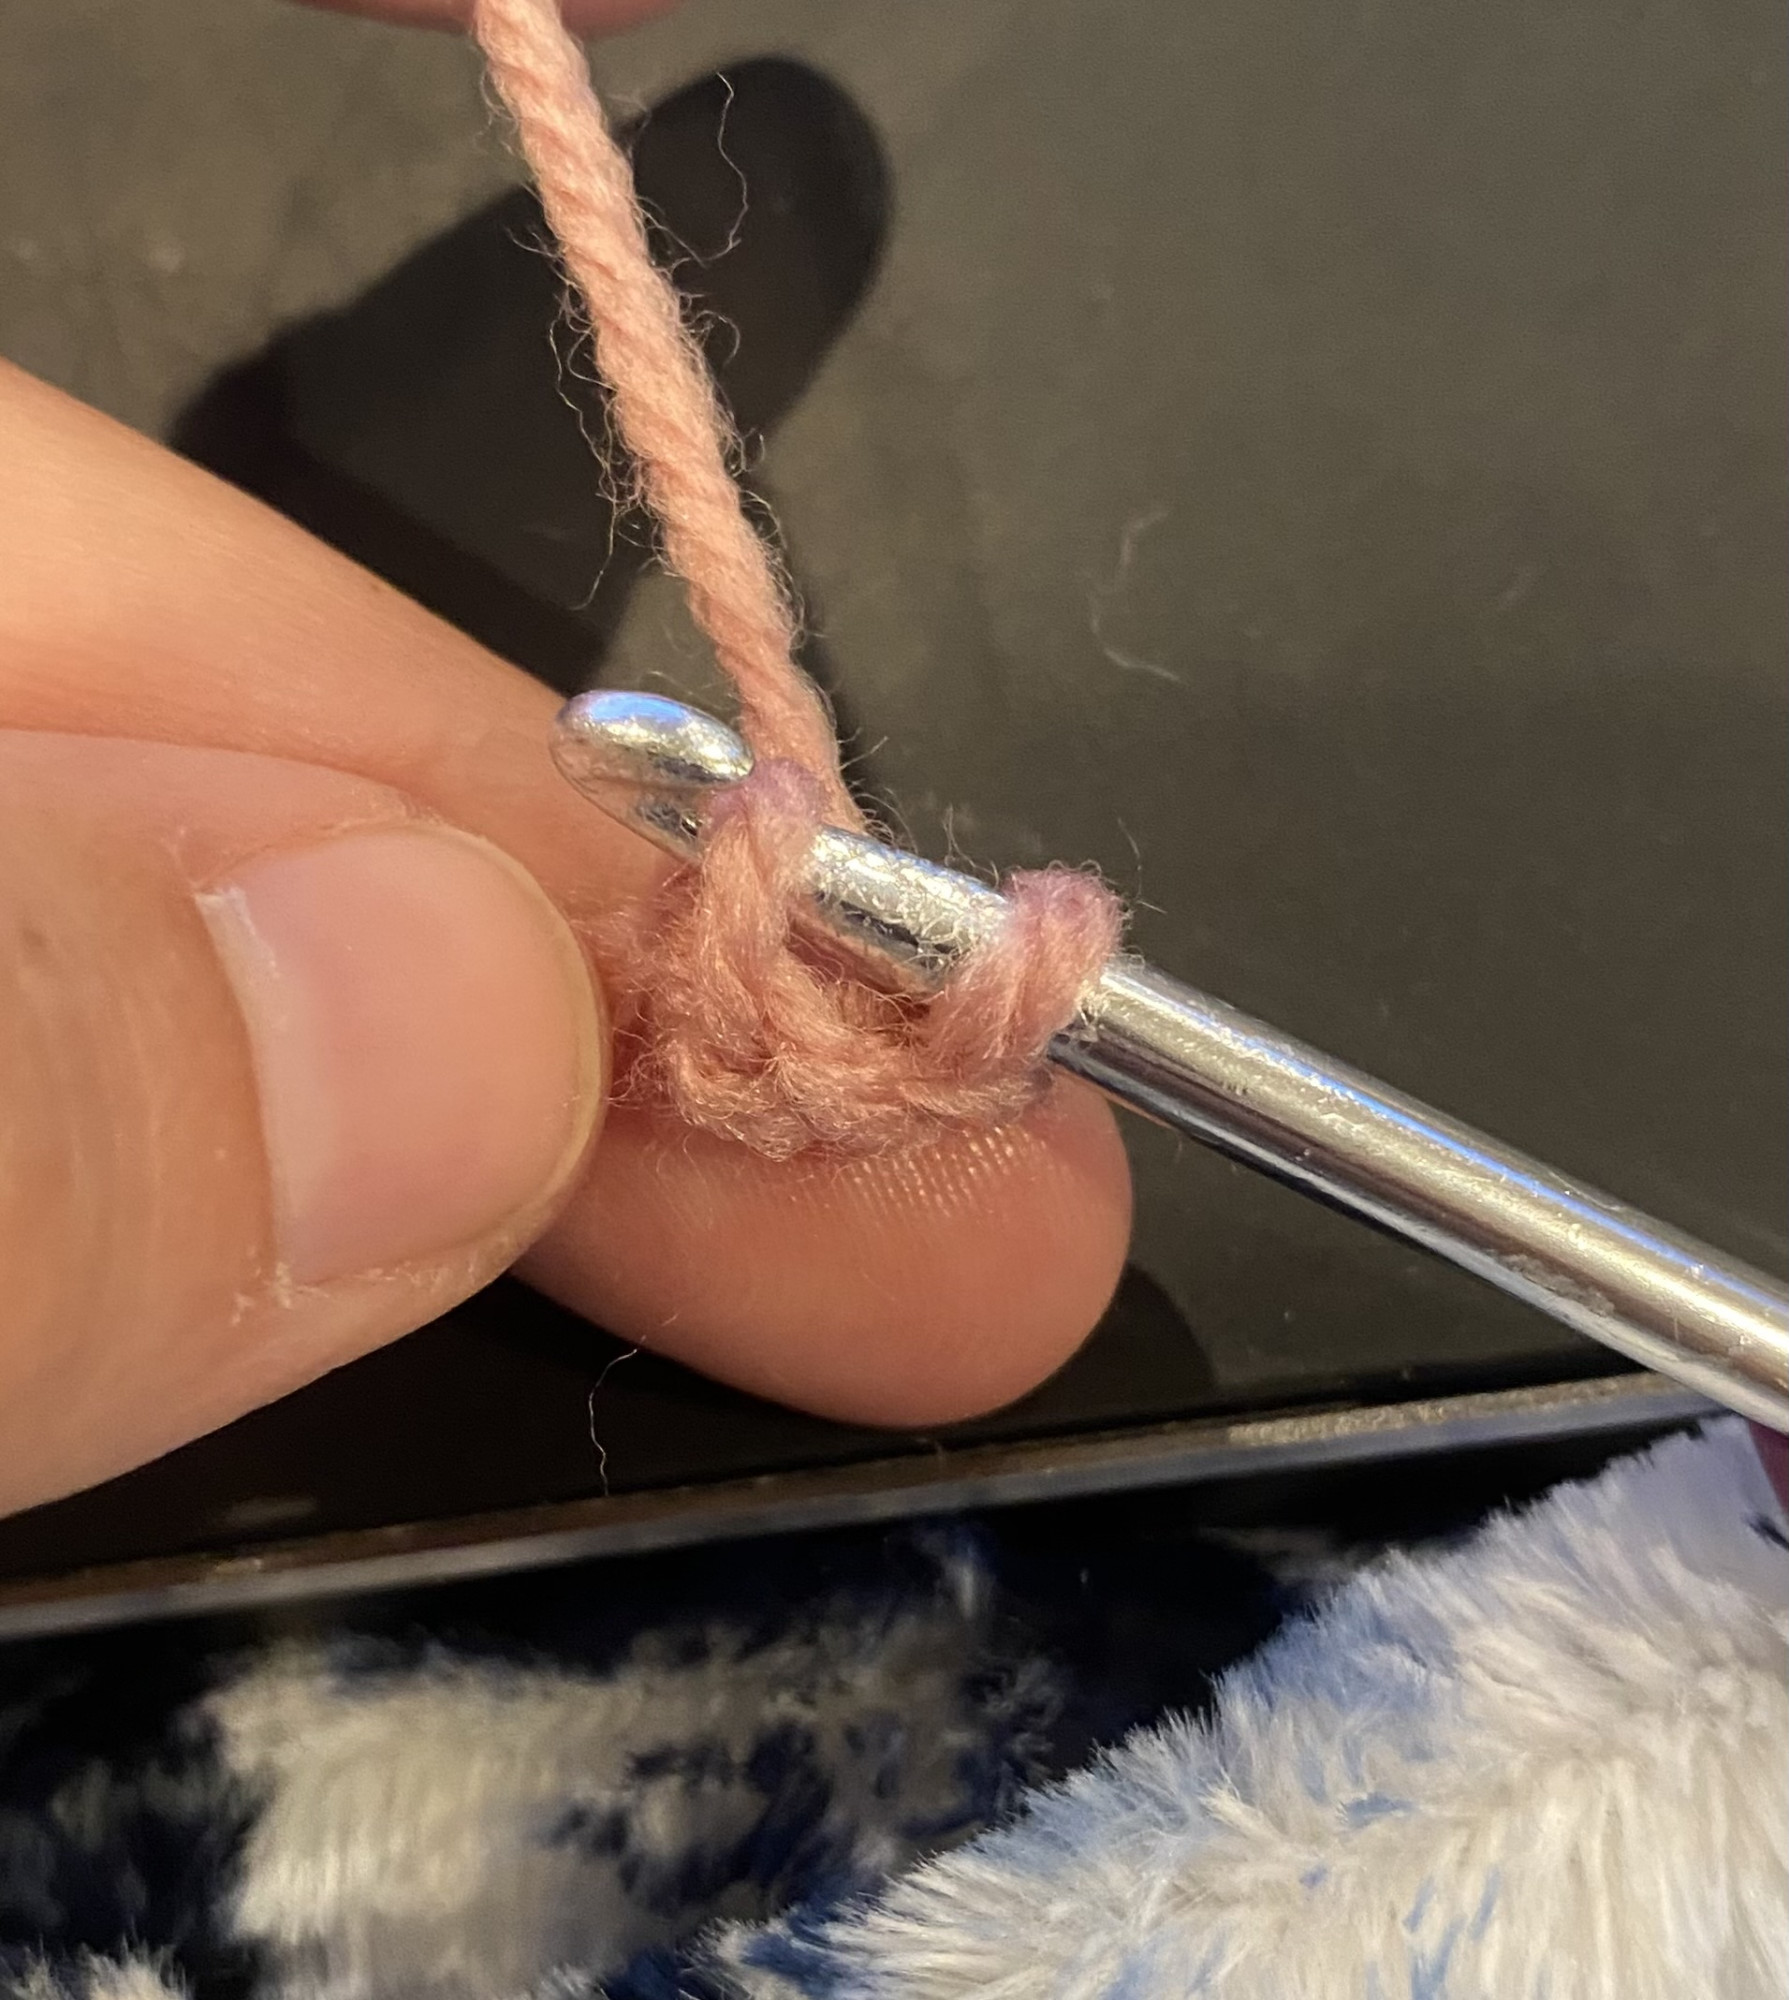
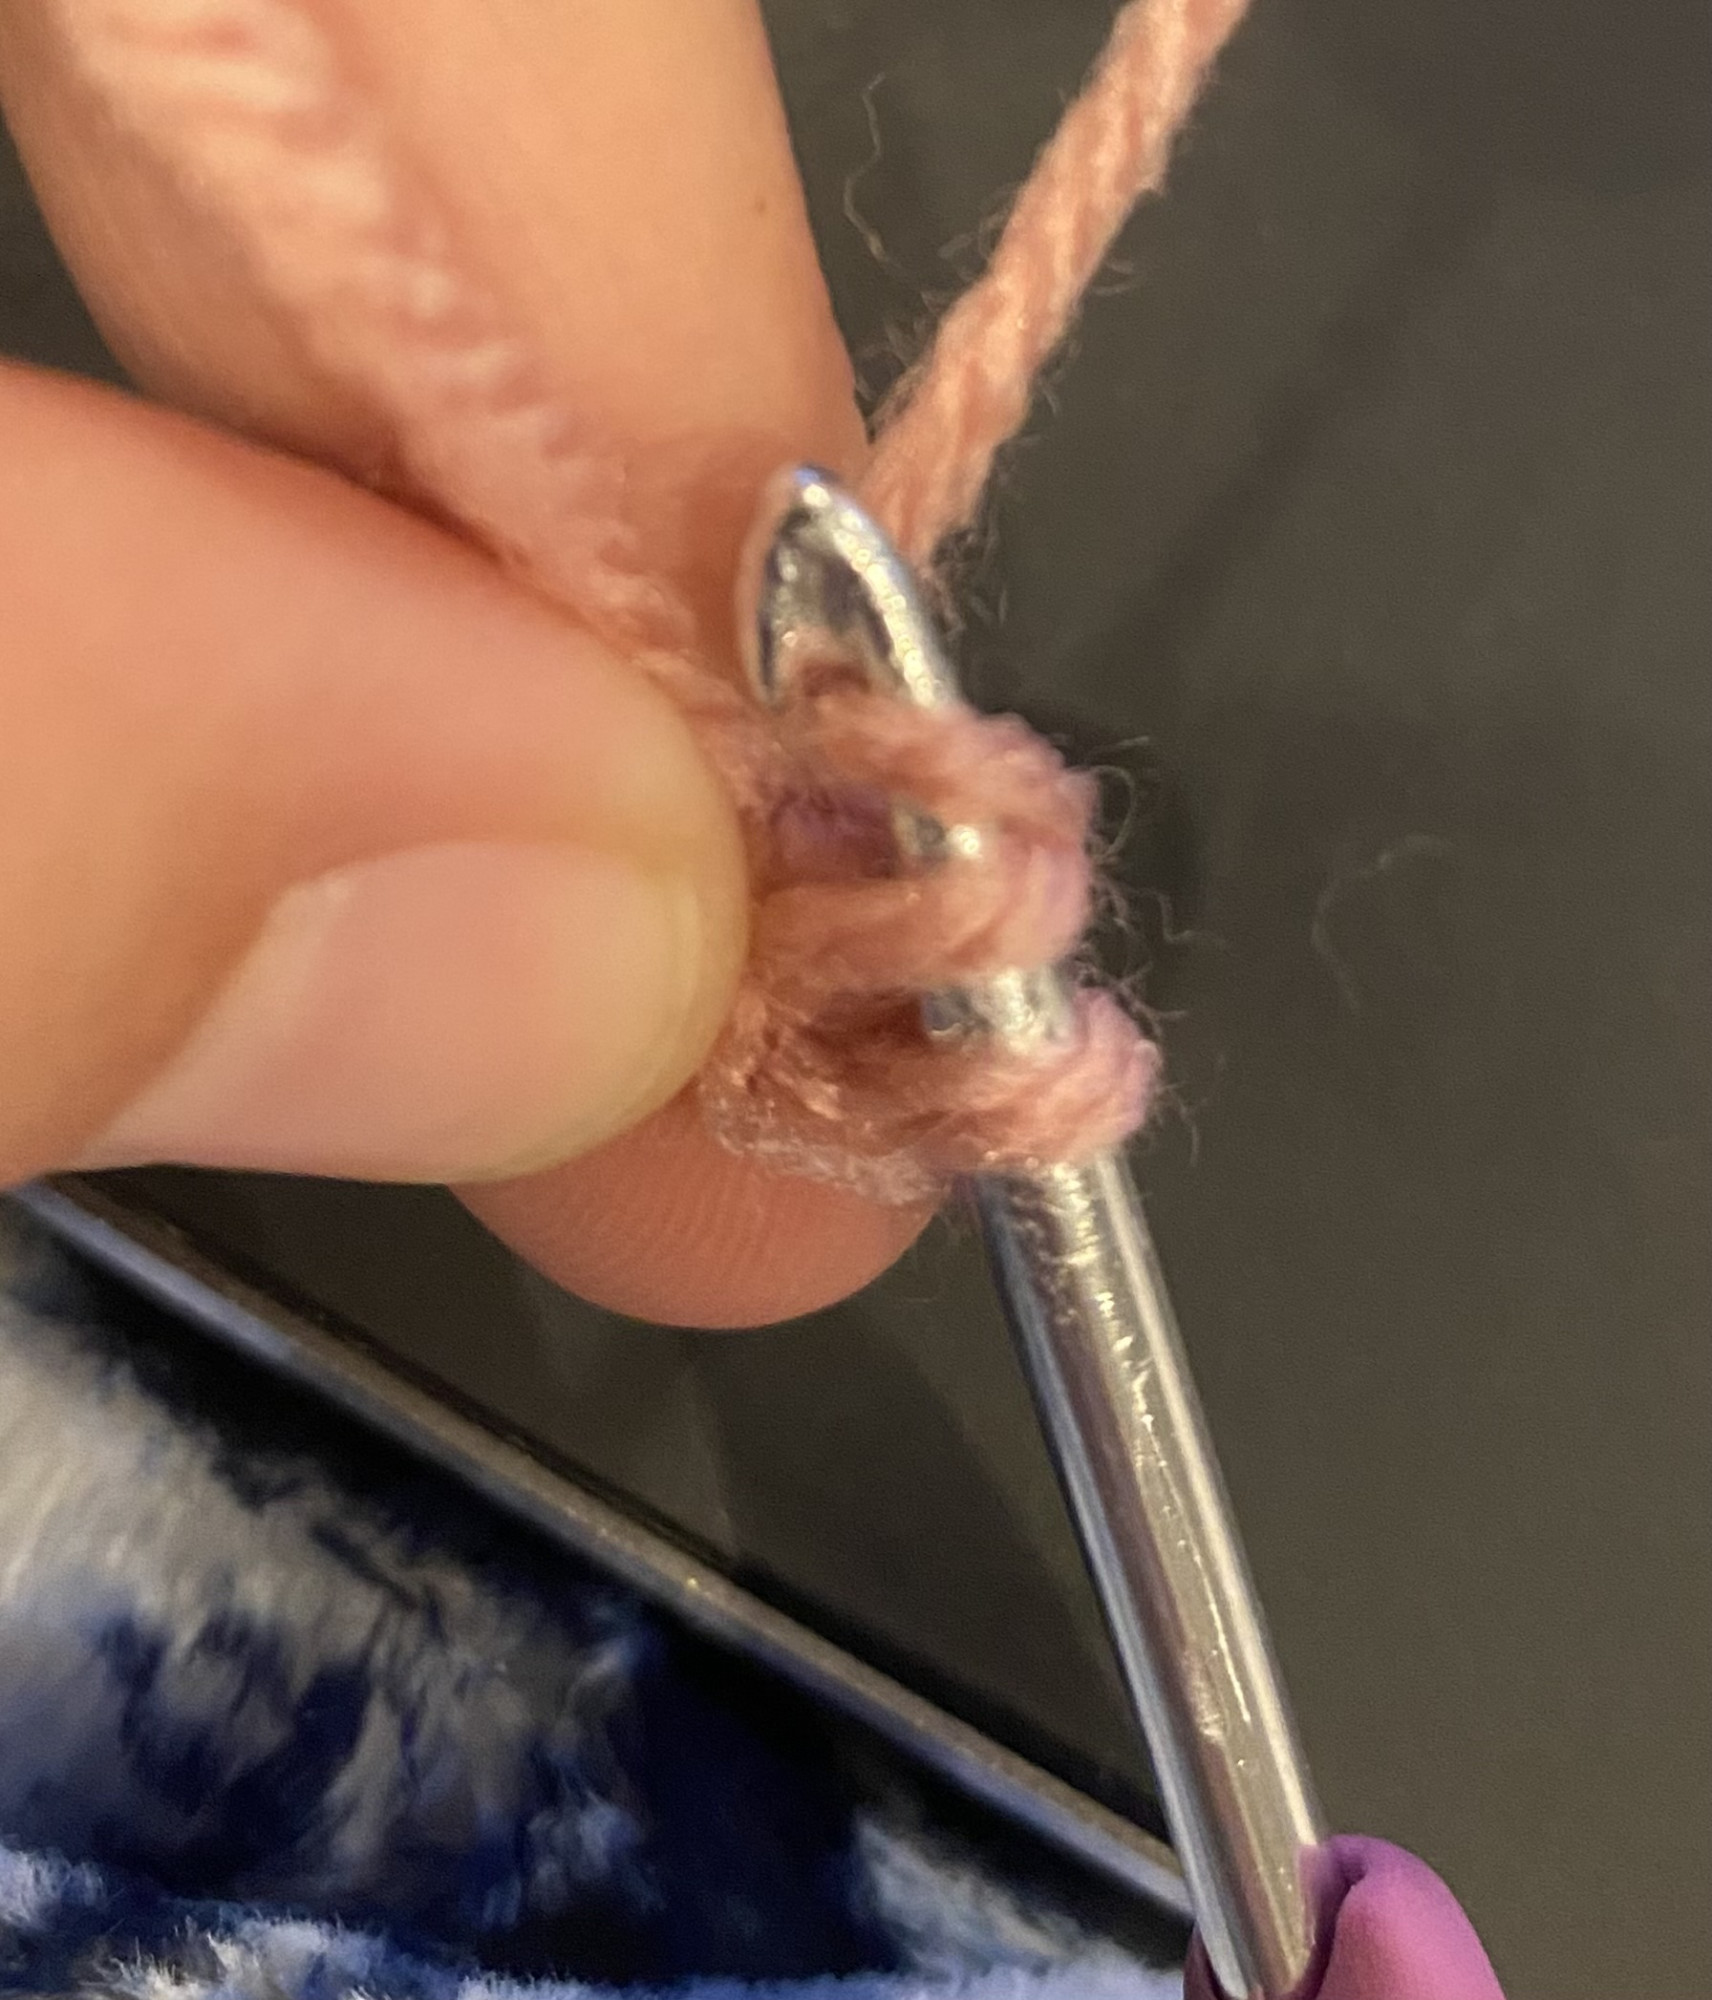
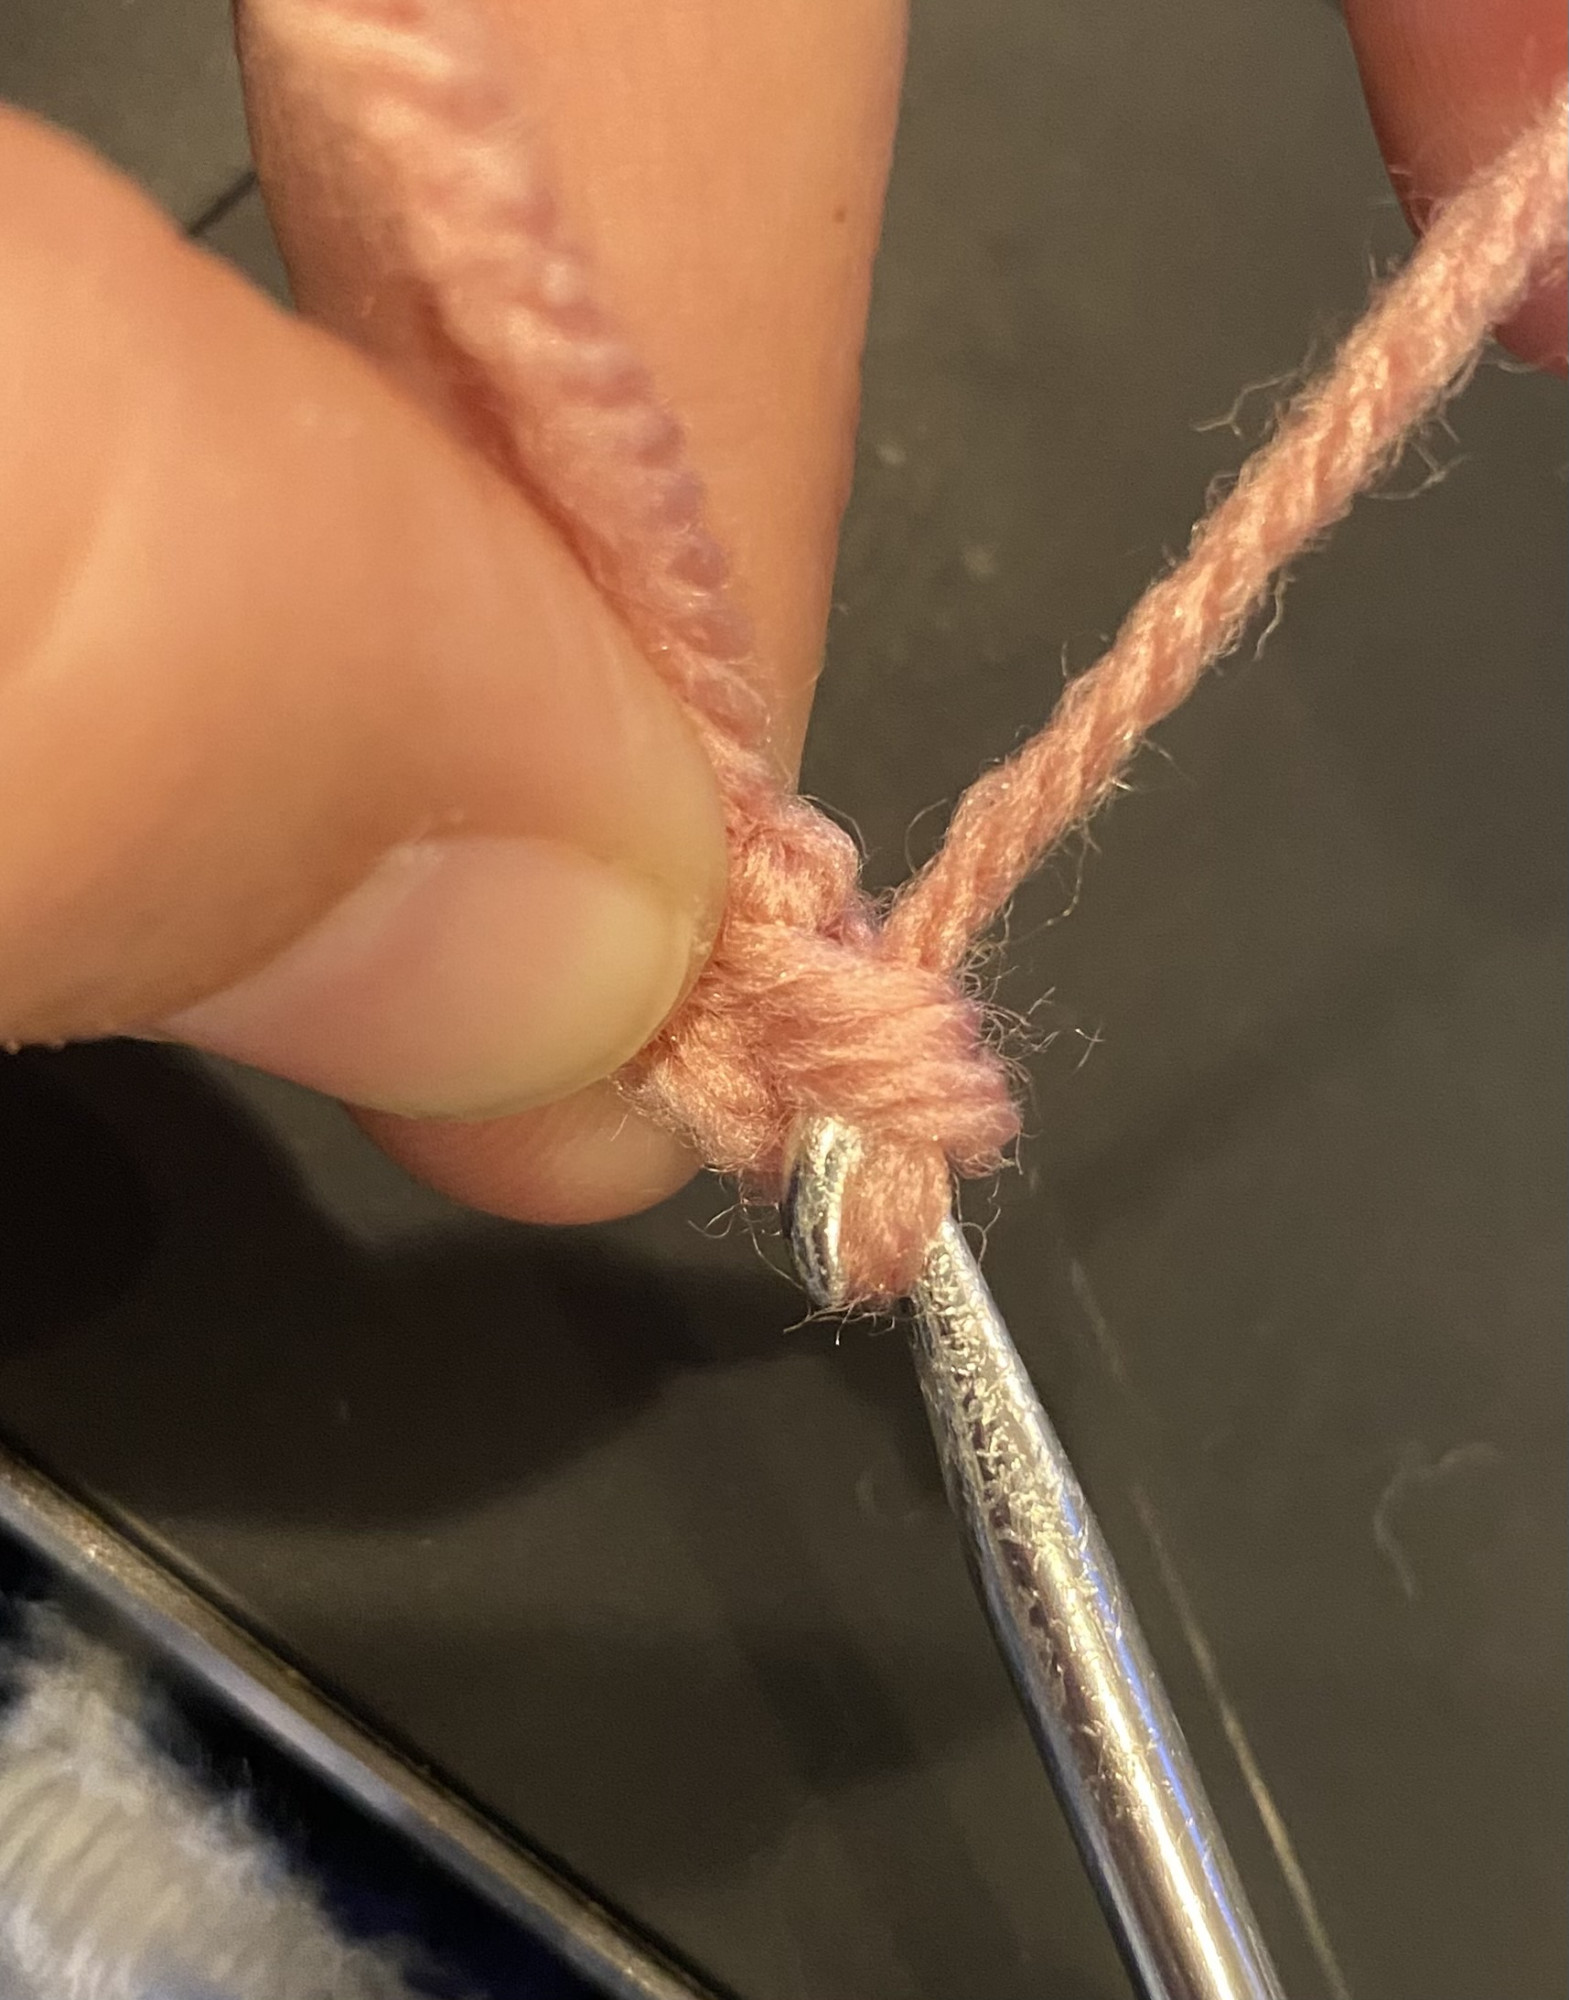
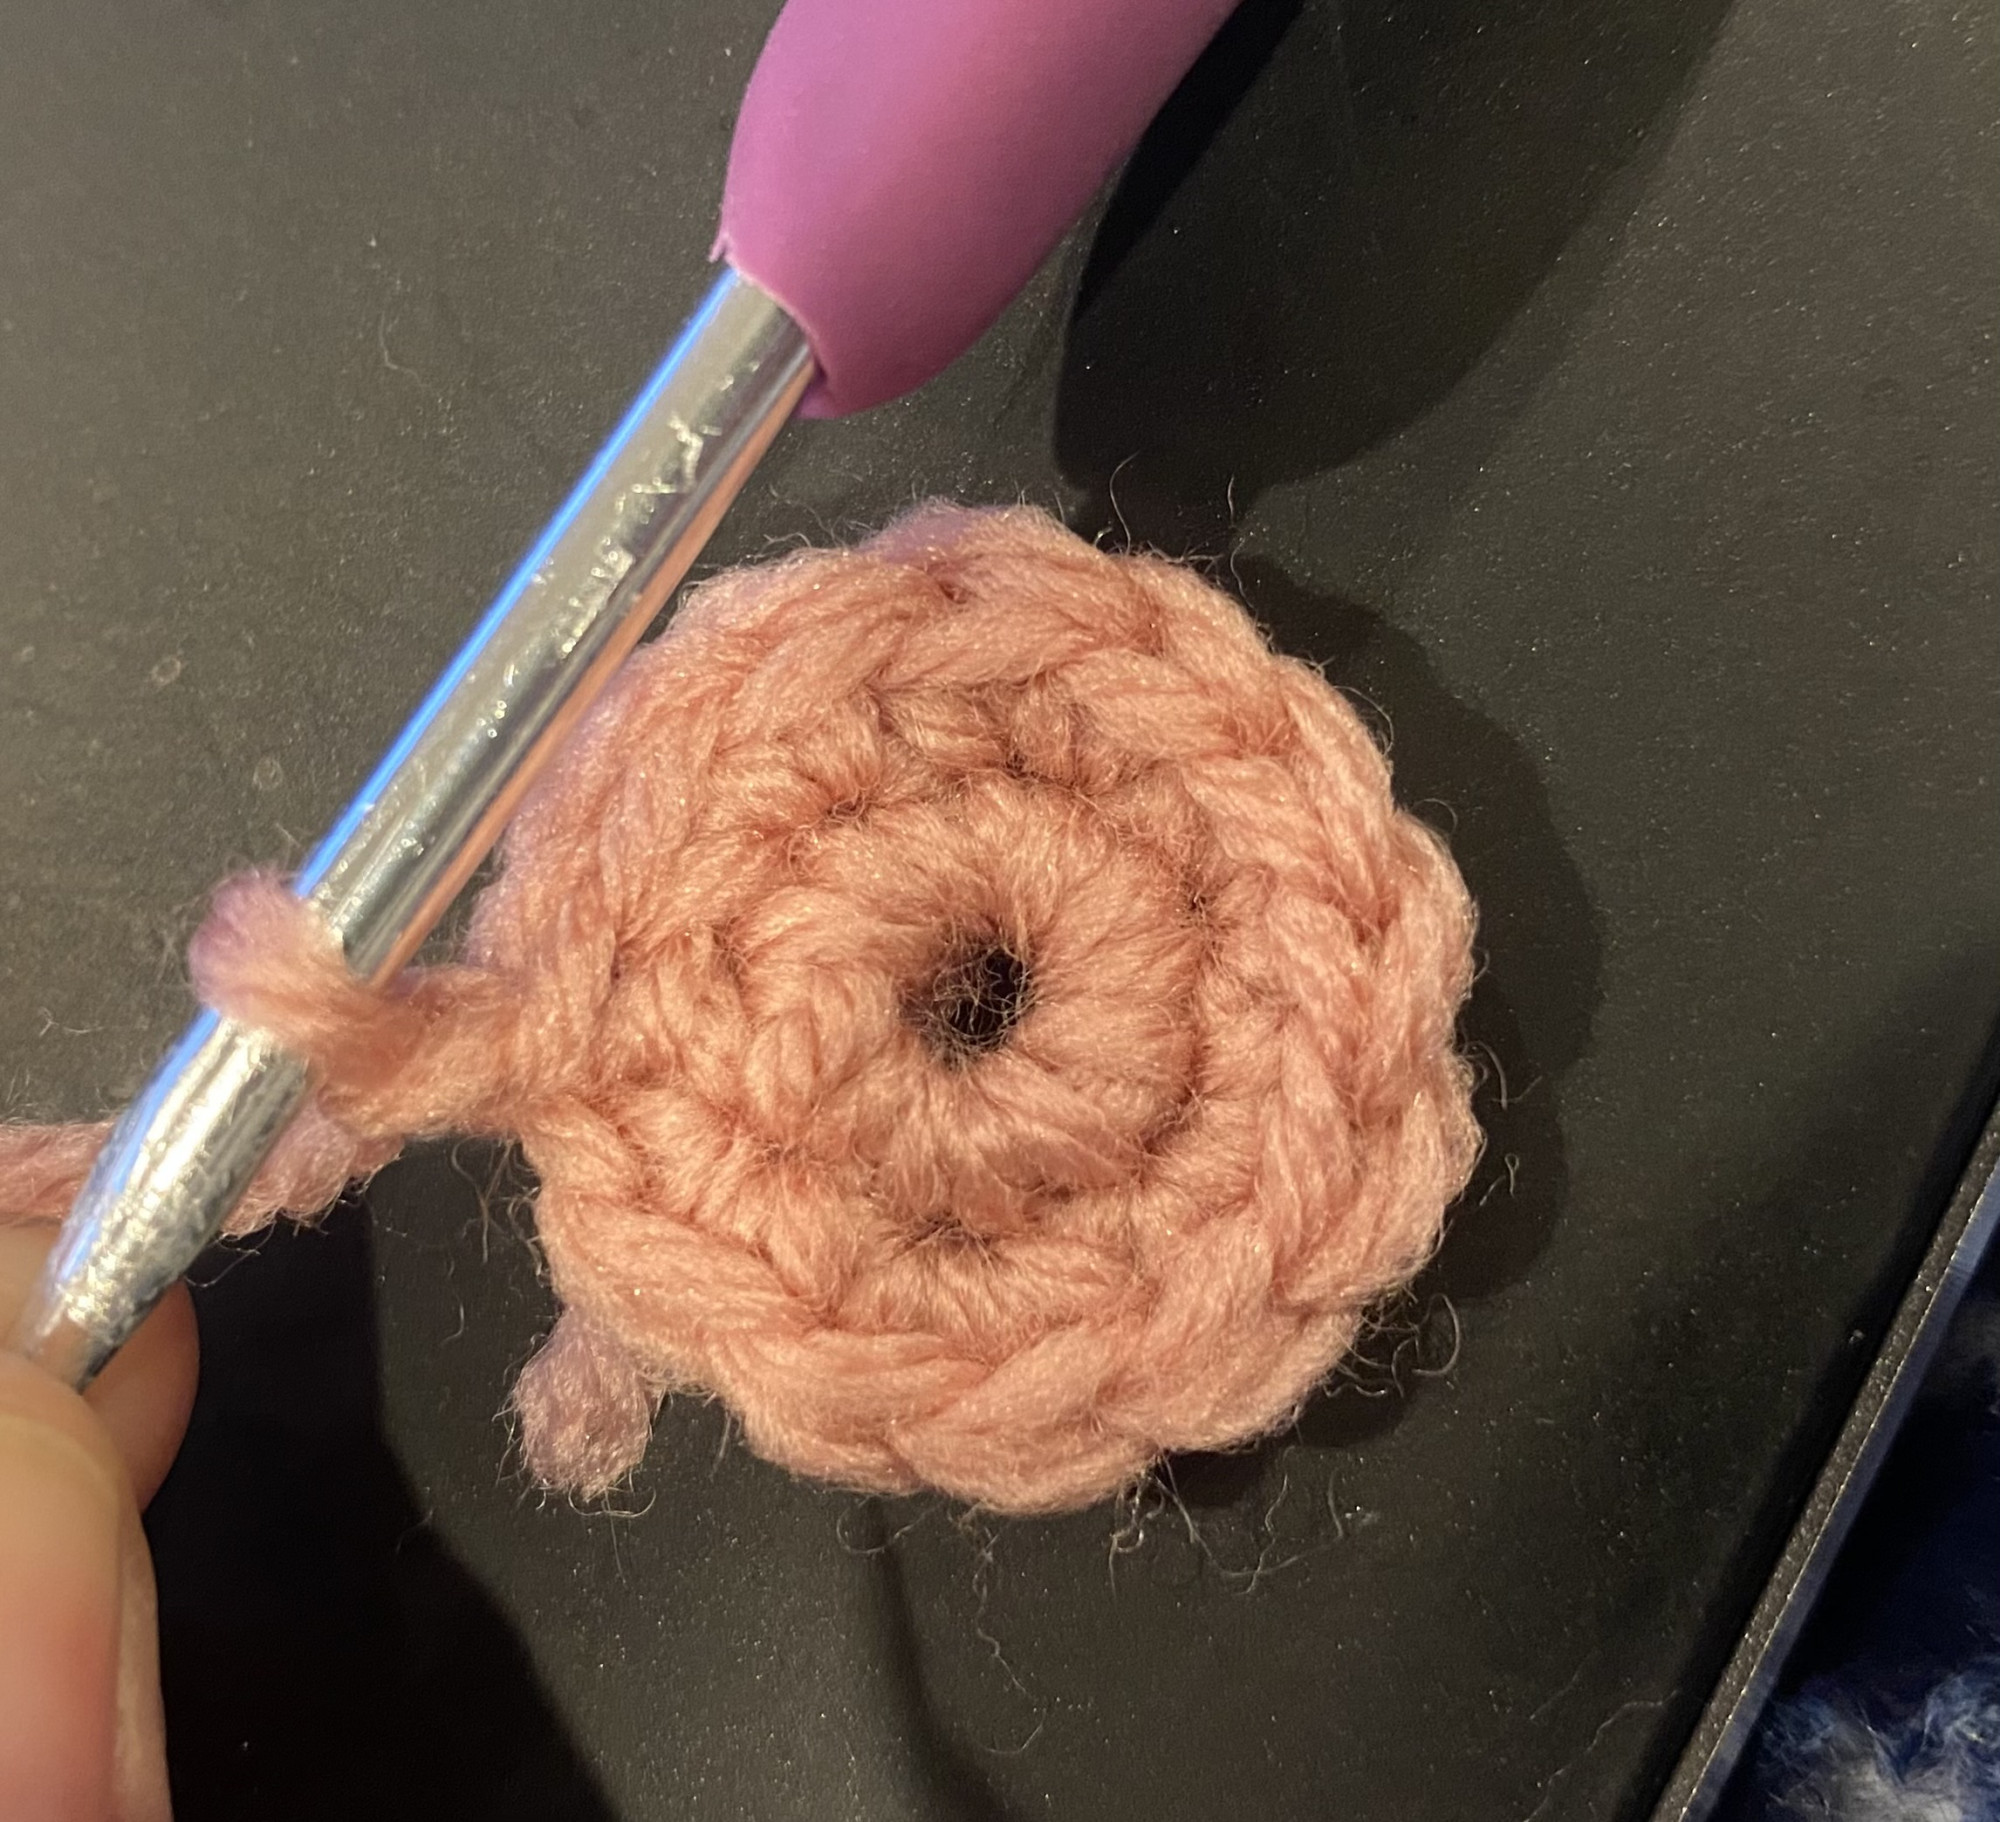 You will always have a little bit of a hole when using this method, but it will stay together. It is best for things like hats, where the holes aren't as big of a deal.
 Magic Circle
This is another way to start a crochet project that needs to be round or a circle. To create the magic circle, make a circle like this on your finger, with the end of the yarn piece under the long ball of yarn piece.
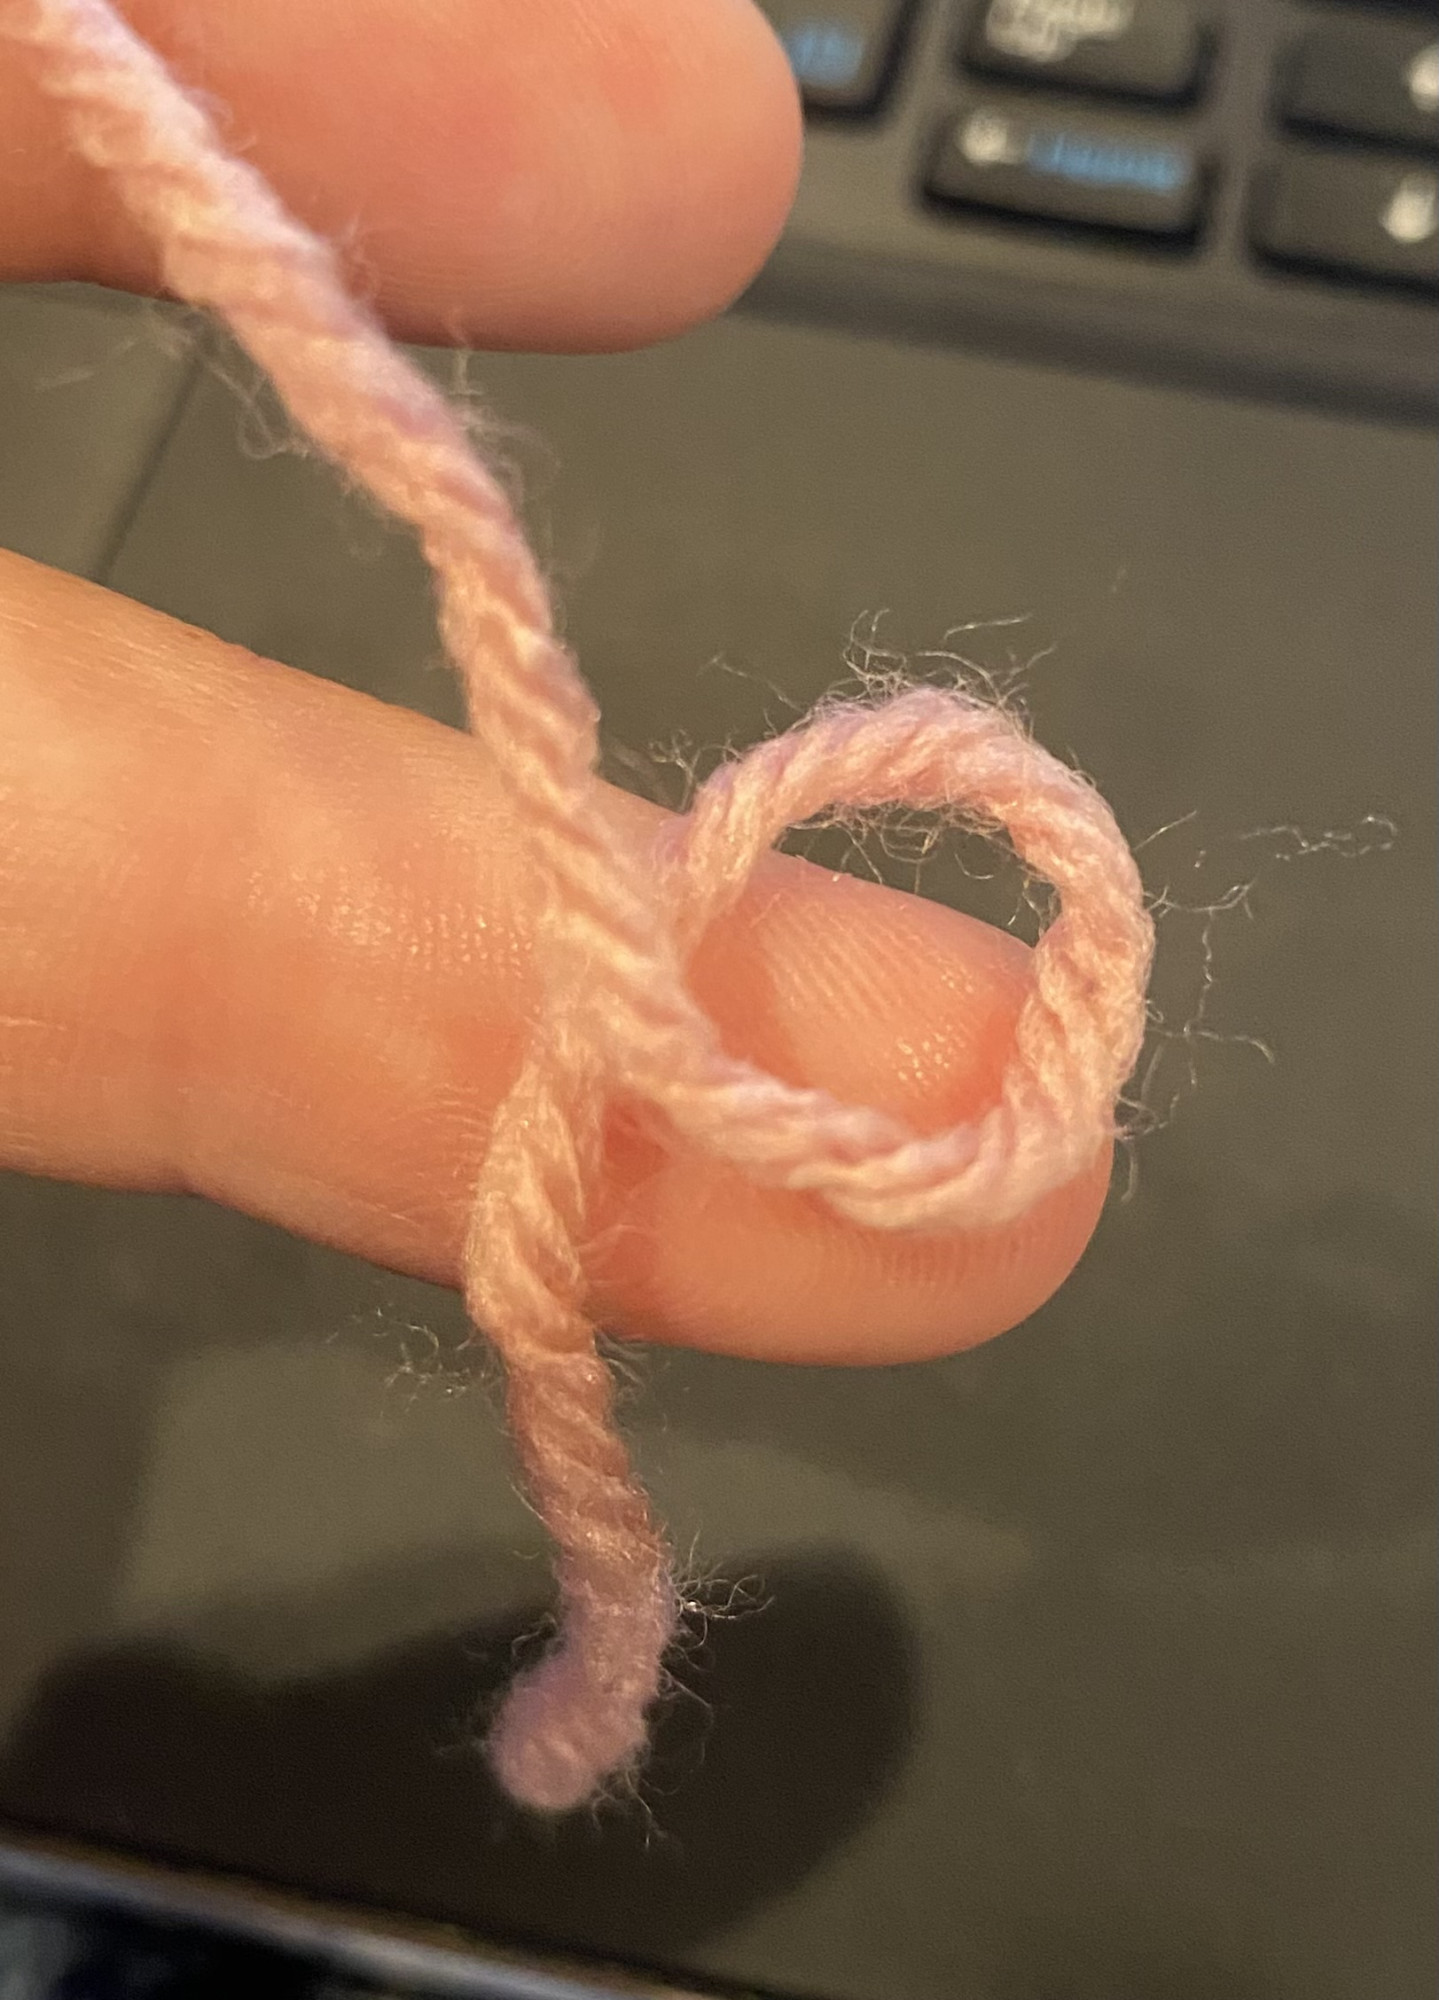
Then insert the hook through the circle and catch the piece of yarn, pull it back through the circle.
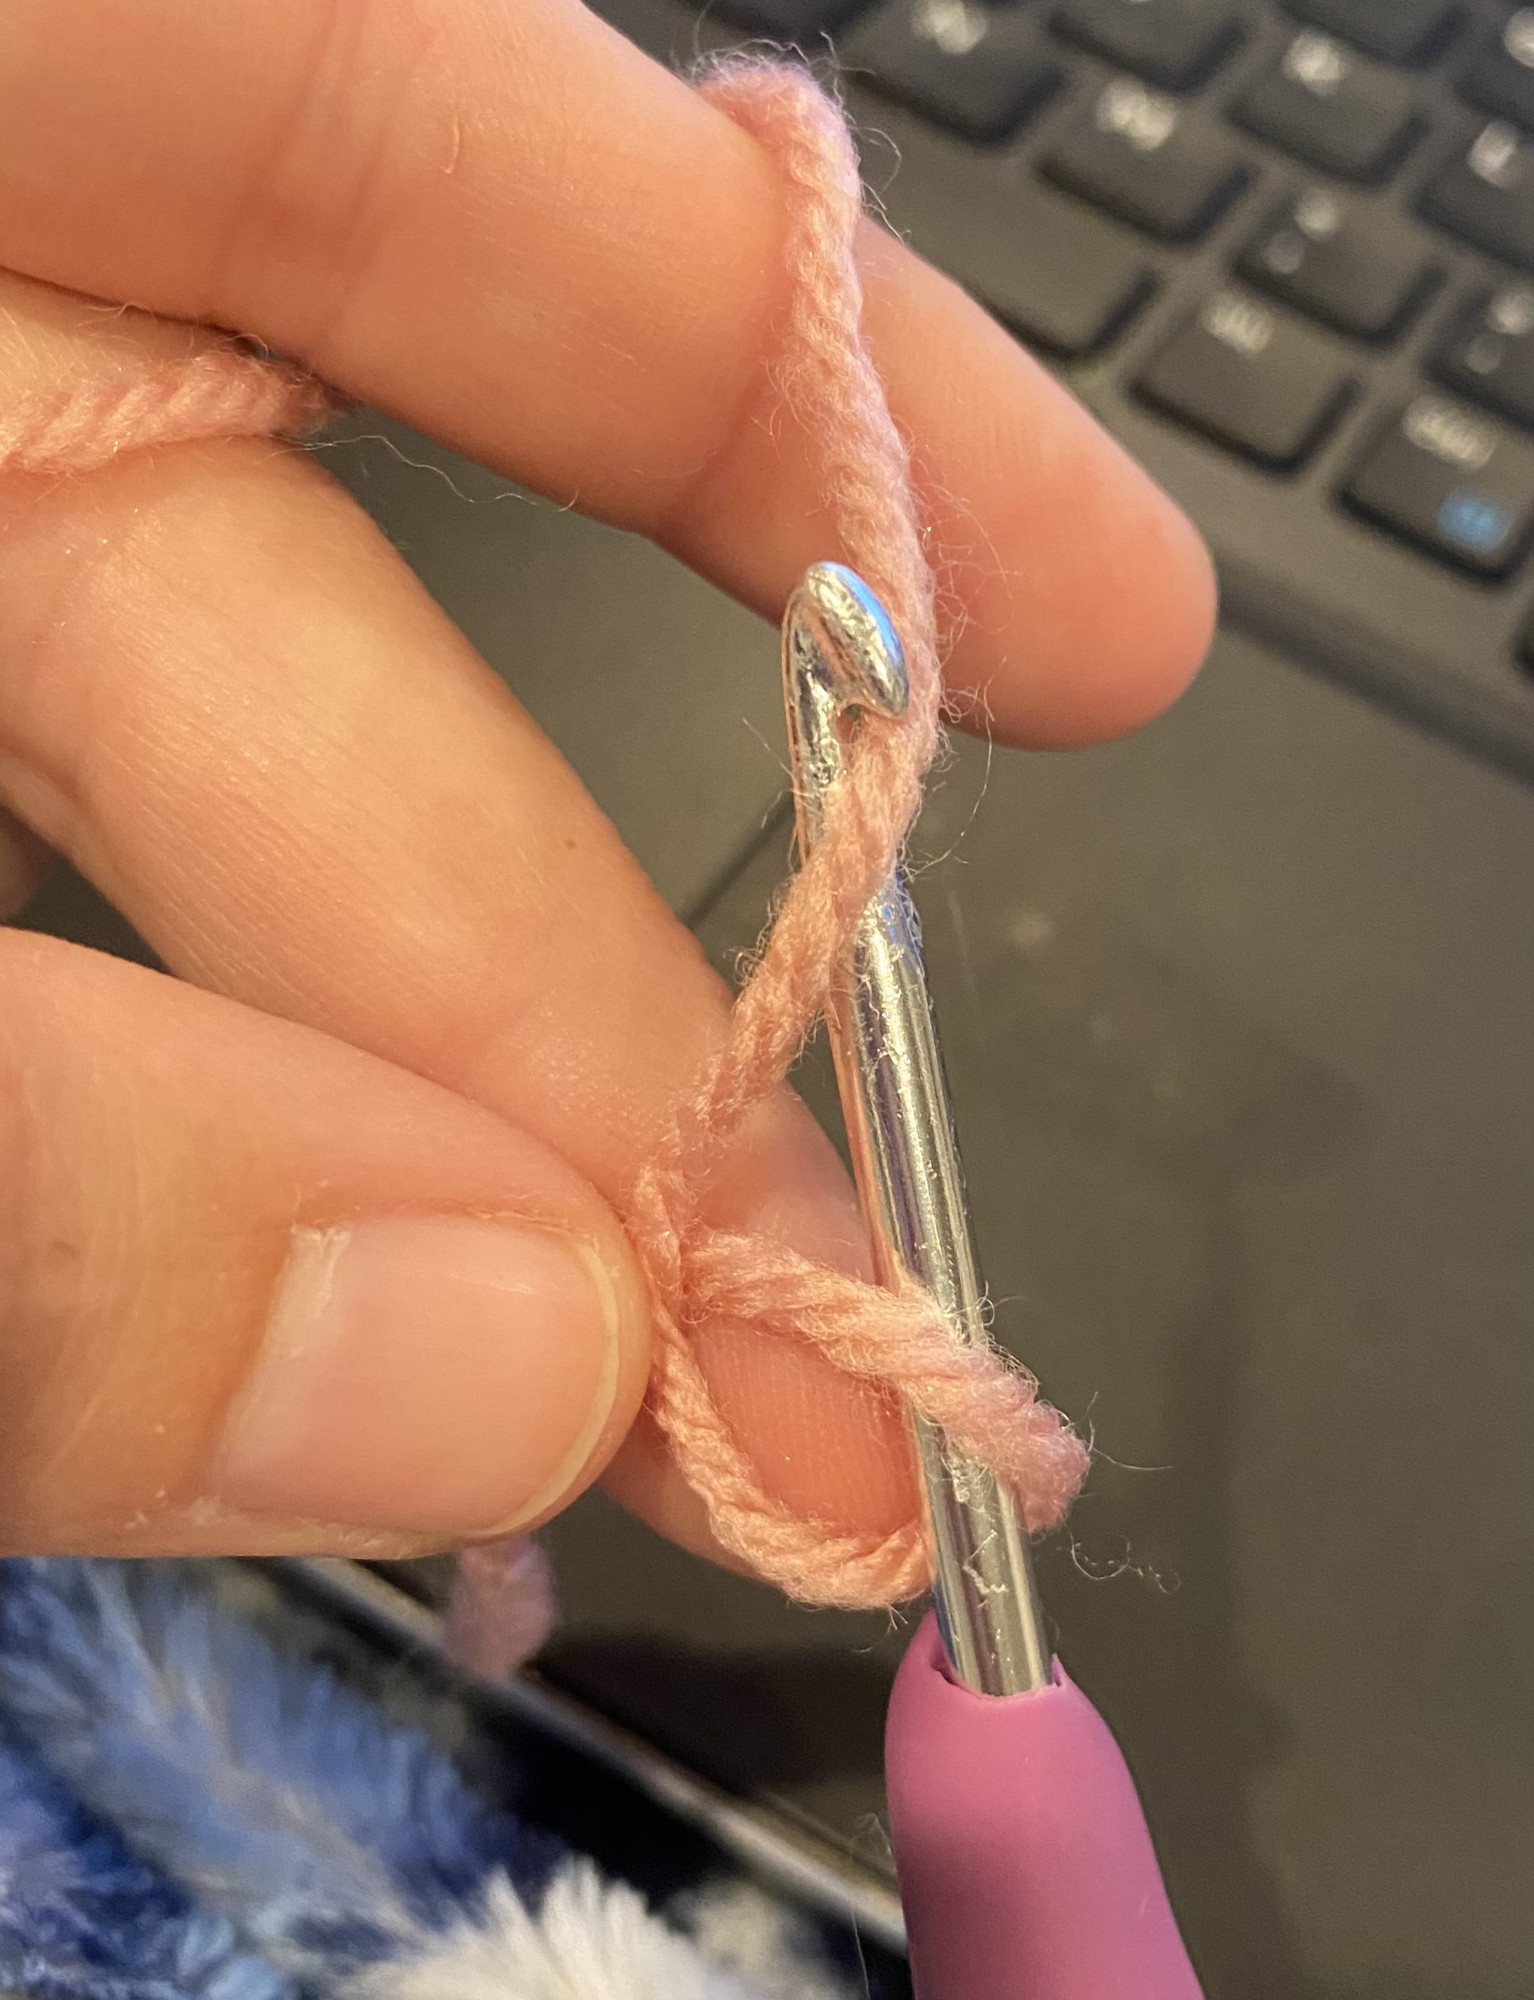
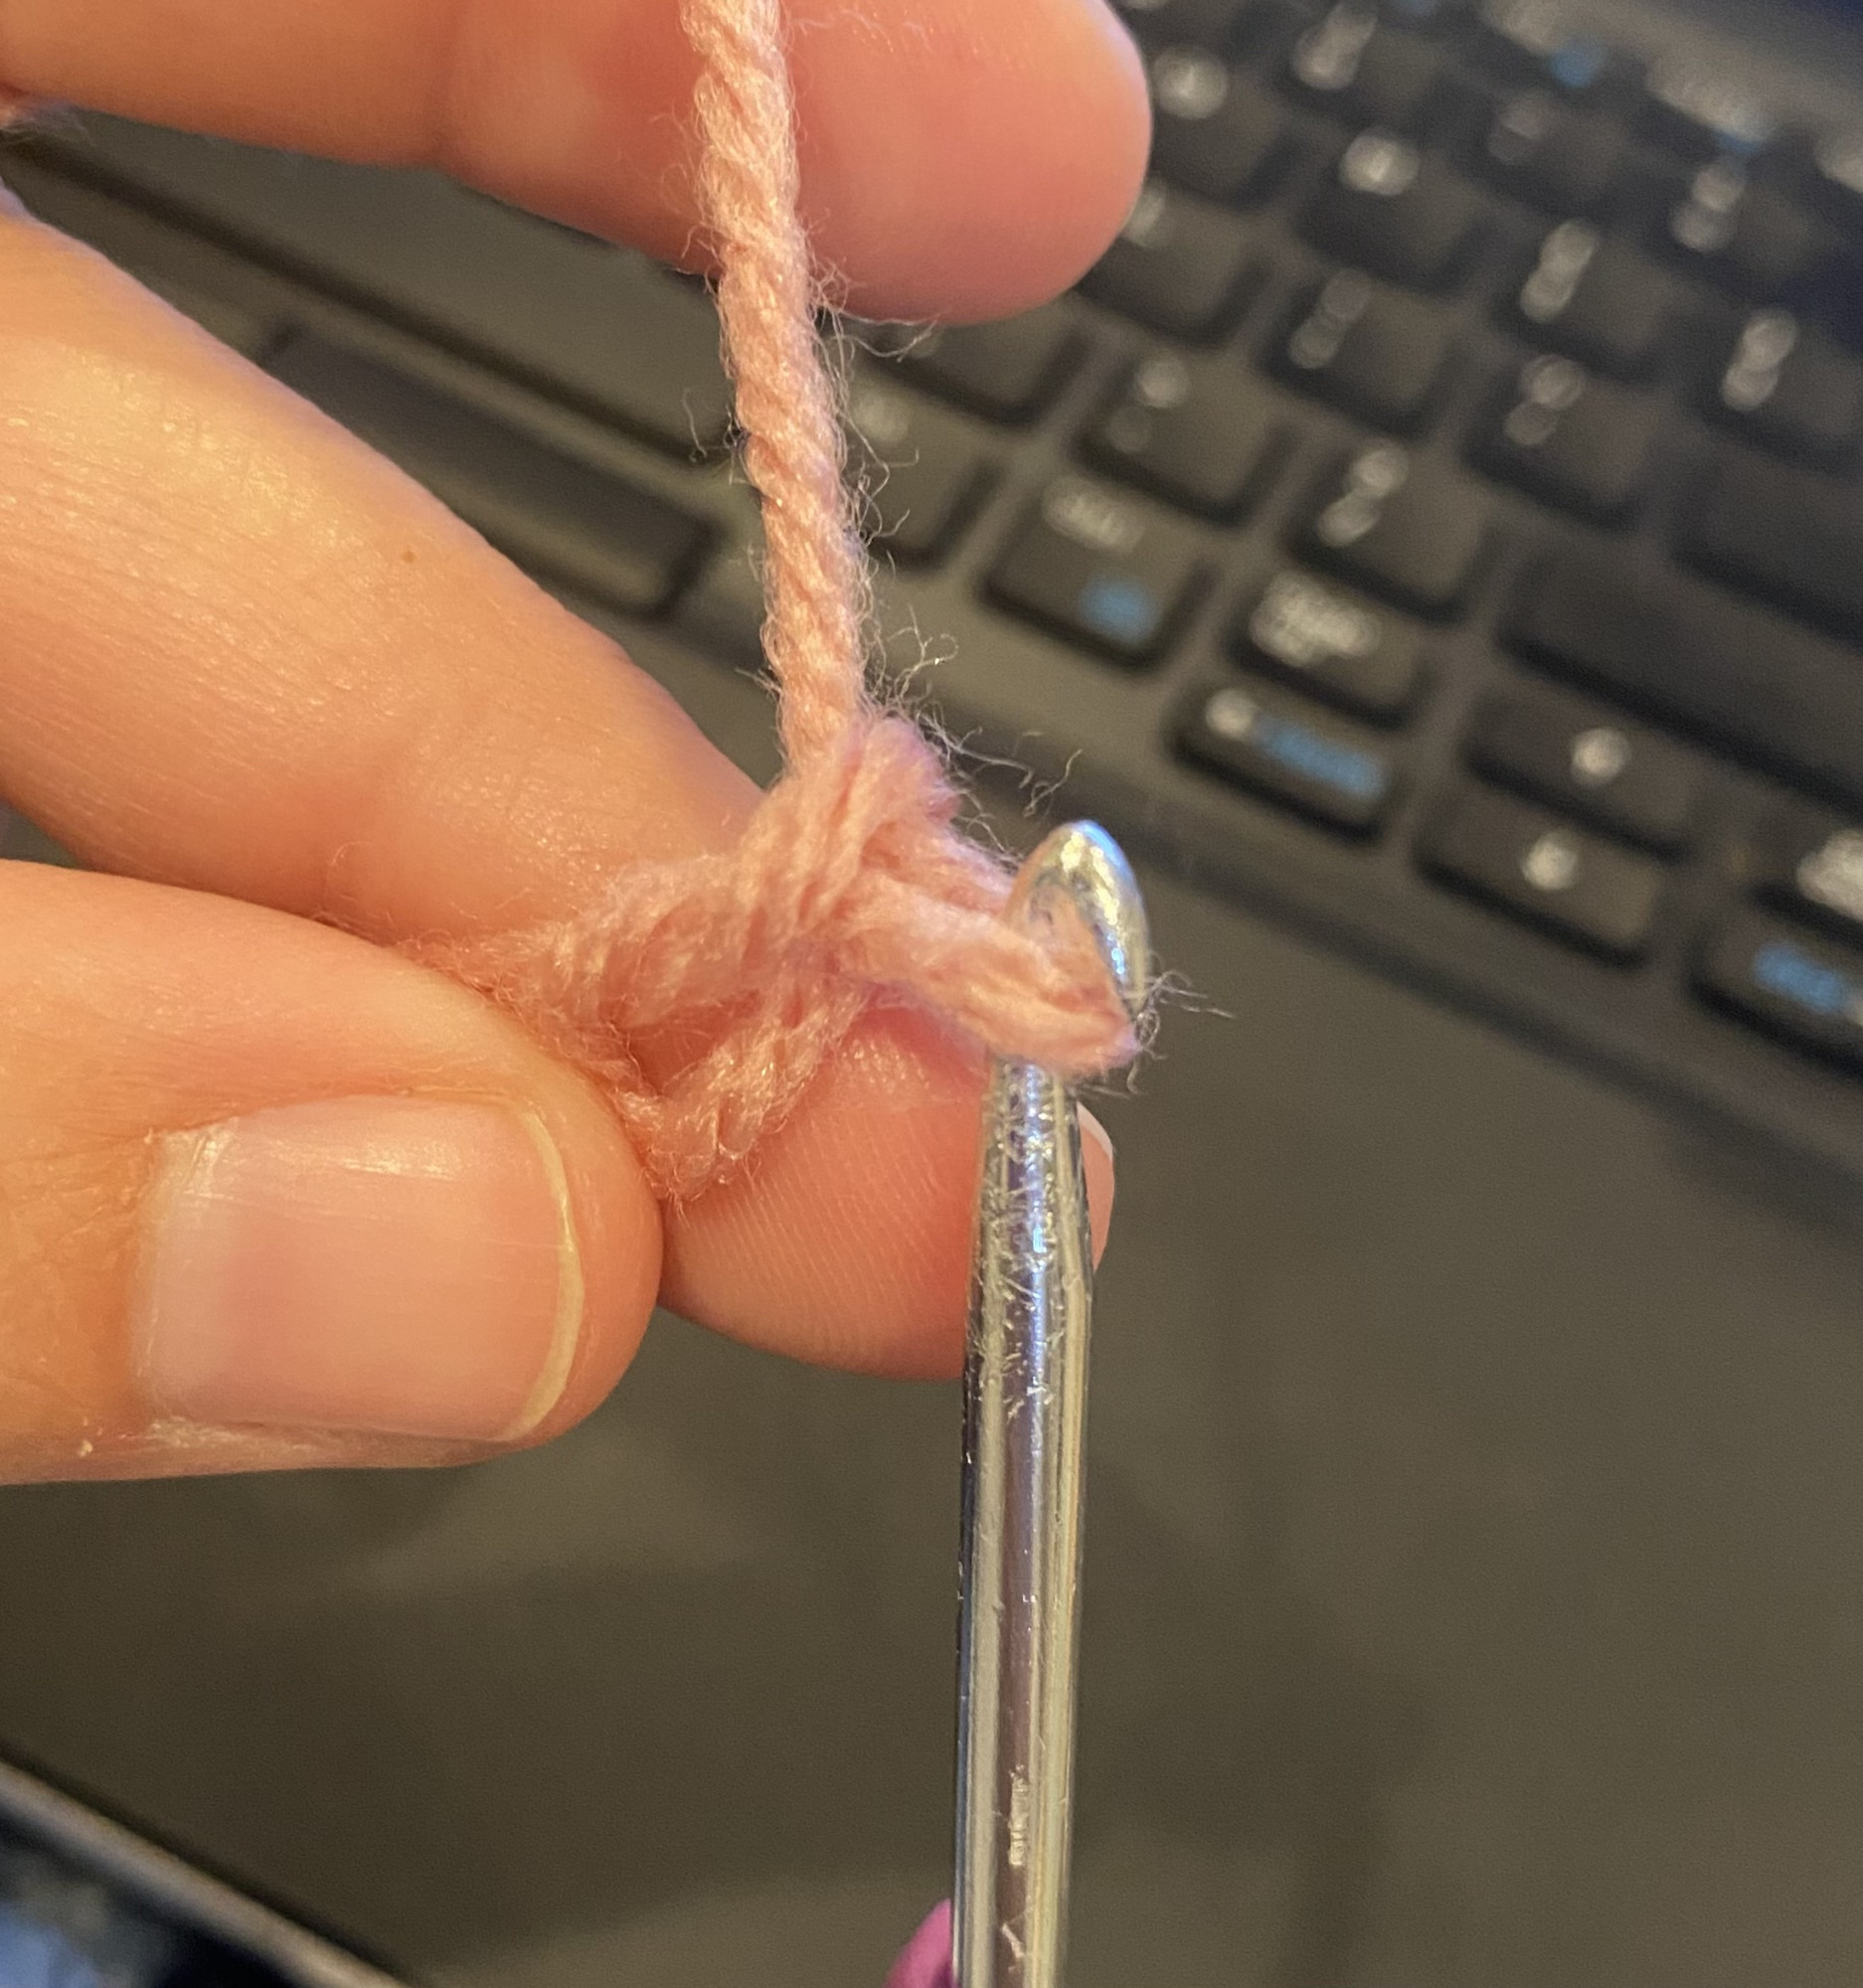
That's it! Super easy, so easy that a lot of people think they are doing it wrong! This method can have a large hole, but when you pull the end, you can tighten it as much as you need, so it works good for amigurumi.
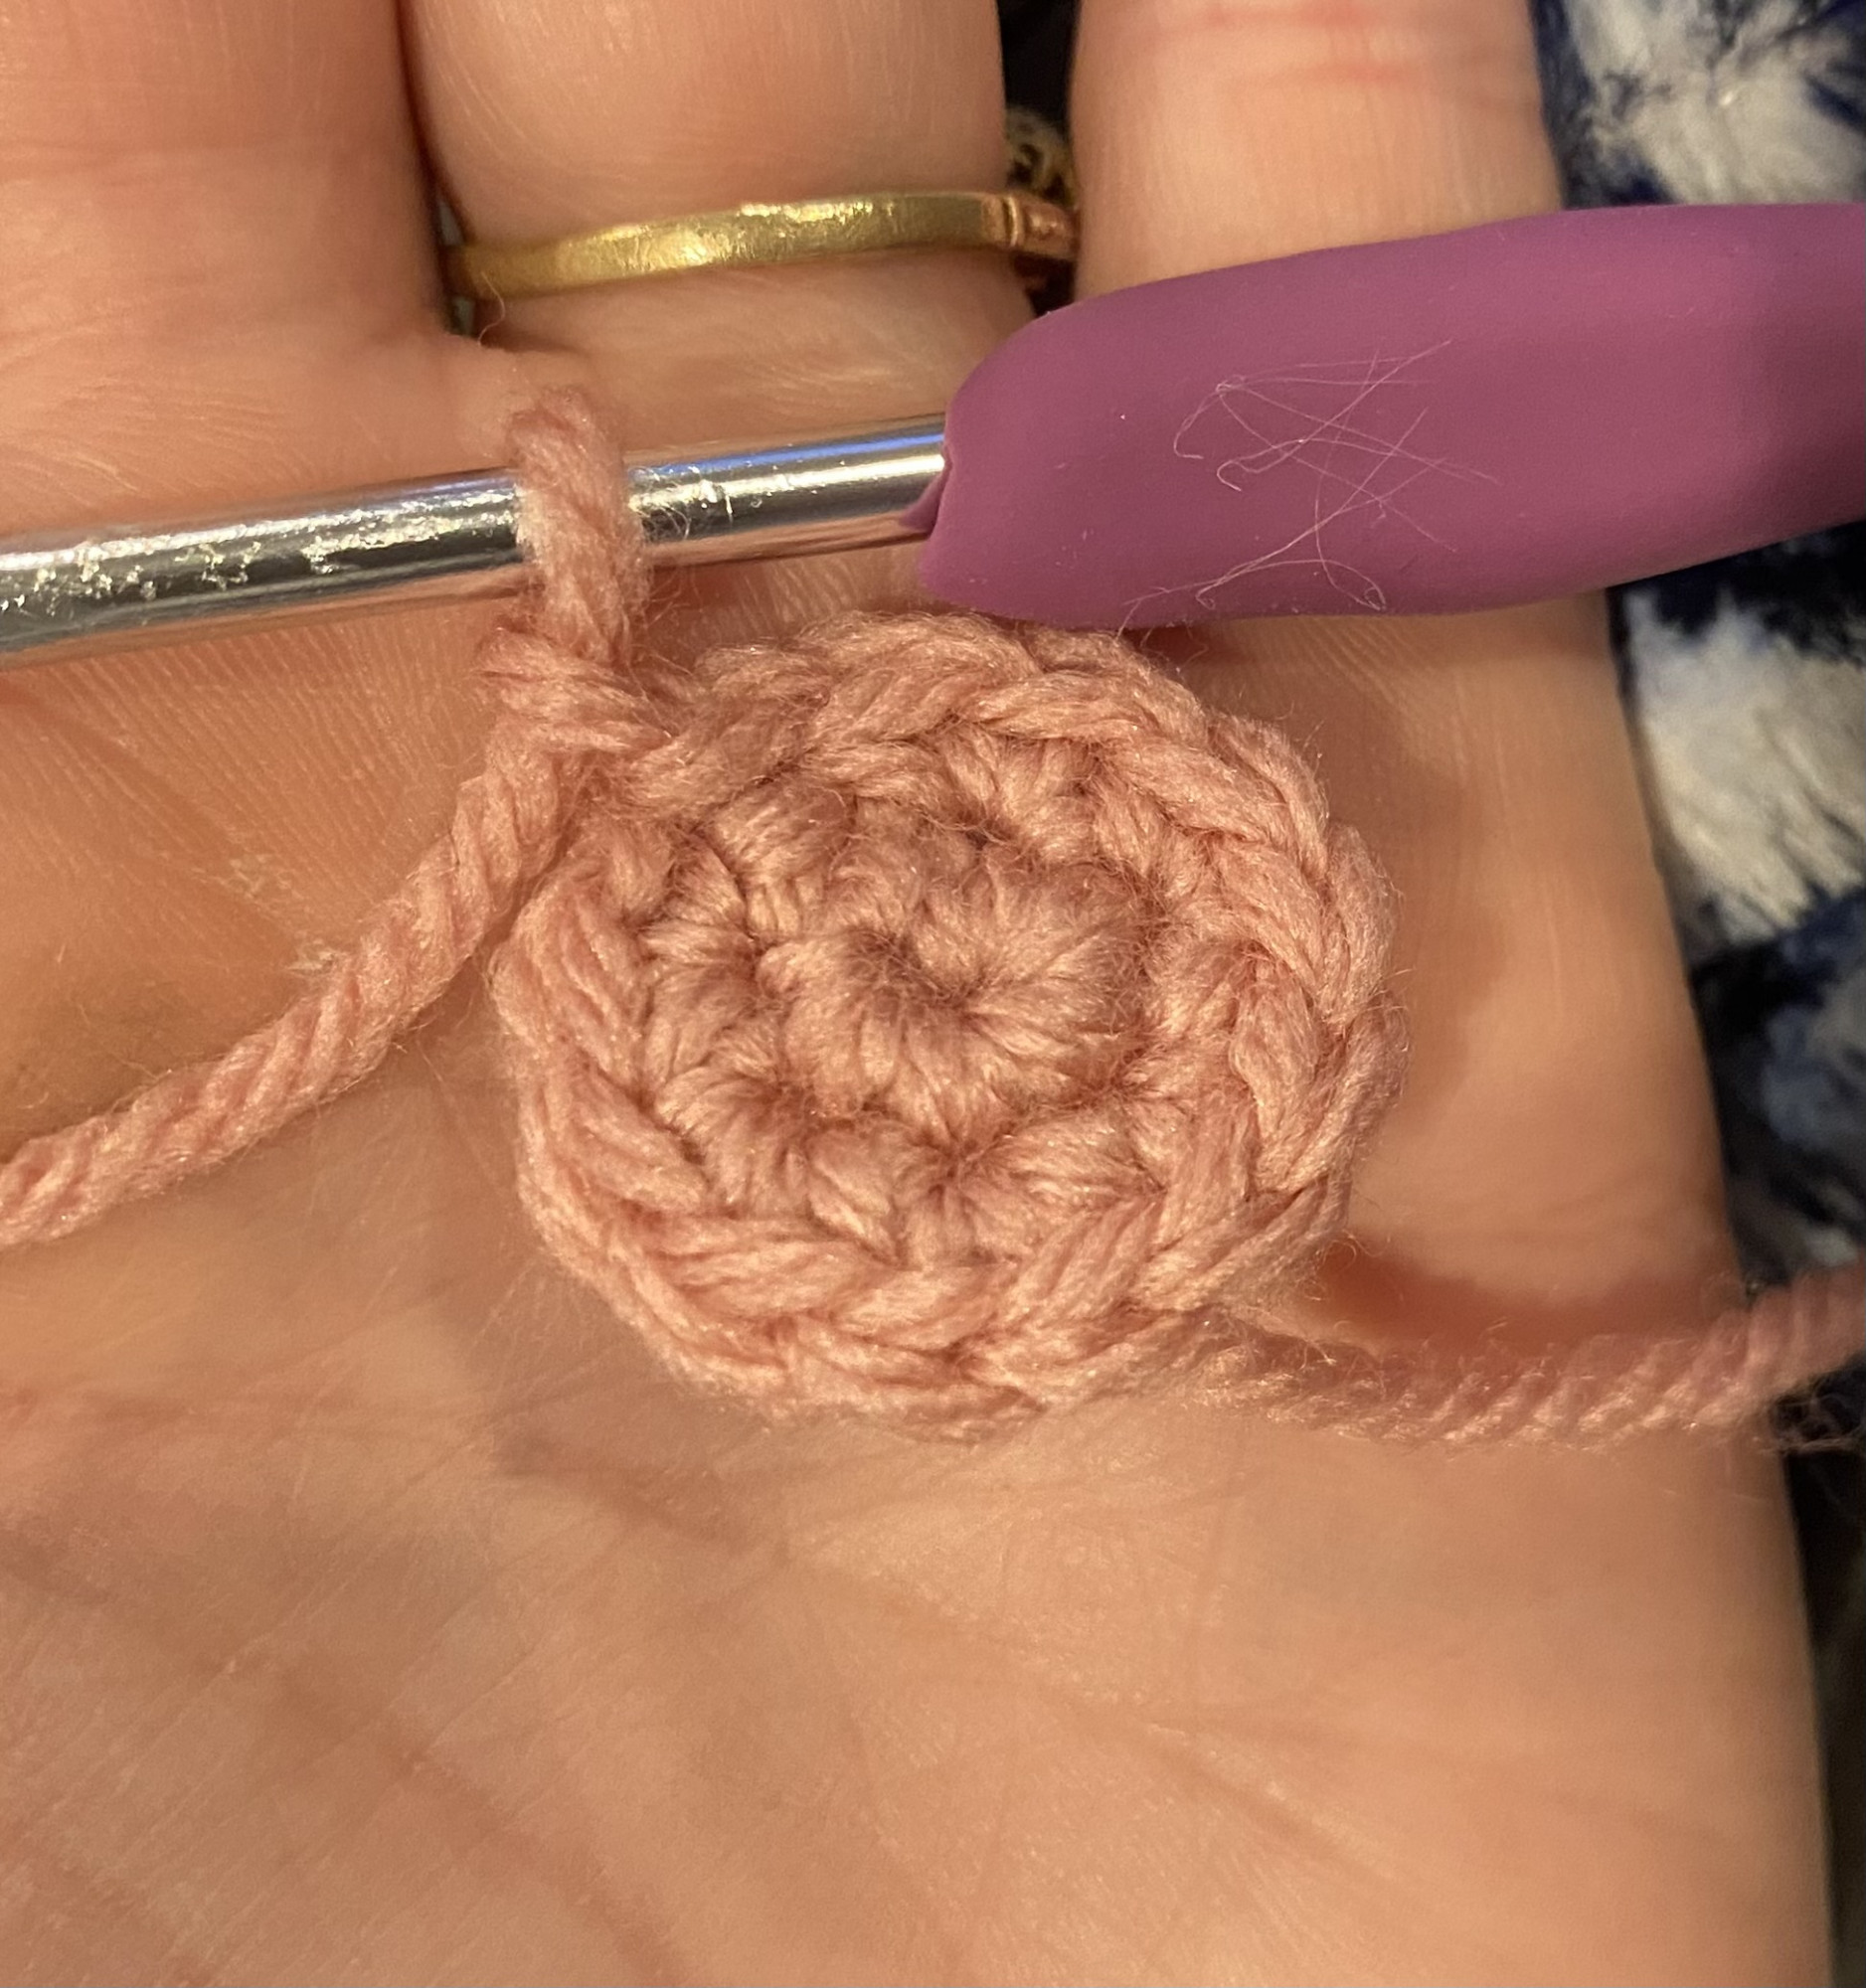
You can practice these different ways to start your work and figure out which you like more. Then head over to this post to see what to do next.
It's almost Fall! Which means pumpkins, and I have the cutest little pumpkin crochet pattern for you. It is perfect for beginners and is super easy to alter to make different sizes. Check it out!
Read more...Learn about the importance of hook and yarn sizes in crocheting. Using the right combination is essential for achieving desired results. Smaller yarn requires smaller hooks to avoid holes in your work, while larger hooks can be used with bigger yarn for creating blankets or doilies. If you're making dolls or toys, it is important to choose the right yarn and hook size to ensure that the stuffing does not show through. The blog post provides examples of different yarn and hook sizes used to create various sized toys, as well as a conversion chart for hook sizes and a chart for yarn weights and sizes.
Read more...Do you need a bunch of small crocheted stuffies? You're in luck! I'm giving away 11 patterns that are soooooo cute, they are irresistible!! Whether you need some inexpensive things to add to your craft fair table, a quick last minute gift, or just love to make cute stuffies, these patterns are for you! And the best part? They are FREE!!
Read more...Get this super cute turtle crochet pattern with a removable shell! And find out how to change the size without having to change the pattern.
Read more...
